Running a Raspberry Pi Zero from an AA Battery Pack
The advent of the Pi Zero has brought the world of Raspberry Pi into the realm of wareable technology. It's time to throw off the shackles of your micro USB wall charger, and start powering using batteries. So, grab your nearest soldering iron, pull out those AA batteries from your kid's Furby and lets get to work! This will of course work on a "regular" Raspberry Pi 2, but your batteries won't last quite as long given the higher current draw.
We're going to be using a 5V USB Voltage Booster Step Up Module for this project. Why? It means we can use one of our switched 3V battery packs (or one of those tiny 3.7V LiPo's), which fits perfectly into the footprint of the Pi Zero, and it also ensures we have a regulated 5V voltage going into our Pi. It also means we can neatly power the Pi without directly soldering onto the Pi itself. These booster can take from 0.9V up to 5V, so they're great for using whatever you have hanging around, or integrating your Zero into another project.
Depending on how far you want to take this project, you need a few tools:
You'll also need some parts:
How To?
1. Get all your gear ready!

2. Solder the battery pack onto the 5V USB booster module, positive to positive, negative to negative.


3. Plug it in :D

You can use a USB to Micro USB adaptor as seen here, or any USB to Micro USB cable to make the connection. It's quite a neat and safe way to battery power your Pi!

One Step Further
So that's the easy one ^^. If you're not afraid of a little snip and switch, then read on, we're going to make it smaller still! Please note. We can't accept any returns for products if they break once you've started soldering or snipping bits off them! You'll need the DIY Micro USB Connector mentioned above for this part.
1. We're now going to solder a micro USB port directly onto our 5V booster board. The first step is to remove the USB port. You can desolder it, or just snip the connections (which is easier in my opinion). Get some diagonal cutters, and snip the two retaining solder joints, one on each side. With these snipped, you can actually bend the USB port upwards and snip the four connecting points. This is ideal, as it leaves a nice point to solder onto!

2. Check your polarity

There's a great article here on DIY USB pinouts but you can check the solder points in the picture below:

3. Use your wire cutters to snip up some short lengths of flexible wire and grab the micro USB port from the DIY pack.

4. Solder it together - positive to positive, negative to negative. If you want to double check the polarity, place a multimeter across the two denoted points of the USB 5V booster module and check it outputs 5V correctly when you switch on your battery pack.

5. That's it! UNLIMITED POWER!!!!!

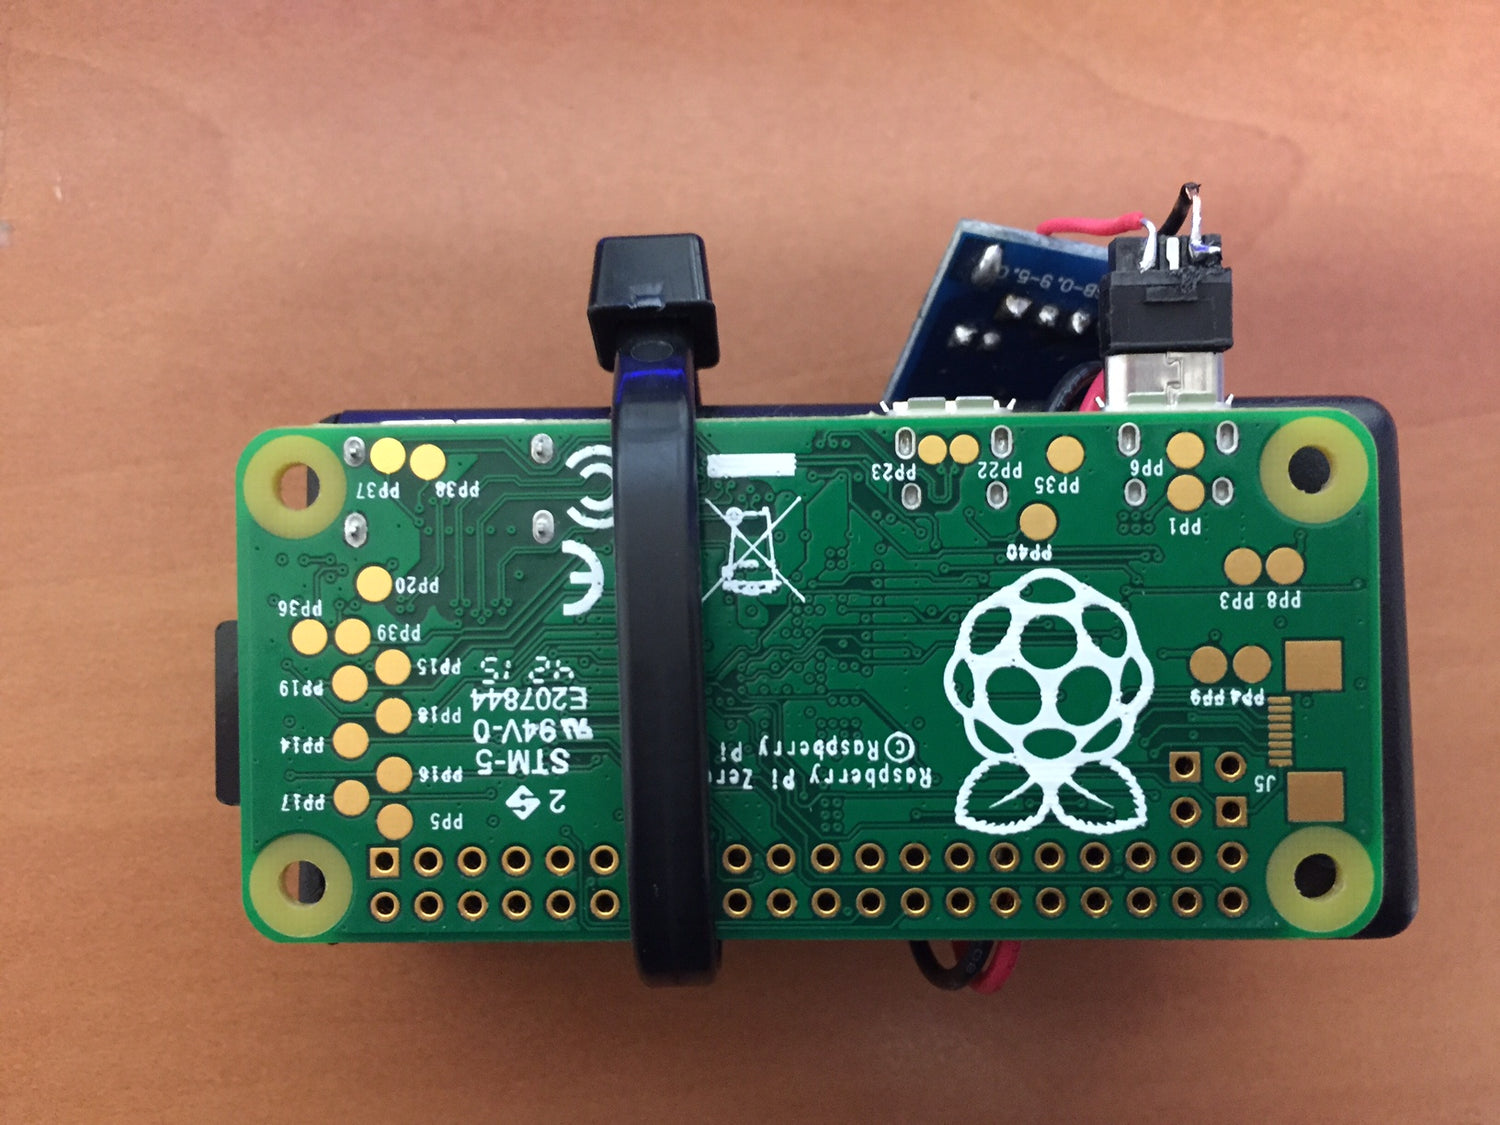
You can wrap it all up into a neat package (please excuse the cable tie, it was all I had to hand!). But it gives you an idea of how you can cheaply and easily power a Zero on the go, in a neat and compact package.


A Step Too Far?!
If you're really brave, you can completely forgo the use of the micro USB plug and solder the 5V booster wires directly onto PP1 and PP6. I have not tested this, so don't blame me if your Zero goes pop! :)


