
Detect the rpm of your motor using a Photoelectric IR Through Beam Sensor
In this project you will learn how to wire up a Photoelectric IR Through Beam Sensor (HC-89) and write some code to calculate the speed at which a motor is rotating.
Things you will need:
- Raspberry Pi, Micro SD Card, Keyboard & Mouse, Power Supply, HDMI Cable
- Monitor
- HC-89 Sensor
- 3V DC Motor
- 3V Battery Pack
- 2 x AA Batteries
- 3 x Female to Female Jumper Wires
- 1 x Card disk cutout
Prerequisites:
Latest version of Rasbian installed on your SD Card
Raspberry Pi setup with a keyboard, mouse and monitor


Here's a quick explanation of how the Photoelectric IR Through Beam Sensor works... The sensor has an IR emitter, and directly opposite has a photoelectric receiver. When an object is placed in between the transmitter and receiver, the beam is broken and the sensor detects the presence of an object.
Using this sensor and a little acrylic/card disk attached to a motor, we can calculate how fast the motor is spinning.
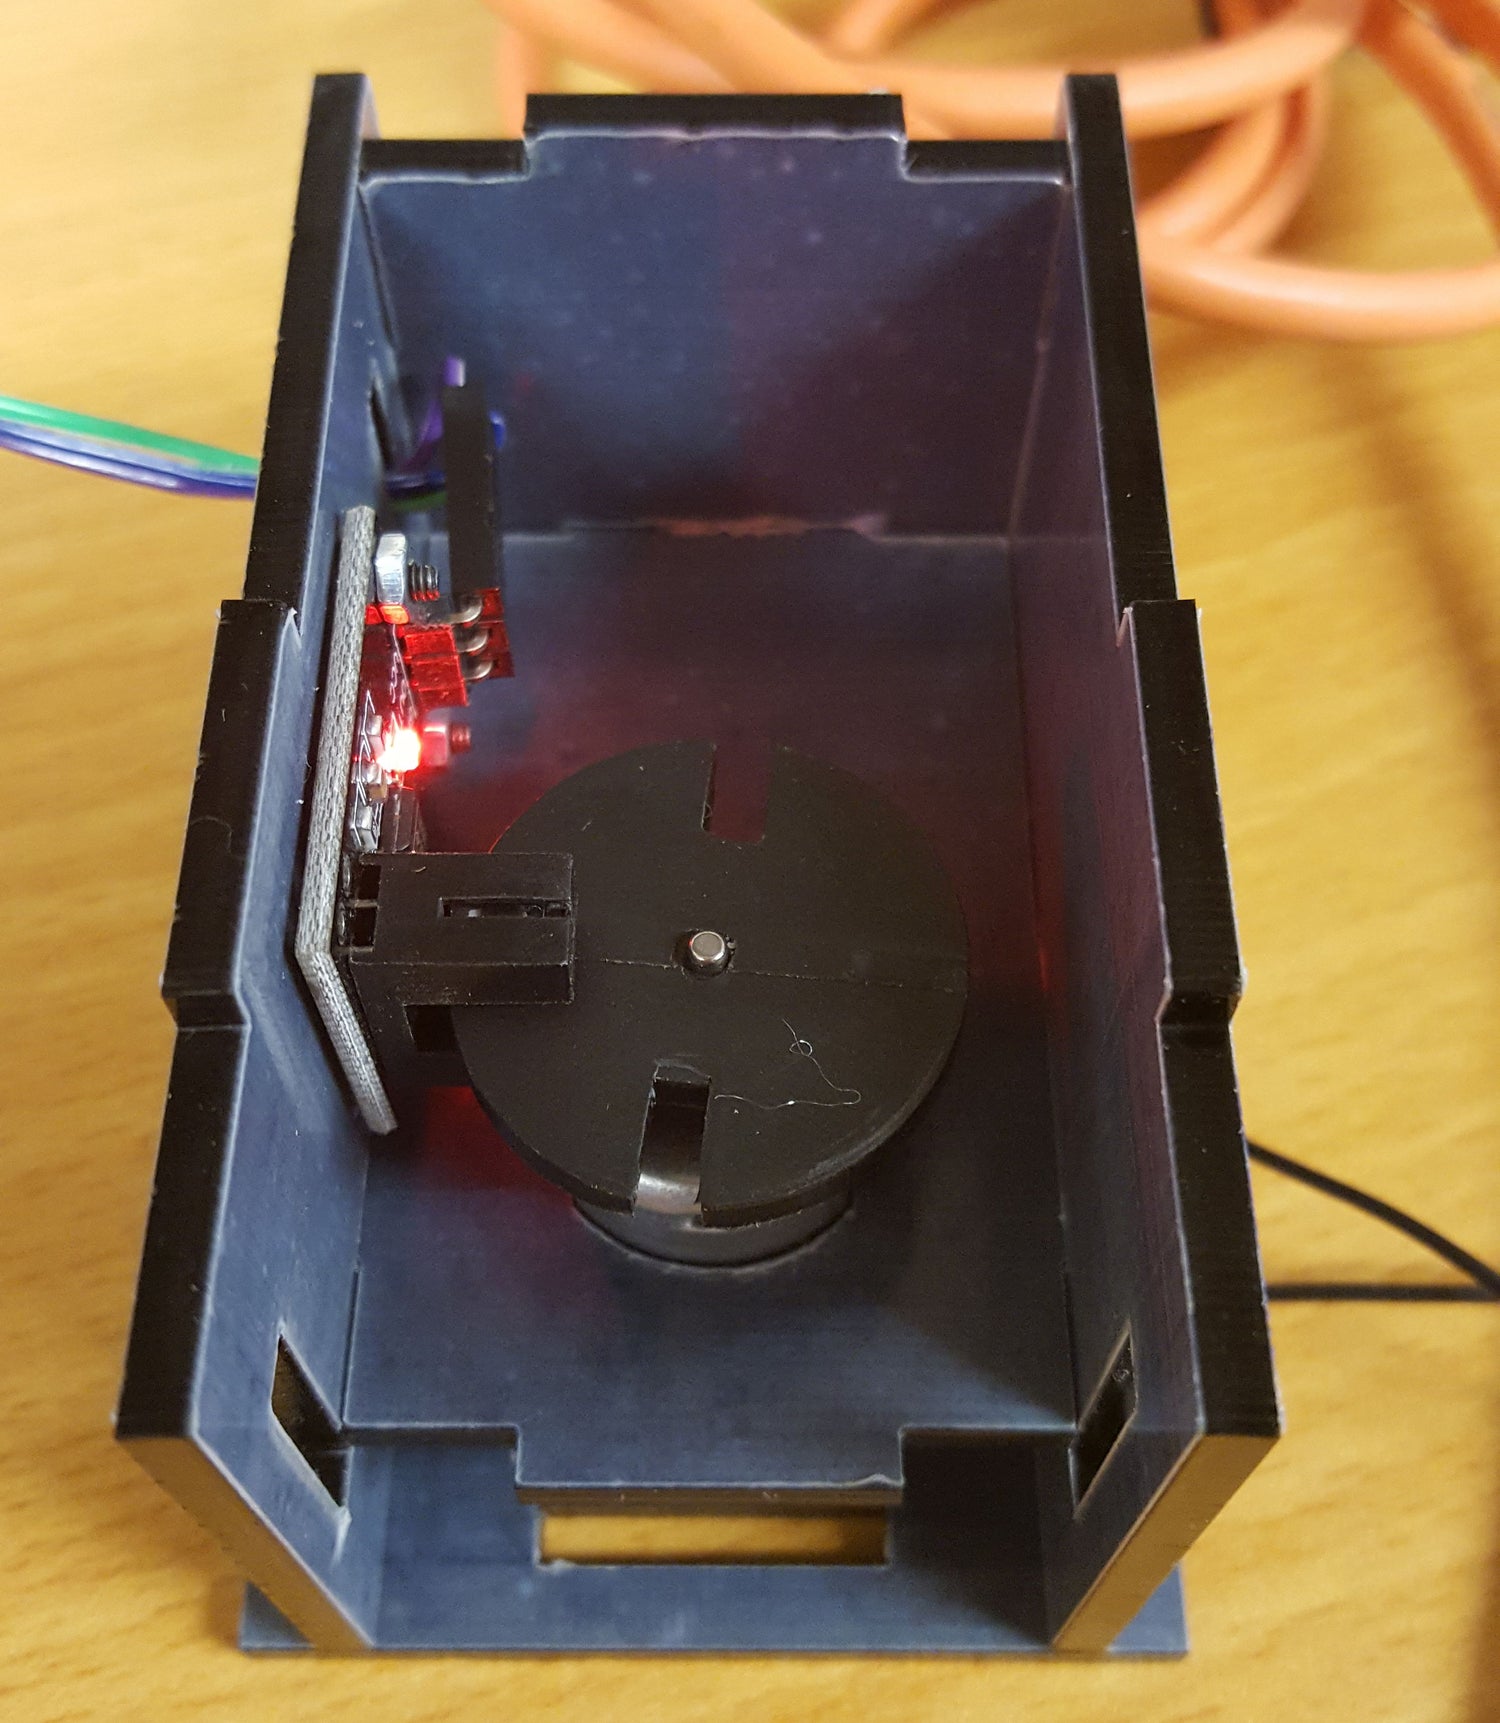
Here's a look at the setup we have used for this tutorial.


Let's start by wiring up the sensor to the Pi.
You should see three pins named: VCC, GND, OUT
Attach each pin to the following Raspberry Pi pin using the F/F jumpe wires:
VCC - 5V (Pin 2)
GND - GND (Pin 6)
OUT - GPIO21 (Pin 40) - You can wire this one up to any free GPIO pin, just remember to update the pin number in the code below.
If you power up your Pi, you can quickly test the sensor. Simply place a bit of card in the fork of the sensor and you should see a little red LED illuminate. You can use paper as well, but you might need to fold it a few times to make it thick enough to block the emitted IR.
Next is to wire up your motor. This is super easy, just attach one pin of the motor to the positive wire of the battery pack, and the other to the negative wire.
Now add your little disk to the shaft of the motor.
You'll then need to secure the sensor and motor in such a way that the little card disk spins freely inbetween the transmitter and receiver of the sensor. Make sure that when you spin the motor that the disk does actually block the IR (led on) and when the two notches in the disk come round that it doesn't block the IR (led off).


With everything wired up and spinning freely its time to look at some code!
Start by creating a script called rpm.py:
nano rpm.py
Then add the following code:
#!/usr/bin/python

import RPi.GPIO as GPIO
import time

sensor = 21 # define the GPIO pin our sensor is attached to

GPIO.setmode(GPIO.BCM) # set GPIO numbering system to BCM
GPIO.setup(sensor,GPIO.IN) # set our sensor pin to an input

sample = 1000 # how many half revolutions to time
count = 0

start = 0
end = 0

def set_start():
 	global start
 	start = time.time()

def set_end():
 	global end
 	end = time.time()

def get_rpm(c):
 	global count # delcear the count variable global so we can edit it

 	if not count:
 	 	set_start() # create start time
 	 	count = count + 1 # increase counter by 1
 	else:
 	 	count = count + 1

 	if count==sample:
 	 	set_end() # create end time
 	 	delta = end - start # time taken to do a half rotation in seconds
 	 	delta = delta / 60 # converted to minutes
 	 	rpm = (sample / delta) / 2 # converted to time for a full single rotation
 	 	print rpm
 	 	count = 0 # reset the count to 0

GPIO.add_event_detect(sensor, GPIO.RISING, callback=get_rpm) # execute the get_rpm function when a HIGH signal is detected

try:
 	while True: # create an infinte loop to keep the script running
 	 	time.sleep(0.1)
except KeyboardInterrupt:
 	print "  Quit"
 	GPIO.cleanup()
If you execute the script, and start the motor spinning, you should see the RPM (revolutions per minute) printed on screen.
python rpm.py
So whats actually going on in this script? Ok so lets first take a look at this line:
GPIO.add_event_detect(sensor, GPIO.RISING, callback=get_rpm) # execute the get_rpm function when a HIGH signal is detected
This line here simply says, when we detect a RISING signal (a change from low to high) from our sensor, execture the function get_rpm. This means as the motor spins the disk, each time the notch passes the sensor it will trigger the get_rpm function.
So when the get_rpm function is first called, when count = 0, the function gets the current time in seconds by calling the function set_start(), it then increases the count variable by 1. Everytime the get_rpm function is triggered the count variable gets increased by 1. This happens until the count value is equal to our sample value. It this point we get the current time again.
By taking away our start time from our end time, we know how long it took to complete our sample amount of triggers. Then with a bit of simple math we can calculate the average time it took to 1 rpm :) simple!
You'll want to adjust the sample depending on how fast your motor spins. The faster your motor spins the higher sample you can have.


1 comment
Berk
Thank you so much.
is there a way to get “string or integer” from this get_rpm function.
:)
Thank you so much.
is there a way to get “string or integer” from this get_rpm function.
:)