
Using Neopixels with the Raspberry Pi
Let’s be honest. Lights are cool. Multi coloured lights are very cool. Controllable multi coloured lights are awesome. This tutorial goes through some of the controllable multi coloured lights you can use with a Raspberry Pi.
Neopixels
The fine folks over at Adafruit produce a number of different products that are multi coloured controllable lights that they call Neopixels. The ones we’re going to look at are
- Breadboard friendly Neopixels
- Sewable Neopixels
- Neopixel strips
- Neopixel rings
Breadboard friendly Neopixels
Don’t let the name put you off! You don’t have to use a breadboard with these Neopixels.
Once soldered, these Neopixels are very easy to connect to a Raspberry Pi. You can chain multiple ones together so you get to choose the length of your project. But with the headers and wires together they are quite bulky and awkward.
If I’m not sure my code is working I find these are the quickest and easiest Neopixels to connect to a Raspberry Pi for testing.
These are available in packs of 4, or a grid of 25 that you can snap off.
You will need to solder male headers onto these Neopixels to use them. This is no different from the soldering of headers onto a Raspberry Pi Zero. Same size headers, just a single row of 3 on each side of the Neopixel.
Note: these particular Neopixels don’t come with headers. You'll need to buy them separately.
There are two sides to the Neopixel – in and out, labelled as I and O. Guess what they do?! Yup, the data wire goes into the In side and if you want to connect another Neopixel in the chain you can add a data wire out of the Out side that connects to the In of the next Neopixel. This is how Neopixels work their magic. You can chain multiple ones together and then address them in the order they are chained (more on that later).
As well as the data pin there is a 5V pin, labelled + and GND pin labelled G, this is what you use to power the Neopixels. Every Neopixel needs power. So there are 3 wires going into each Neopixel and if you’re connecting another one – 3 wires going out to the next Neopixel.
In the case of these breadboard friendly Neopixels, the wire is a simple female to female jumper wire.
What’s great about these Neopixels is the wire can be a different length. So you can control the gaps between each light.
Step 1: Solder the Neopixels
Solder some pins to the Neopixels. Your last Neopixel doesn’t need pins on the OUT side but it’s good to finish them off and not limit that Neopixel to always be the last one. What’s some more soldering between friends?!

Step 2: Add the wiring
Connect female to female jumper wires between the Neopixels. Make sure you’re connecting Data Out (O) to Data In (I), G to G and + to +. Mixing up ground and power is unlikely to break the Neopixel at this power level but that light and everything after it will not work, so just double check your wires

Step 3: Connect to a Raspberry Pi
Turn off the pi! From the IN side of the first Neopixel:
Connect In to a GPIO10, 12, 18 or 21
Connect + to 5V
Connect G to any ground (GND) pin on the pi

Step 4: Code it
There is a Neopixel library for the python for the Raspberry Pi.
Adafruit has a very detailed guide for installing the Neopixel library. You need to install circuitpython first. This guide includes how to setup a Raspberry Pi from the very beginning without a monitor. I’ve found it really useful.
Once you’ve completed all the instructions on that page you’re ready to install the Neopixel library.
Note: I followed these steps (on 15th November 2018), but they didn’t work for me - I had to install this library separately. You can do it by either force reinstalling the library
pip3 install --force-reinstall adafruit-blinka
or installing it on its own:
sudo pip3 install rpi_ws281x
Use the code on the page above: Neopixel_simpletest.py to test your lights are working. It cycles through a number of animations. You need to make some changes
- Comment out this line
pixel_pin = board.NEOPIXEL
- Remove the comment on this line
pixel_pin = board.D18
- Change the number of Neopixels
num_pixels = 10
So those lines should look like this:
#pixel_pin = board.NEOPIXEL
pixel_pin = board.D18
# The number of Neopixels
num_pixels = 2
The page also goes through how Neopixel code works.
You can set individual lights to specific colours by setting the Red, Green and Blue values. You can use any number between 0 and 255 for each colour. This makes the first light go Red. All other lights will either stay blank or stay on their last colour.
pixels[0] = (255, 0, 0)
This sets all the lights to Green
pixels.fill((0, 255, 0))
You have to use this code to show your changes:
pixels.show()
Find out more about coding Neopixels on the adafruit website
https://circuitpython.readthedocs.io/projects/neopixel/en/latest/
Step 5: Dance
Look at the code in Neopixel_simpletest.py. It gives great examples of looping code and changing colours. Once you’ve mastered coding Neopixels, create a disco light show and get grooving!

Note: The Raspberry Pi can only power a few Neopixels. For small projects like wearables this is fine. For anything that needs more than a few Neopixels you will need to power them separately. Don’t risk putting too many Neopixels onto a pi. They will pull more current than it can provide.
Sewable Neopixels
For the ultimate Christmas jumper you need sewable Neopixels. You can sew these directly into your fabric and be the coolest person at the office party.
Think of sewable Neopixels as exactly the same as breadboard friendly Neopixels. The only difference is that instead of jumper wires you have conductive thread. There is no soldering involved here, just sewing. Some important things to note:
Don’t cross the streams!! Conductive thread has no covering. It’s just basically bare wire. If you cross the ground and the power threads you risk breaking your circuit, your Neopixels and things can get dangerously hot. Keep your sewing really tight. Cut all stray strands of thread and use clear nail polish to finish off the frayed ends of thread.
Connecting to the pi
If you have a Raspberry Pi Zero with no pins soldered on then you could wrap the conductive thread through the holes on the pi. It’s tricky and definitely turn the Raspberry Pi off when you’re doing it.
Another way is to hack a jumper wire to have a ring terminal on one end and a female connection on the other end:
- Chop of its head! It doesn’t matter if it’s a male to female or female to female jumper wire. You’re not use the non-female end. Chop it off.
- Strip the wire
- Crimp it to a ring terminal. I haven’t found a small enough ring terminal that this works on. I bend the bare wire back itself so I get the thickness of the jumper wire to crimp onto.

Now you can wrap your conductive thread around the ring terminal and connect the other end to a pin on the Raspberry Pi.
Wrap the thread around the ring or the Neopixel three times. Remember: keep it tight and don’t cross any wires.
On the sewable Neopixel, + is Power, - is Ground and the arrow pointing towards the LED is Data In. You can have one Power thread going from + to + to + on each neopixel. You can have one Ground thread as well. But the wire going from Data Out of one Neopixel to Data In of the next is just one wire. You can’t thread it along.

Code
It’s a Neopixel. It’s the same code as before.
Neopixel Strip
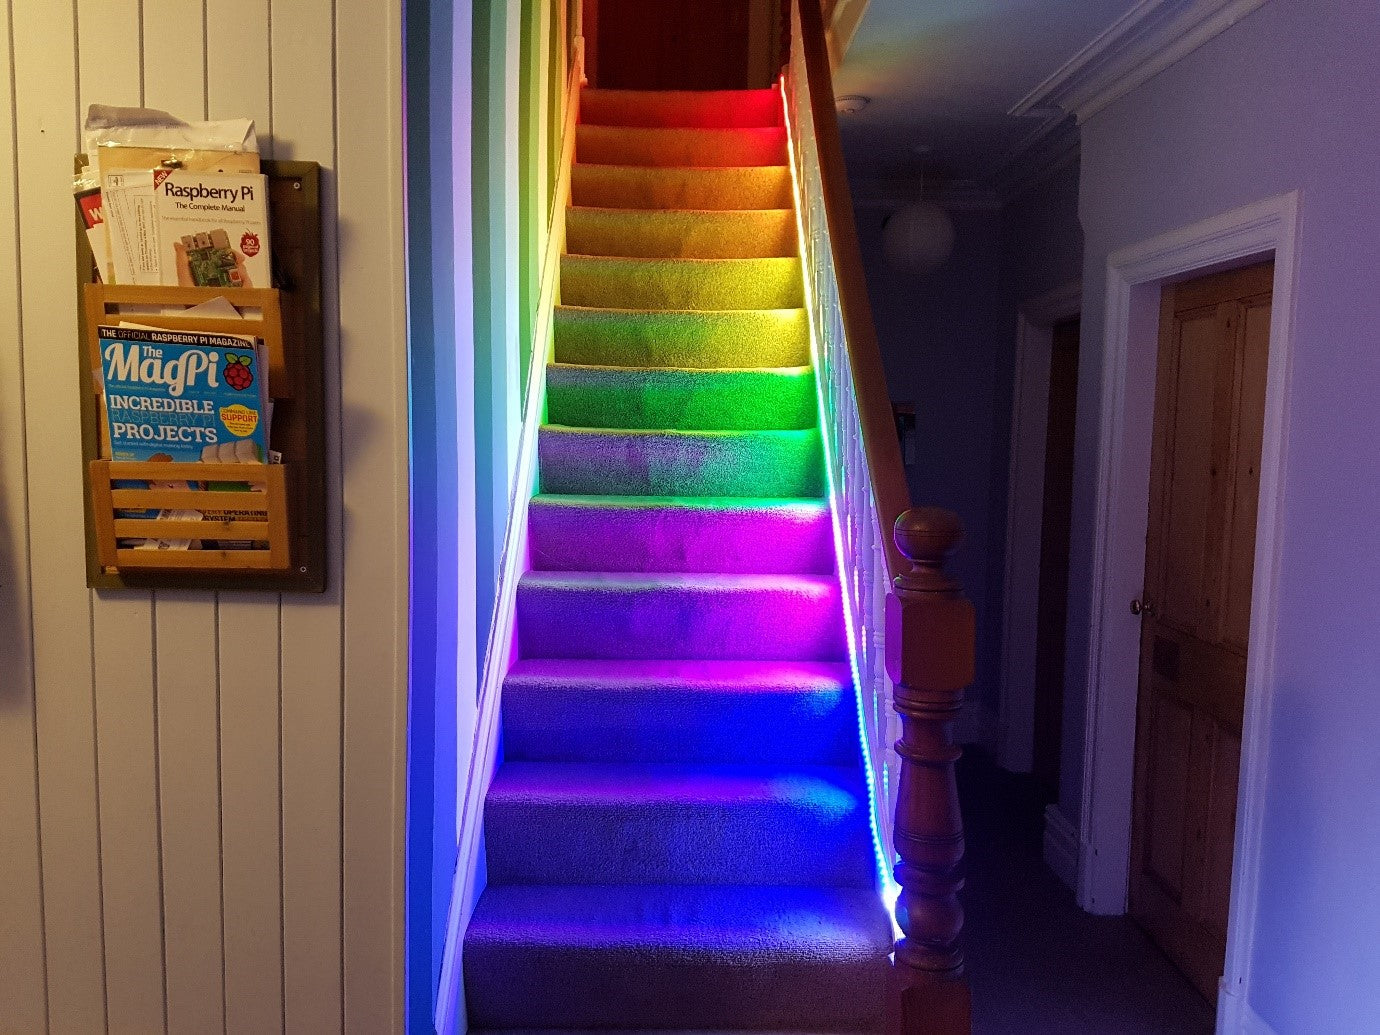
Here comes the big guns! A strip of Neopixel can look really impressive going up your stairs. They come in lots of different lengths and have a protective covering around them. Good for stroppy toddlers.

Here you will definitely need a separate power supply.
Power
Neopixels can pull up to 60mA of power but realistically unless you’re putting every light on full brightness and full white all the time, it’s more likely they won’t pull any more than 20mA. The thing with amps that if you have too many, it won’t hurt your lights. Your volts need to be 5 and no more, this is vital. Your amps can be more. I go with a 5V, 4A power supply for my strips of 60 lights.
Wiring
The Neopixel strip (just like the individual Neopixels) needs data, power and ground. The separate power source will supply power and ground. The Raspberry Pi will supply data. HOWEVER you need to ground the Raspberry Pi to the strip too.
Let’s look at the Neopixel strip. Both ends have a black and red wire bare then a black and white wire in a connector. Look for the IN end of the strip.
Black is ground, red is power and white is data. You can fit a male pin in the black and white connector so this is what I use to connect the strip to the pi.

Turn the Raspberry Pi off!
Connect the male end of a male-to-female jumper wire into the black side of the connector. Connect its female end to Ground on the pi
Connect the male end of a male-to-female jumper wire into the white side of the connector. Connect its female end to GPIO18 on the pi.
Like so:

This isn’t the most secure connection but for long strips like this connected to the wall, they don’t tend to move around a lot.
Next you need to connect your power source to the light strip. You could connect it to those wires next to the data wires. And you can also connect it to the other end of the strip. The direction of power does not matter. It’s only the data wire that has to go into the In side of a light strip.
The Out side is identical to the In side. The connector at this end is for connecting another light strip to it.
To add the power supply: strip off a bit more wire from the red and black wires. Use a Female DC Power Adaptor and screw the red wire into the + side and the black wire into the – side.

Connect your power supply and power up the pi. Use the code as above to test your light strip.

Finally
I love controllable RGB LEDs. I think they have so much potential for creativity, especially when connected to a Raspberry Pi. My stair lights connect to a Raspberry Pi which checks the outside temperature for my house and displays certain lights at certain temperatures. I also had a pair of shoes that changed colour when I got a tweet or text. When you’ve got access to the Internet and controllable LEDs I think the possibilities are endless.


1 comment
Old nick.
3core wire to remote connect neopixel string.
3core wire to remote connect neopixel string.