
TV HAT Case for Raspberry Pi Assembly Guide
How to assemble our TV HAT Case for Raspberry Pi 4!
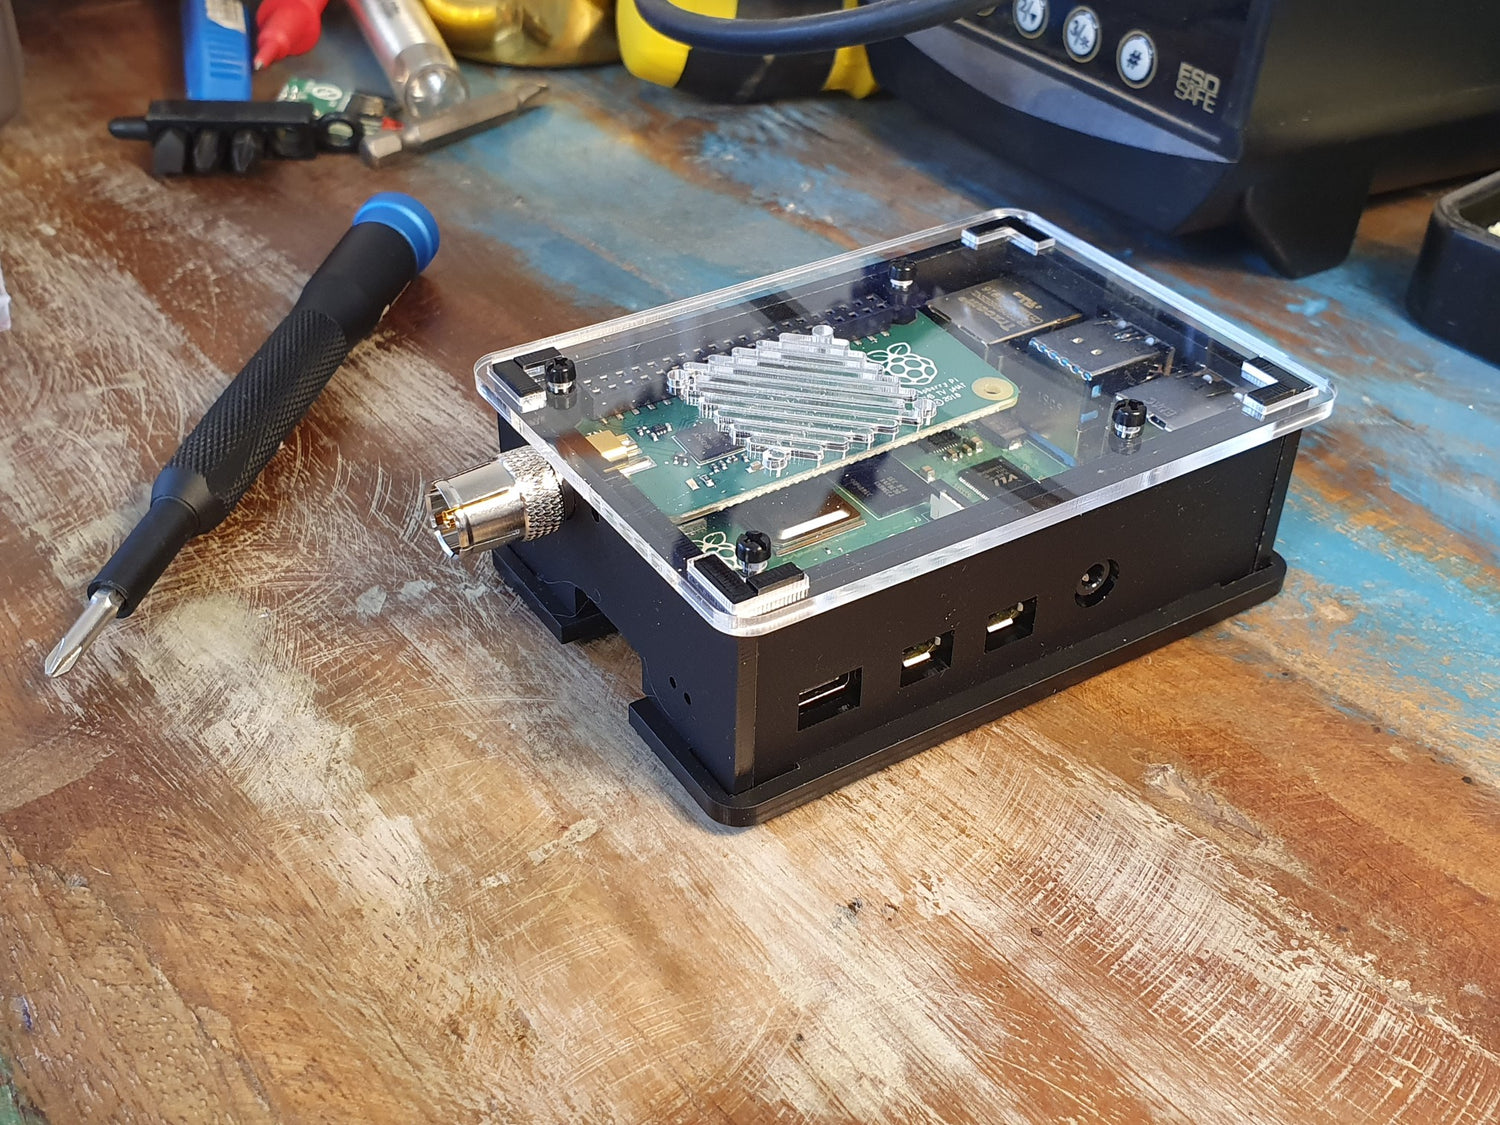
Please note images in this guide are for the previous version of the TV HAT case (updating very soon!) but the overall assembly is the same.
What you need
!! Important note!! - At step 4, It's best to attach the GPIO header to the HAT before fitting to the Raspberry Pi. It keeps the pins fitted properly inside the HAT for a solid connection.
1. The laser-cut parts of the case are protected by an adhesive film which needs to be removed before assembly (this is *very* therapeutic), simply peel it off

2. Using the black screws, attach the 5mm m/f stand-offs to the bottom plate of the case (this kit also uses 6mm m/f stand-offs, so make sure you're using the 4 shorter ones!)

3. Place your Raspberry Pi 4 Model B on top of these stand-offs with the SD card above the SD cutout and attach the 12mm f/f standoffs on the GPIO side and longer 20mm f/f standoffs on the opposite side. Be careful not to over-tighten as this could damage the acrylic.

4. Fit the GPIO header (which came with your TV HAT) to the HAT itself (not the Pi). This is to ensure the HAT has a good connection with the header, as the kit standoffs are taller than the originals.
5. Now add your Raspberry Pi TV HAT on top, followed by two 6mm m/f stand-offs (upside down this time) to both sides of the TV Hat.
You will notice a small gap between the Pi and the header - this is expected and doesn't impact the connection/performance.

6. Assembling the side pieces is nice and easy - they'll be loose at first, but don't worry, the lid and screws on top hold the case together nice and snug.

7. Close the case and screw it shut with the remaining black screws.

Viola! Case complete!
NOTE: Acrylic is a hard and stiff plastic which is sensitive to stress concentrations and shares a certain level of fragility with glass. Acrylic can scratch easily and should be cleaned with a mild solution of dish detergent and warm water. Never use cleaners unsuitable for acrylic. Never use a dry, abrasive cloth.


9 comments
Alan Bartlett
It’s important not to attach the antenna socket to the HAT until the end piece of the case is in place because it will not fit through the hole and I’m not sure if it is intended to be removed once attached.
It’s important not to attach the antenna socket to the HAT until the end piece of the case is in place because it will not fit through the hole and I’m not sure if it is intended to be removed once attached.
Alasdair
Whoops – many thanks for replying. It’s cathartic to own up to mistakes! When I couldn’t tighten one of the top screws, I just assumed it was a spacer size problem that had been reported by others. However, when I started measuring with a rule, I immediately noticed that the main board wasn’t level; although the spacers nearest the SD card were correct, I had inadvertently used the two top ones on the other side!
All fine now and apologies for wasting your time… Alasdair
The Pi Hut
@Alasdair Scott – We just built one to check and the screws are reaching fine. There is just enough thread on the included screws to reach (they’re not intended to be screwed tight, as they are only nylon). The standoffs also meet flush with the top of the side sections.
If you can message support via support.thepihut.com, they will get a new fixing pack out to you, as it may just be a bad bag. Sorry about that!
Alasdair Scott
Hi,
Small point, but on assembling the case and hat (which arrived fom you today) as per instructions, I also found (like others) that two of the top screws don’t reach the spacers. The main problem is that the spacers are a few millimetres too short.
Any suggestions?
Thank you,
Alasdair
Hi,
Small point, but on assembling the case and hat (which arrived fom you today) as per instructions, I also found (like others) that two of the top screws don’t reach the spacers. The main problem is that the spacers are a few millimetres too short.
Any suggestions?
Thank you,
Alasdair
Jono
Can you please post an annotated parts list so that those of us who are not engineers can follow along? Version 2.
These are not very easy instructions to follow. I’ve had better luck with IKEA instructions!
Can you please post an annotated parts list so that those of us who are not engineers can follow along? Version 2.
These are not very easy instructions to follow. I’ve had better luck with IKEA instructions!
Nathan
Hi. I am also having problems with the newer version of this case as the riser stand-offs which go on the GPIO side aren’t long enough to go through the holes in the TVHat board?? im sure these are the wrong screws supplied for mine.
Hi. I am also having problems with the newer version of this case as the riser stand-offs which go on the GPIO side aren’t long enough to go through the holes in the TVHat board?? im sure these are the wrong screws supplied for mine.
Roy Lambert
Remember not to cut your fingernails for a week before ordering. Its essential for peeling the protective film off.
Remember not to cut your fingernails for a week before ordering. Its essential for peeling the protective film off.
The Pi Hut
@Benjamin Sanchez La O – Please get in touch with our support team via support.thepihut.com and we’ll help with that – it may be that your pack has incorrect screws.
@Benjamin Sanchez La O – Please get in touch with our support team via support.thepihut.com and we’ll help with that – it may be that your pack has incorrect screws.
Benjamin Sanchez La O
The last 2 screws to drive not reach m/f….
The last 2 screws to drive not reach m/f….