NAS (Network Attached Storage) Streaming to RaspBMC
Introduction
There are many media streaming applications for the Raspberry Pi, for example as a Webserver, Dropbox like storage cloud, bittorrent download box, or even a desktop PC. But in this case we are using it as a Network Attached Storage (NAS) streaming client with XBMC on top – and it does the job really well!
We're only focusing on one aspect of NAS and the Raspberry Pi - media streaming. However, NAS is an incredibly useful tool (especially using a low power unit such as the Pi) for having a permanent externally accessibly file server and backup space. If you have a look at the end of the tutorial we've included a number of external resource links, so check them out if you want to take your NAS set-up to the next level!
Part 1. Installing Raspbmc To The SD-Card
We've selected RaspBMC as our XMBC client here, simply because we like it, but XBian and Openelec can both be used too using a similar NAS set up. The steps for installing all distributions are very similar.
There's a previous blog post here, that goes through all the steps of setting up RaspBMC on the Raspberry Pi, so all you need to do is follow them, then pop back here!
Part 2. Setting Up your Video Resources.
These steps might seem a little convoluted on a first pass, but if you do it with the set up in front of your, it's pretty straightfoward!
Boot up your Raspberry Pi to the RaspBMC GUI.

We're going to use NAS to stream media. So select Videos, then select Files.

On the next page, select Files again.

Then select Add Videos.

This will bring up the following Add Video Source page. Hit Add.

Scroll down and select Add Network Location.

Fill in Server name, Username and Password with the details matching to your NAS. Then hit OK.

You will then see it in the location list.

Now select Video and hit OK.

Then browse for new share.

Hit OK again and select the matching content depending on the Video source. In this example I used two HD Trailers:

Assign the NAS directory.

In this example it's movies:

Finally, we need to refresh the library:

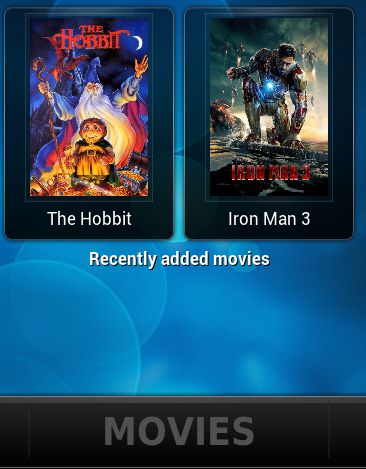
If everything went successfully, the recently added movies can now be seen from the homescreen!

To start one, just select it. For adding photos and music just proceed the same way with PICTURES and MUSIC from the homescreen, instead of MOVIES.

And that's it really!
Other Resources
There are a number of articles on external websites which offer different insights into using the Raspberry Pi as a NAS webserver, and we've put a few of them below:
e-linux - The Raspberry Pi and NAS
TechSwamp - Setting Up a Raspberry Pi-Powered Headless Media Server and NAS
Simon The Pi Man - How to Set Up a Raspberry Pi Windows NAS Storage Server
How To Geek - How To Turn a Raspberry Pi Into a Low Power Network Storage Device
Author
Dimitrios Kuckhoff - www.pocketpc.ch - Streaming mit Mini-PCs Teil 2: Raspberry Pi und Fazit


