
How to Install the Realtek RTL8125 2.5G Ethernet Driver on Ubuntu
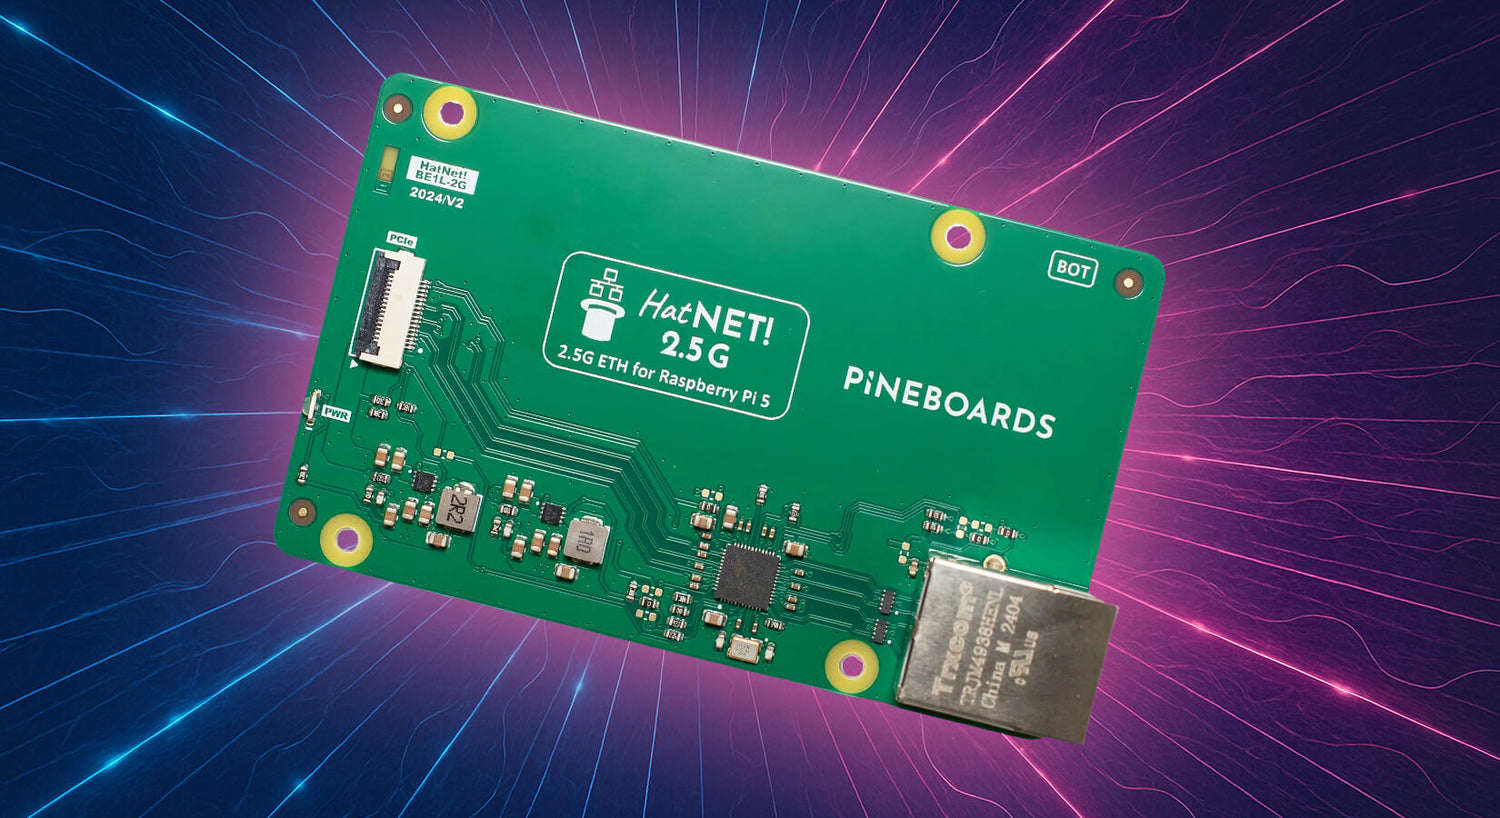
This blog post is a backup from the now-unavailable Pineboards documentation page for how to install the Realtek RTL8125 2.5G Ethernet driver on Ubuntu, intended for those using the Pineboards HatNET! 2.5G for Raspberry Pi 5. We have created this post to ensure this information remains available for our customers following the unfortunate closure of Pineboards.
If you need to install the Realtek RTL8125 2.5Gb Ethernet driver on Ubuntu, using the driver from the GitHub repository provides a method to ensure you're using the most up-to-date version. This tutorial will guide you through the process of installing the driver via a script included in the repository.
Prerequisites
- An Ubuntu system with internet access
- Terminal access with sudo privileges
Step 1: Install Required Packages
Before you can install the driver, you'll need to ensure your system has the necessary tools and headers to compile and manage kernel modules.
Open a terminal.
Install the Linux headers for your current kernel, along with essential packages for building and managing kernel modules:
sudo apt-get install linux-headers-$(uname -r)
sudo apt install devscripts debmake debhelper build-essential dkms
Step 2: Clone the Driver Repository
Download the driver source code directly from GitHub to get the latest version.
Clone the Realtek RTL8125 driver repository:
git clone https://github.com/awesometic/realtek-r8125-dkms.gitNavigate to the directory of the cloned repository:
cd realtek-r8125-dkmsStep 3: Run the Installation Script
The repository includes a script that automates the installation of the driver using DKMS. This ensures that the driver remains operational across kernel updates.
Execute the installation script:
sudo ./dkms-install.shThis script will compile the driver, add it to the DKMS framework, and ensure it is loaded into the kernel. After installing the Realtek RTL8125 driver on your Ubuntu system, a system reboot is necessary to ensure that all changes take effect and the new driver is properly loaded.
Step 4: Reboot Your System
Reboot your system to load the new kernel module:
sudo rebootStep 5: Verify the Driver Functionality
Once your system has restarted, confirm that the driver is correctly installed and functioning:
Open a terminal.
Use lspci to check the status of the Ethernet controller:
lspci -vvLook for the RTL8125 entry under Ethernet controllers. You should see details similar to the following:
0000:01:00.0 Ethernet controller: Realtek Semiconductor Co., Ltd. RTL8125 2.5GbE Controller (rev 05)
Subsystem: Realtek Semiconductor Co., Ltd. RTL8125 2.5GbE Controller
Flags: fast devsel, IRQ 169 Memory at 1b00000000 (64-bit, non-prefetchable) [size=64K]
Memory at 1b00010000 (64-bit, non-prefetchable) [size=16K]
Capabilities: <access denied>
Kernel driver in use: r8125
Kernel modules: r8125
This output confirms that the RTL8125 driver is active and the device is properly managed by the system.
Summary
Your Realtek RTL8125 2.5Gb Ethernet controller is now fully installed and operational on your Ubuntu system.
You can expect improved network performance and stability with the newly installed driver. This installation process ensures that the driver remains integrated and functional across future system updates due to the use of DKMS.


1 comment
cody
i tried this but it did not work now it is causing issues with other packages how do i undo this proccess
i tried this but it did not work now it is causing issues with other packages how do i undo this proccess