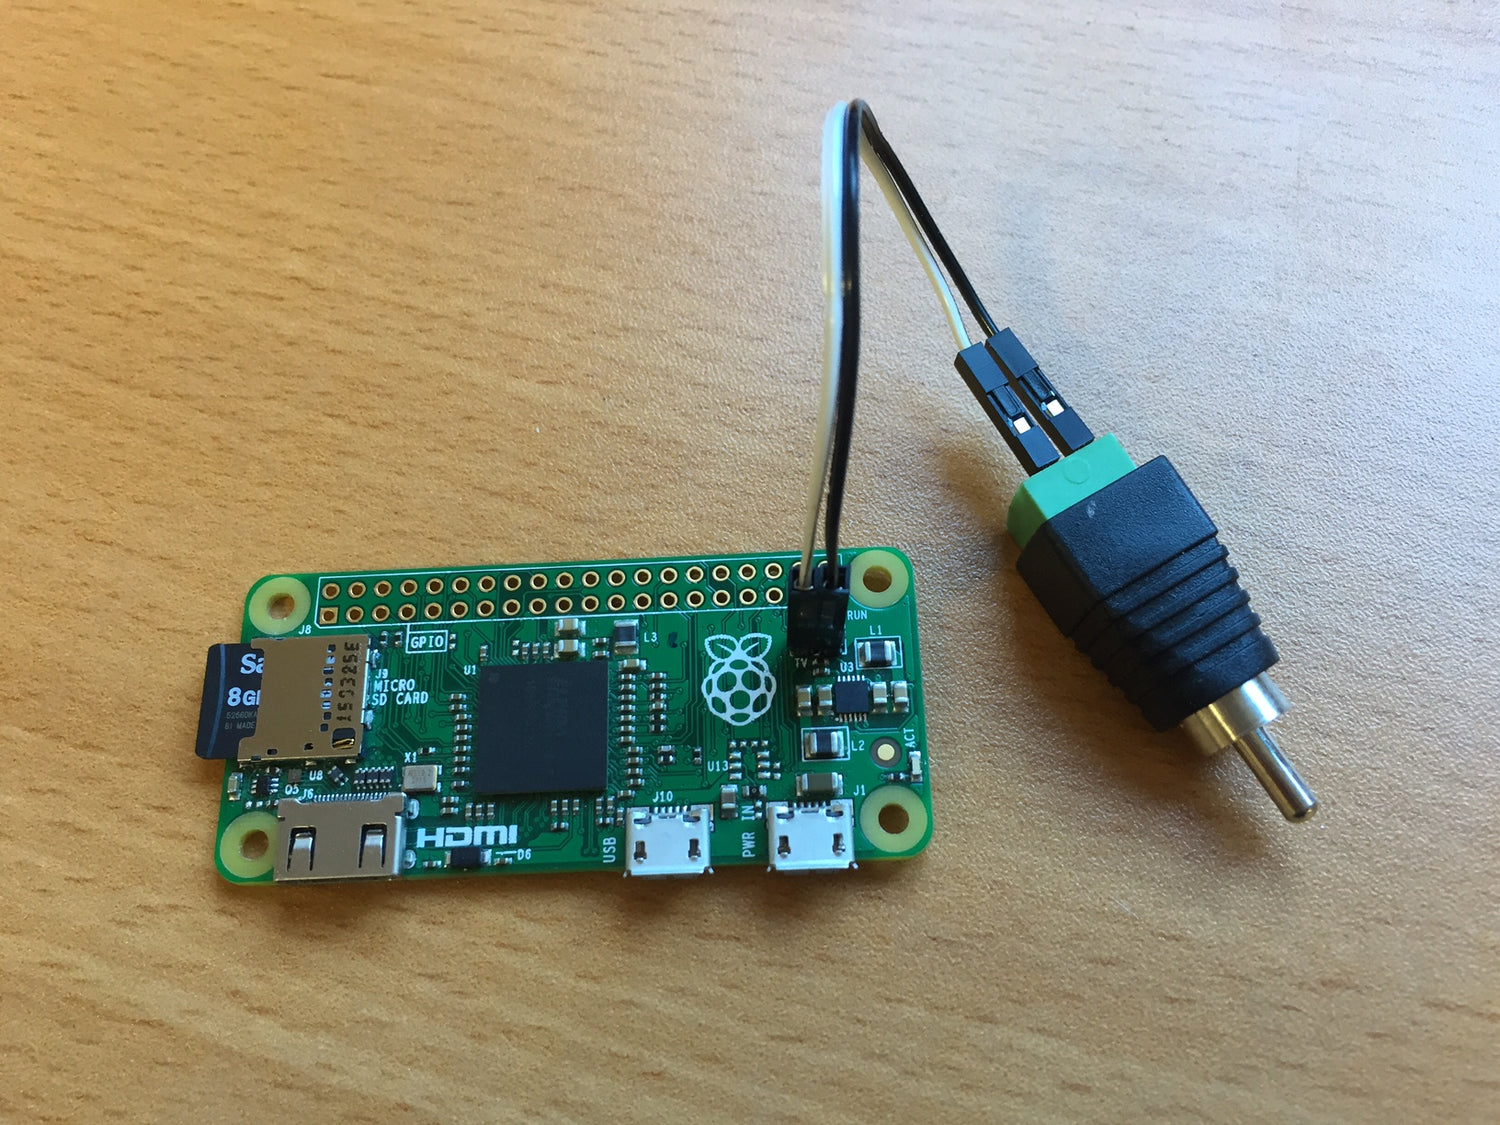
How to add an RCA TV Connector to a Raspberry Pi Zero
So you've got your Pi Zero, but you don't have an HDMI monitor! Argh!?! Right?
Nope! The Pi Zero has a composite video out port which is very easy to access, and we're going to show you how!
You'll need a few bits and pieces, including a soldering iron to solder some headers on:

We're going to be soldering two pin headers onto the Pi Zero, circled in red and labelled TV in the picture below

So, go ahead an solder your pin headers on! You can of course solder wires directly to the board if you'd like, but headers are neater (and their connection subsequently removable).

Now get your RCA connector, and plug the two male ends into the two screw terminals. Again, you can use wire for this, but male pins are probably neater.

Now we can plug the female end of the jumper wires into our Zero.
Polarity should always be "Positive" (+) of the RCA connector, to the pin labelled "TV" on the Raspberry Pi. In this case, it is our white jumper wire.
The Pi should automatically switch the output method depending on what you have plugged in, e.g. if you have no HDMI plugged in, and you connect the RCA, it should output via RCA. However, if you've pre-configured your system (for example on another Pi) it may not work.
If it doesn't work off the bat, you'll need to edit the Pi's config.txt file to force video output via RCA.
So, open up your Pi's config.txt file, you can do this in terminal using the command:
sudo nano /boot/config.txt
There are two lines you need to edit.
First, you need to REMOVE the comment # from the line
#sdtv_mode=2
So it should look like this:
sdtv_mode=2
Next, you need to ADD a comment # to the line
hdmi_force_hotplug=1
So it should look like this:
#hdmi_force_hotplug=1
Check the lines highlighted in red in the images below for clarification.
BEFORE

AFTER

Remember to save the config file when you exit!
That's it! You can now plug the Zero into your RCA/composite video and it should output on that channel!

Voila!


