
GPIO and Python (7/9) - Temperature Sensor
In this project you will learn how to wire and program a temperature sensor. Let’s see how hot the room is.
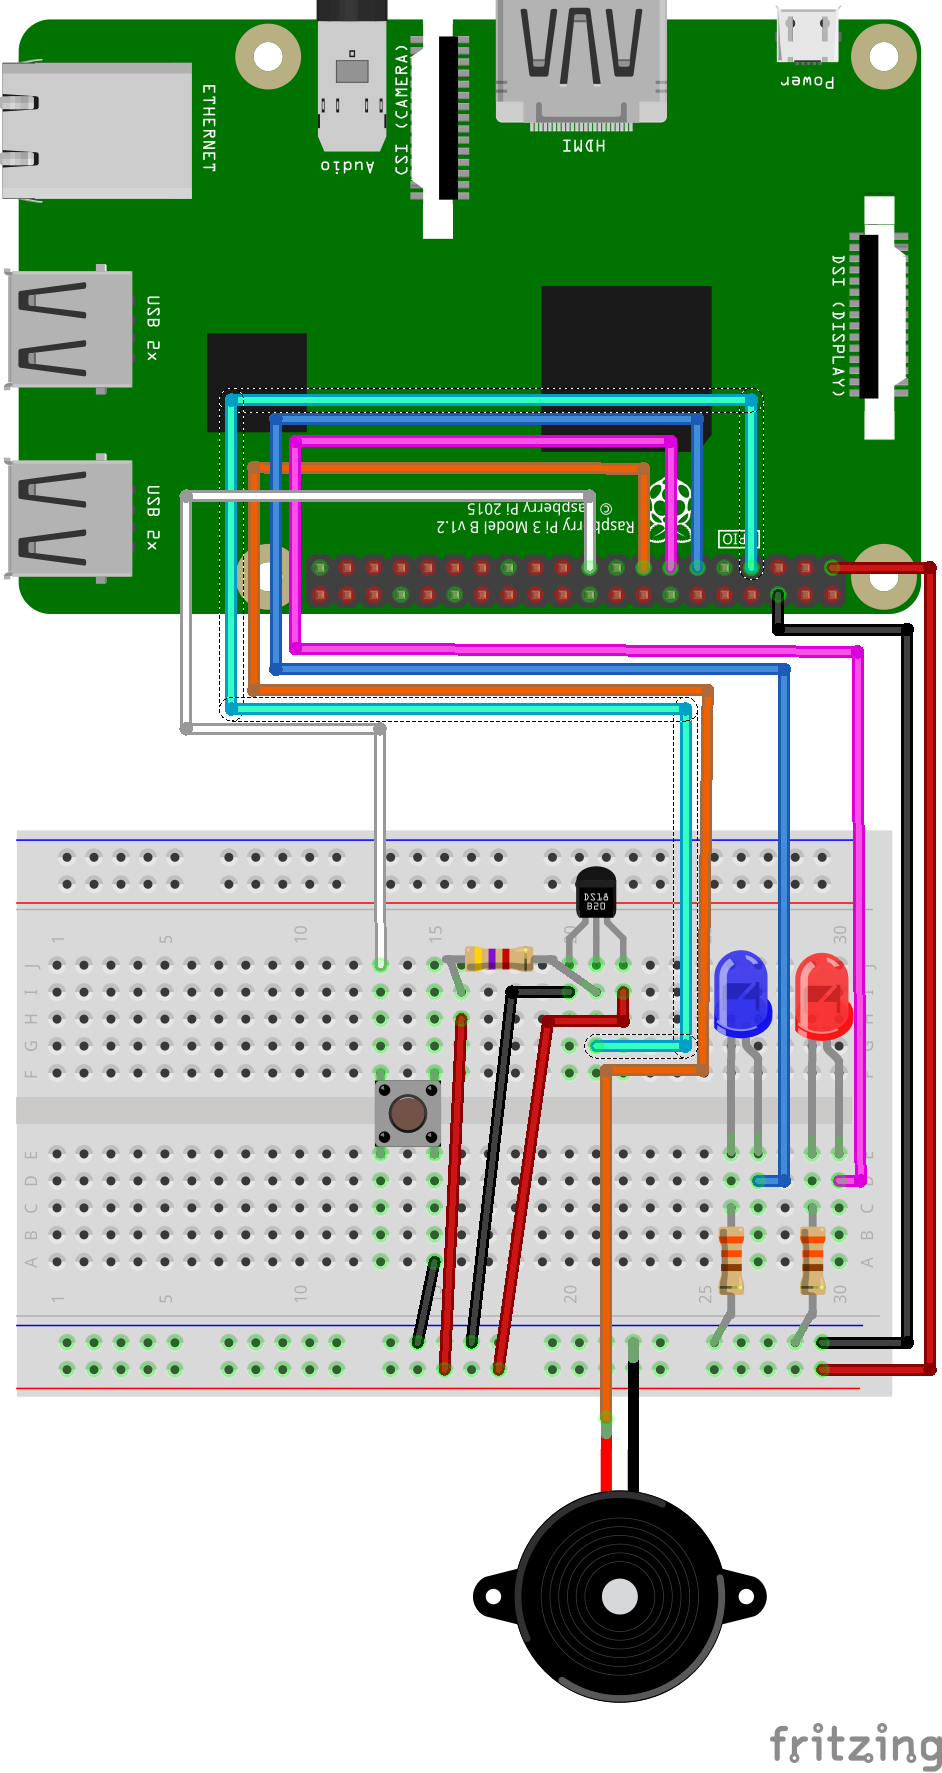
Things you will need:
Raspberry Pi + SD Card
Keyboard + Mouse
Monitor + HDMI Cable
Power Supply
Breadboard
1x Red LED
1x Blue LED
2x 330? Resistor
5x M/M Jumper Wire
7x M/F Jumper Wire
1x Button
1x Buzzer
1x DS18B20 Temperature Sensor
1x 4k7? Resistor
Prerequisites:
Latest version of Rasbian installed on your SD Card
Raspberry Pi setup with a keyboard, mouse and monitor

1. First we need to enable I2C on our Raspberry Pi. We do this by opening
the raspi-config menu.
sudo raspi-config

2. We then need to go to the Interfacing Options menu.

3. Select I2C and then Yes to enable it.

4. Next we need to enable the 1-wire I2C library. To do this we need to edit the boot config.txt file
sudo nano /boot/config.txt
5. Scroll down to the bottom of the file and add the following line:
dtoverlay=w1-gpio

6. Now reboot
sudo reboot
7. Change the current directory to our gpio_python_code directory:
cd gpio_python_code

8. Create a file for our temperature script:
touch 7_temperature.py

9. Edit the 7_temperature.py script using nano 7_temperature.py and add the following code:
#!/usr/bin/python


import glob

from time import sleep


base_dir = '/sys/bus/w1/devices/'

device_folder = glob.glob(base_dir + '28*')[0]

device_file = device_folder + '/w1_slave'


def read_temp_raw():

    f = open(device_file, 'r')

    lines = f.readlines()

    f.close()

    return lines


def read_temp():

    lines = read_temp_raw()

    while lines[0].strip()[-3:] != 'YES':

        sleep(0.2)

        lines = read_temp_raw()

    equals_pos = lines[1].find('t=')

    if equals_pos != -1:

        temp_string = lines[1][equals_pos+2:]

        temp_c = float(temp_string) / 1000.0

        temp_f = temp_c * 9.0 / 5.0 + 32.0

        return temp_c, temp_f


while True:

    print(read_temp())

    sleep(1)

10. Execute your 7_temperature.py script
sudo python 7_temperature.py


