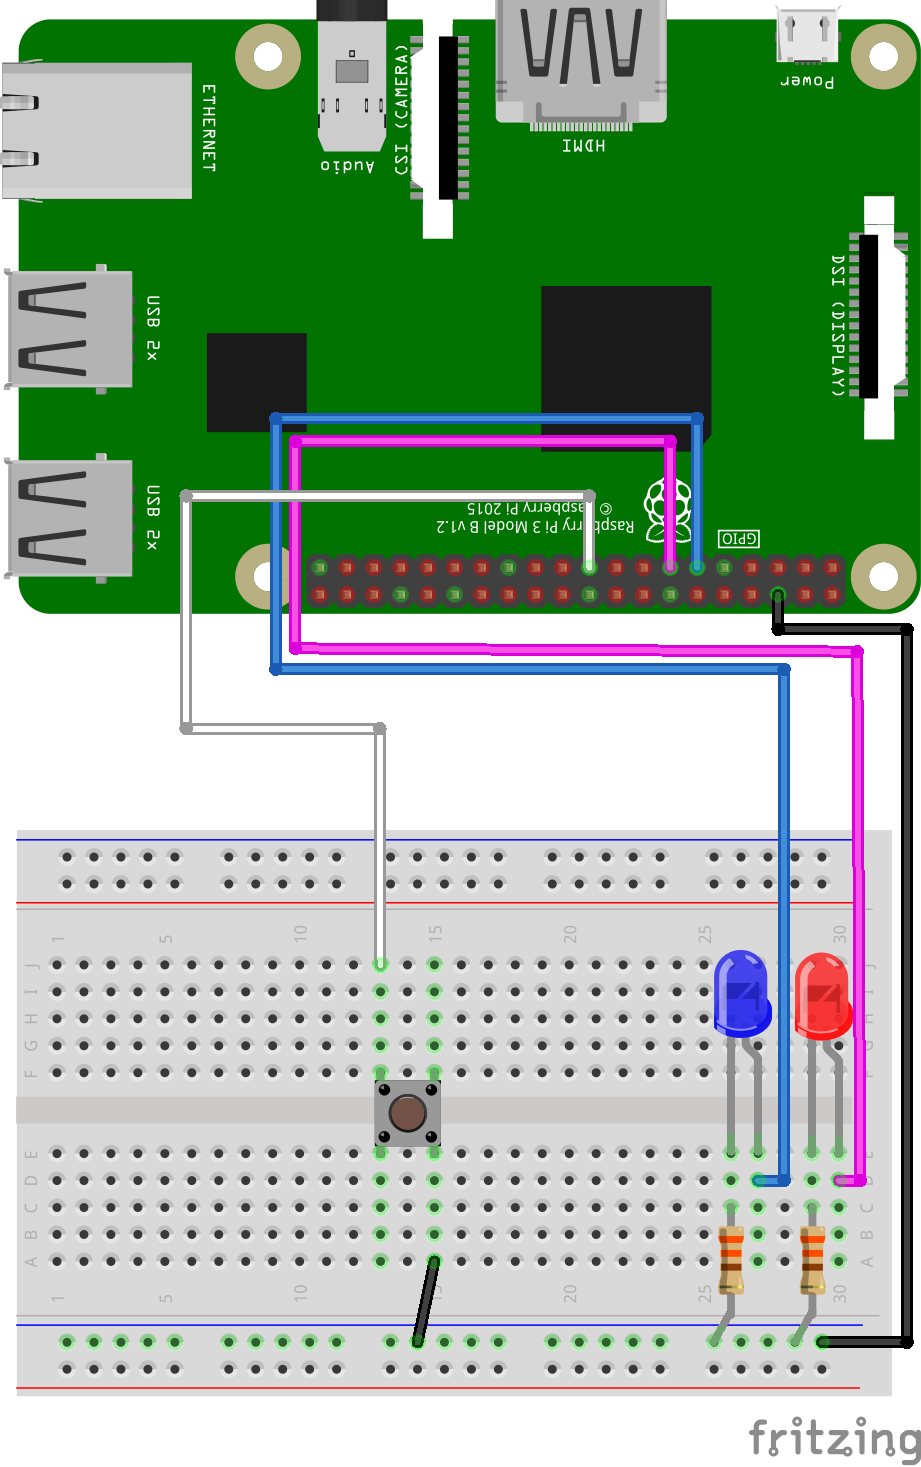
GPIO and Python (4/9) - Push Button
In this project you’ll learn how to make a LED blink!
Things you will need:
Raspberry Pi + SD Card
Keyboard + Mouse
Monitor + HDMI Cable
Power Supply
Breadboard
1x Red LED
1x Blue LED
2x 330? Resistor
1x M/M Jumper Wire
4x M/F Jumper Wire
1x Button
Prerequisites:
Latest version of Rasbian installed on your SD Card
Raspberry Pi setup with a keyboard, mouse and monitor

1. Change the current directory to our gpio_python_code directory:
cd gpio_python_code

2. Start by creating a file for our button script
touch 4_button.py

3. Edit the 4_button.py script using nano 4_button.py add the following code:
#!/usr/bin/python


import os

from time import sleep

import RPi.GPIO as GPIO


GPIO.setmode(GPIO.BCM)


# setup our input pin

# we use an internal pull up resistor to hold the pin at 3v3, otherwise the inputs value could chatter between high and low


GPIO.setup(10, GPIO.IN, pull_up_down=GPIO.PUD_UP)


while True:

    if ( GPIO.input(10) == False ):

        print("Button Pressed")

        os.system('date') # print the systems date and time

        print GPIO.input(10)

        sleep(5)

    else:

        os.system('clear') # clear the screens text

        print ("Waiting for you to press a button")

        sleep(0.1)

4. Execute your 4_button.py script
sudo python 4_button.py

5. Now press the button

6. To stop your 4_button.py script, simply press ctrl+c


