TinyS2

Price:
Sale price £16.50
incl. VAT
excl. VAT
Stock:
Only 15 units left
Quantity:

Awesome Extras

The Pi HutUSB-A to USB-C Cable - Black
Sale priceFrom £2.25 incl. VAT excl. VAT
The Pi HutUSB-C to USB-C Cable - Black
Sale priceFrom £2.25 incl. VAT excl. VAT

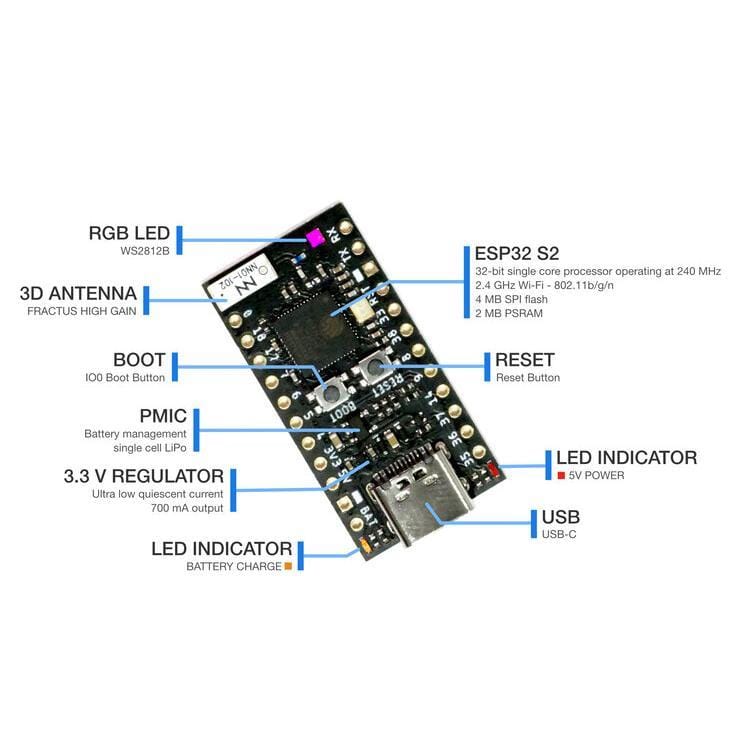
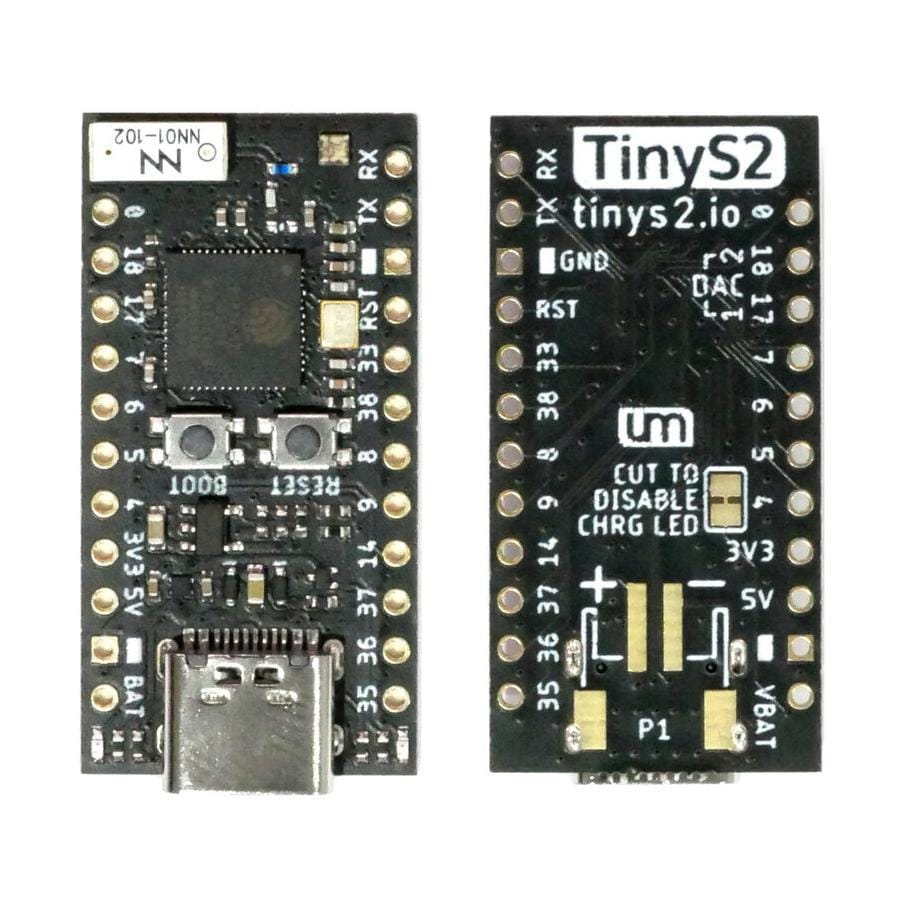
The Tiny Mighty ESP32-S2 development board in the TinyPICO format from UnexpectedMaker!

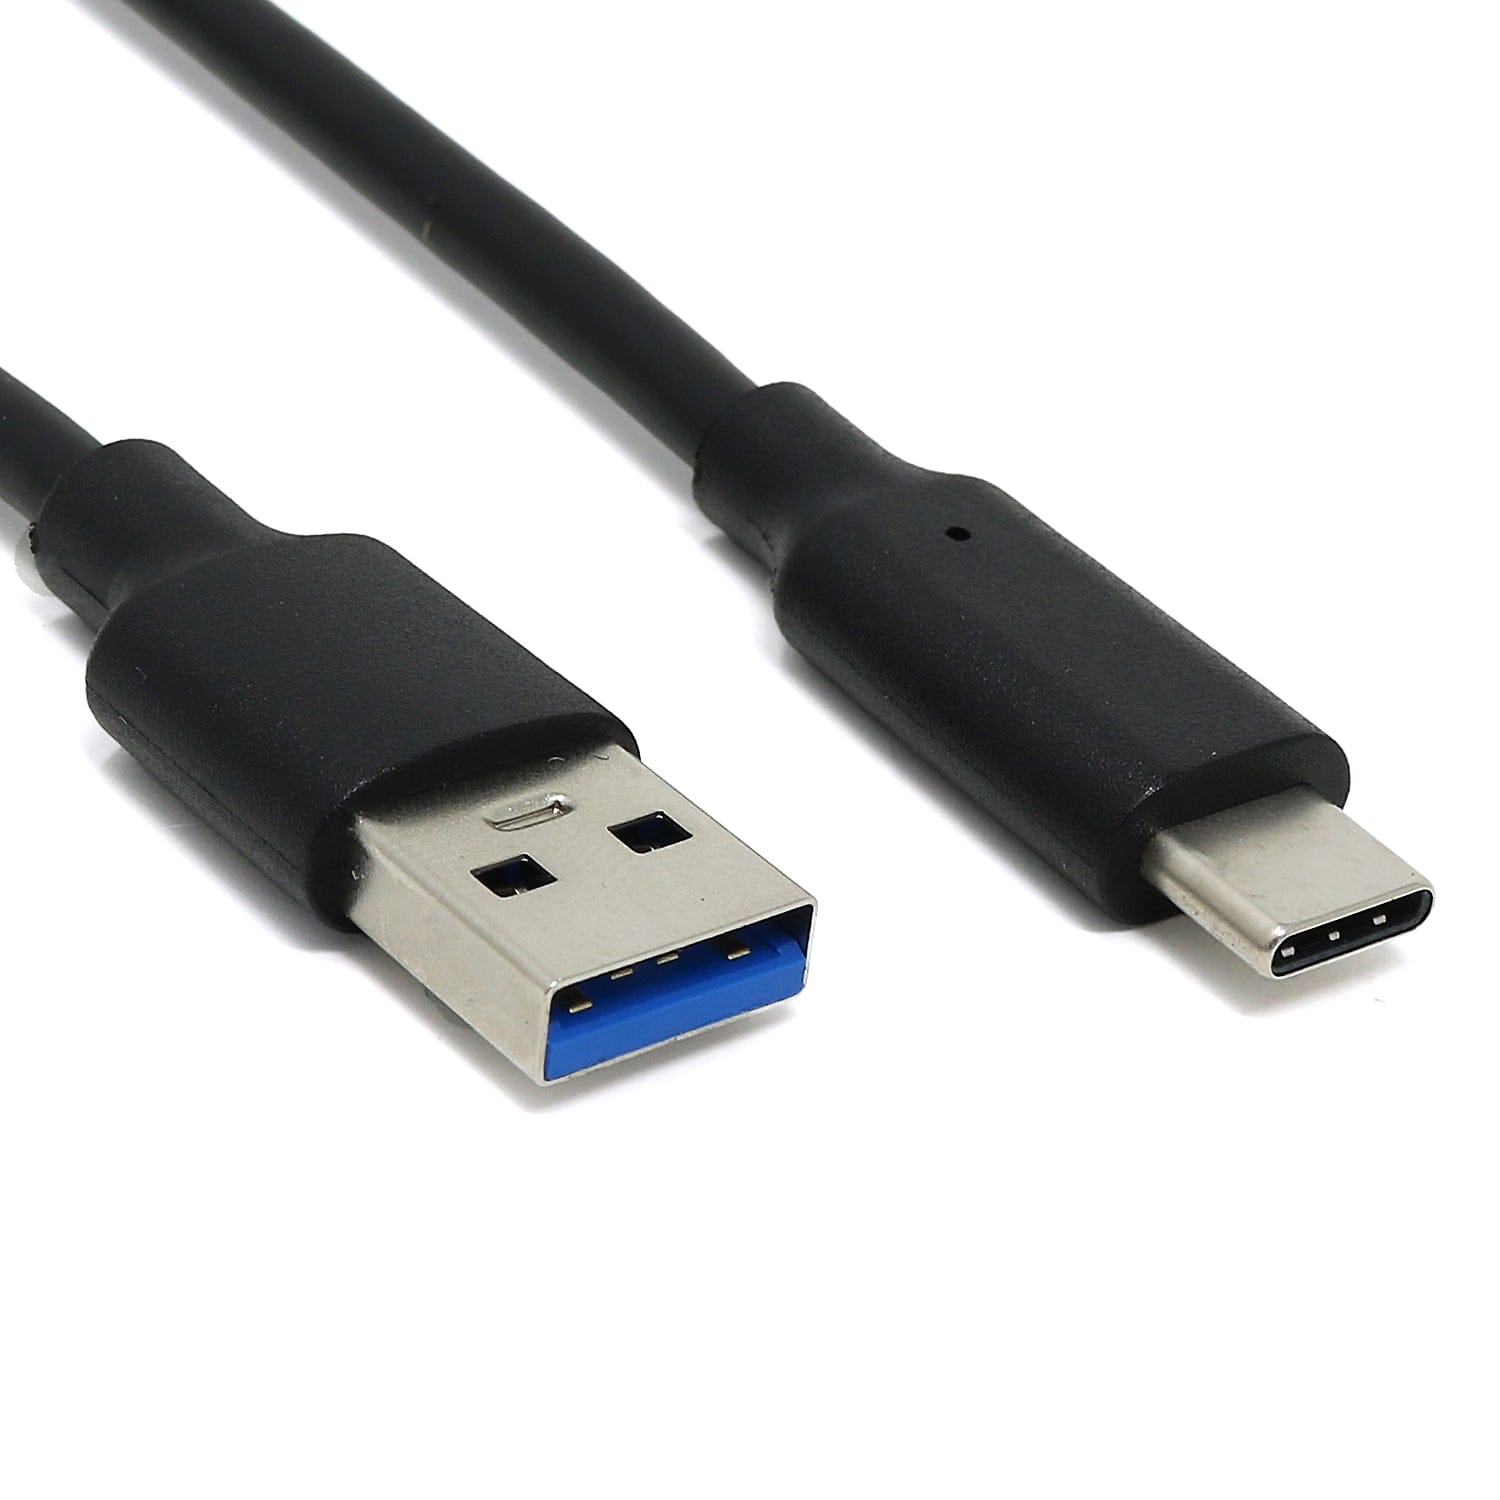
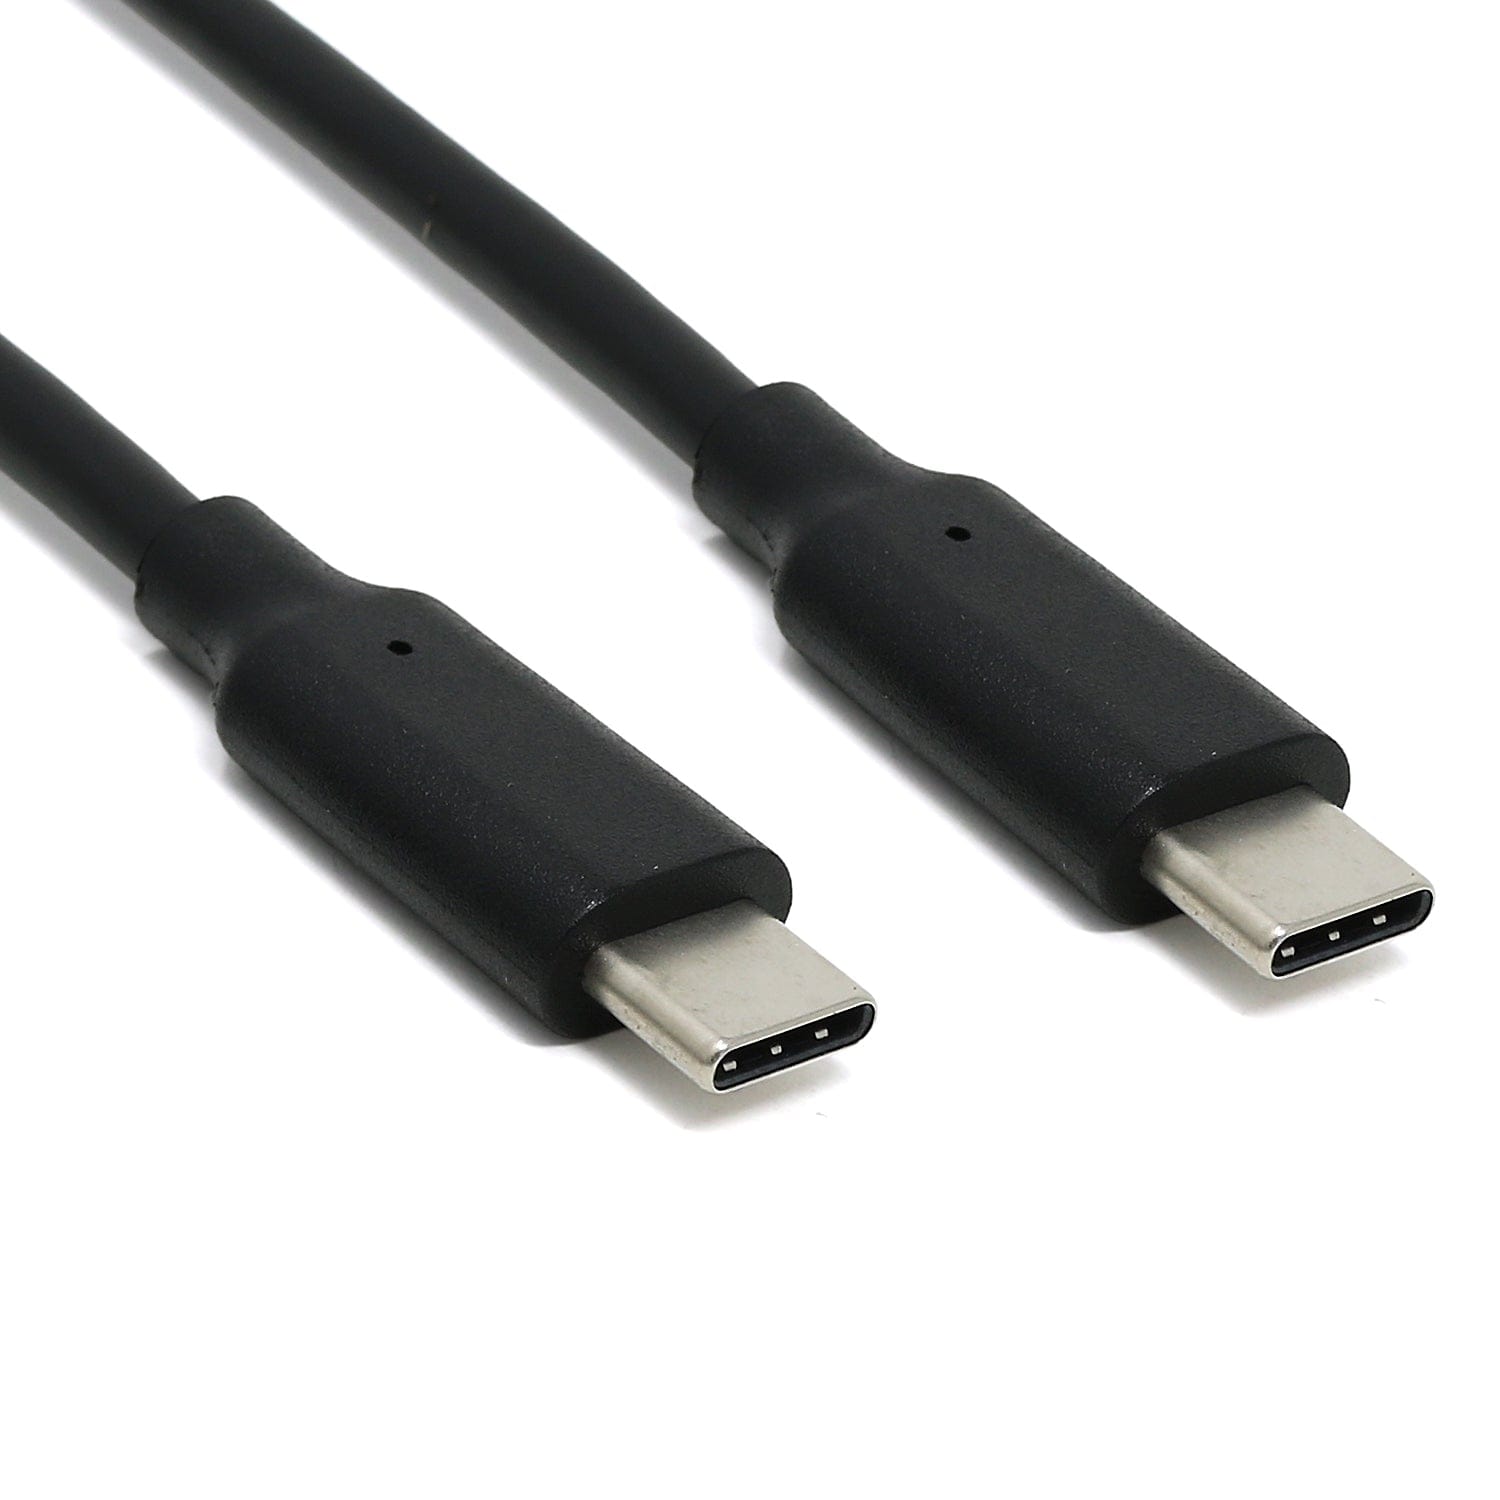
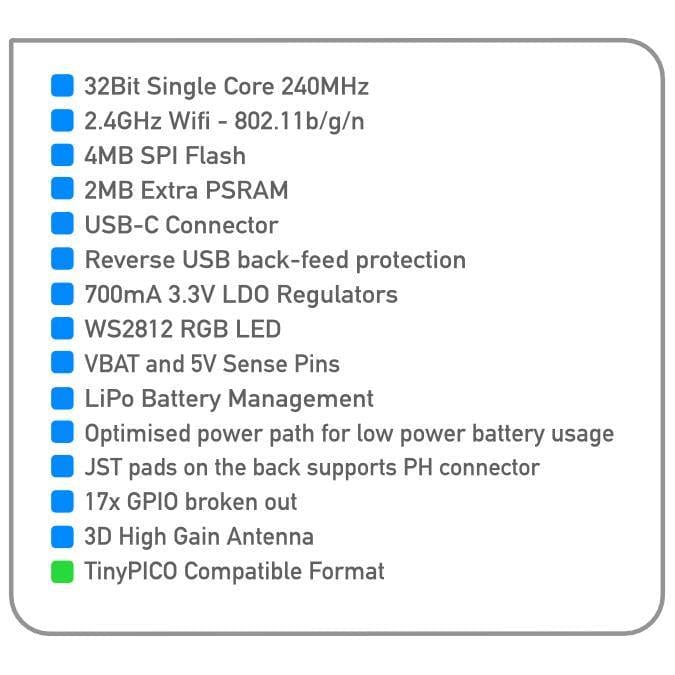
Just like its bigger brother TinyPICO, the TinyS2 has onboard LiPo battery charging, 4MBs of flash, an onboard RGB LED that can be shut down to reduce deep sleep current and a generous 700mA output 3.3V regulator. The TinyS2 uses a USB-C connection (be sure to grab a cable!).

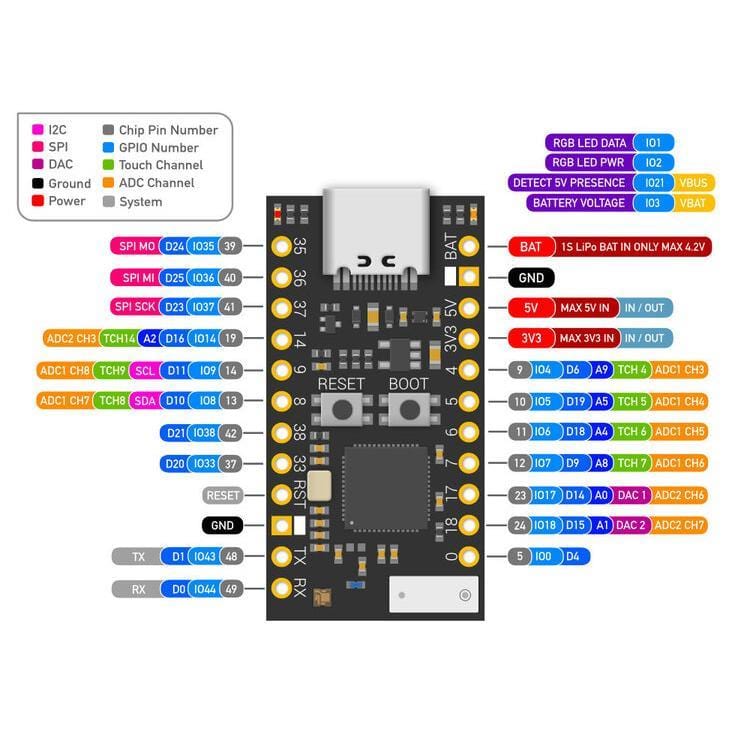
TinyS2 also has 2MB of extra PSRAM on top of the 320K SRAM and 17 GPIO broken out.

TinyS2 is 17.8mm wide and 41mm long.

Specifications

  • 32-bit 240 MHz single-core processor
  • 4 MB SPI Flash
  • 2 MB extra PSRAM
  • 2.4 GHz Wi-Fi - 802.11b/g/n
  • 3D high gain antenna
  • 700 mA 3.3 V LDO regulator
  • Optimised power path for low-power battery usage
  • LiPo battery management
  • Power (red), Charge (orange) LEDs
  • USB-C + Reverse USB power protection
  • VBAT voltage check and VBUS presence detection
  • 17x GPIO
  • Onboard RGB LED
  • TinyPICO format

Code & Schematic

Ships with CircuitPython pre-installed!

TinyS2 ships with a UF2 bootloader and the latest version of CircuitPython that supports the ESP32-S2.

Just plug your TinyS2 into your computer and it will appear in your filesystem as a USB flash drive! Just copy your code over, or edit your code directly on the drive. Coding a microcontroller has never been easier!

As newer versions of CircuitPython are released, you are able to update as you require from circuitpython.org

Schematic available here

Code Any Way You Like!

There is also early ESP-IDF and Arduino support if you prefer coding in C++ and there is an early MicroPython port available as well - use the links above to find out more about each development environment.

NOTE: There is no ESP32-S2 support in the currently released ESP32 Arduino Core version (1.0.6). If you would like to use the Arduino IDE with your TinyS2 (or any ESP32-S2 board) you will need to download the the latest version from github using the link above and use that *instead* of the released version.

FAQ

  • The red power LED doesn't light up when running off battery
    • That is by design! The power and charge LEDs and corresponding 2K resistors drain the battery, so they have been isolated to the 5V power domain, so they will only light up and draw power when the board is either being power by the USB plug, or by a 5V power source connected to the 5V header pin.
  • The orange charge LED blinks when no battery is connected
    • That is the correct behaviour! The charge IC can’t tell the difference between a full battery and no battery, so it cycles between trying to charge and not charge. You can disable the organs status LED by cutting the solder jumper on the back of the TinyS2
  • Sometimes my battery doesn't start charging when I plug it in
    • If you have 5V power connected to your TinyS2 before you plug your battery in, sometimes it might not start charging. Just unplug and re-plug in the 5V source and it should start charging correctly. This is a common issue with PMICs (Power Management ICs).
  • How do I read the battery voltage?
    • The TinyS2 can read an approximate voltage from a connected battery via IO3. If you are using CircuitPython, you can also read board.VBAT or use the TinyS2 helper provided.
  • Can I check if there is 5V present?
    • TinyS2 has the ability to check if a 5V power source is connected to the board by reading if IO21 or board.VBUS is high. :This allows you to alter your code when running off battery when you have a 5V source present or not… pretty cool :)
  • RX & TX pins are not coupled with the internal USB, what are they used for?
    • RX & TX are connected to UART0, which will give you internal debug output when in download mode. Otherwise, you can use them as UART0 when connecting a module that uses serial, or use them as general IO, it's up to you.
  • How can I flash my TinyS2 in Arduino?
    • If you currently have CircuitPython or MicroPython installed or have flashed your TinyS2 via the IDF and you would like to use your device in the Arduino IDE, you will need to put it into download mode by holding [BOOT], clicking [RESET] and then releasing [BOOT]. That will enable the CDC USB in ROM and you will be able to select the device post in the Arduino IDE tools menu.

      This only needs to be done once, while you keep working in the Arduino IDE.

  • Can I switch between CircuitPython, MicroPython, IDF or even Arduino IDE?
    • You can switch between each development environment, but each time you will need to put the TinyS2 into download mode by holding [BOOT], clicking [RESET] and then releasing [BOOT] and then flashing the respective firmware you require onto the board.
  • How can I get my TinyS2 into UF2 bootloader mode?
    • To get your TinyS2 into UF2 bootloader mode (assuming you have not stomped your CircuitPython install with Arduino/IDF or MicroPython) you can click [RESET], then about a second later click [BOOT] to get it into the UF2 bootloader mode. You will then see the RGB LED on your TinyS2 turn green once the filesystem is mounted,

      A drive will appear in your filesystem called TINYS2BOOT. From here you can re-flash the latest CircuitPython firmware by copying over the firmware.uf2 file for the version you want to install.

      You will see the RGB flash a redish orange many times during the copy, and then the TinyS2 will automatically reboot itself and mount the new CircuitPython version.

Payment & Accreditations

Payment methods
Visa Mastercard Maestro PayPal Amazon Klarna

Your payment information is processed securely. We do not store credit card details nor have access to your credit card information.

Accreditations