
Securely Logging into a Raspberry Pi without a Password
We’re always being told to choose a long, hard to guess password for all our accounts, so how can we log into a Raspberry Pi without a password using ssh (Secure Shell)?
Passwords are not the most secure way of logging in. They can be guessed, or ‘brute-forced’ by making millions of guesses using common words or known passwords. There is a better way; by using secrets that only the Raspberry Pi and the computer you are logging in with knows in the form of certificates.
For this we will use a tool to generate what is known as a private/public key pair on the PC that you are going to log in FROM. You absolutely must keep the ‘private key’ secret, and not give it to anyone else. However, you may give the ‘public key’ to anyone you like, as it is useless without the private key.
There are lots of different ways of generating the key pairs, but a common application you can use for Windows is called puTTygen. It is part of the puTTy SSH and Telnet client for windows. Download it from https://www.putty.org/, following the link to the downloads section.
Generating the Key Pairs
Once installed, you need to run puTTygen. You will be presented with the simple screen:

DO NOT take the default RSA key because it is not as secure as it used to be. Instead, choose ED25519, and then click on Generate. You will be asked to move your mouse round randomly in the blank area of the window. This will give the program the ‘entropy’, or ‘randomness’ that is required to generate a good private key:

Don’t worry, I’m not going to use that private key anywhere!
Do not enter a passphrase. If you do, you will be asked for it every time you try to log into your Raspberry Pi.
It may be useful to edit the key comment, changing it to the name of the PC you are going to login from, which makes it easier to delete the right line if you have more than one computer accessing your Raspberry Pi.
Now save your both your Public Key and Private keys to files on your PC, calling them something like ‘myssh.pub’ and ‘myssh.ppk’ respectively. Remember to keep the Private Key safe, and back it up your preferred password vault like LastPass (you are using one, aren’t you?).
Now you are ready to install the public key on your Raspberry Pi, and private key in your SSH client on your PC.
Installing the Public Key
Now, log into your Raspberry Pi using your current preferred method, be it SSH with password, or VNC. Open a terminal window and create a new folder using the following:
cd ~
mkdir .ssh
cd ~/.ssh
Now we need to create a new authorised key file and copy the public key into that. The public key is shown in the top box of the puTTygen window:

Create and edit the file with:
nano ~/.ssh/authorized_keys
Copy and paste the public key into that file, and close it after saving by pressing Ctrl+X, responding ‘Y’ to the request to save, and pressing return.
If you want to access your Raspberry Pi from other computers, you can add more than one public key to the authorized_keys file.
Setting up the SSH Client
On your PC, I am assuming you are using one of the two most popular SSH clients; PuTTy or KiTTy. Both are very similar (KiTTy is a fork of PuTTy), but since we installed PuTTy to be able to use PuTTygen, we will use that here.
Open PuTTy. You will be presented with a list of saved sessions, or computers that you have previously saved the login details for:

Enter the hostname or IP address of the Raspberry Pi you want to log into the ‘Host Name’ box, and leave the port as 22 and connection type as SSH.
Next, click on Data under Connection. Enter ‘pi’ into the Auto-login username’:

Click on the + next to the SSH under the Connection category on the left:

And then select ‘Auth’:

This is where you are going to tell PuTTy to use your Private Key to connect to your Raspberry Pi. Click on Browse and select your .ppk file saved from PuTTygen.

Return to the Session screen by scrolling all the way to the top of the scrollbar to the left, and selecting ‘Session’. Enter the name of your Raspberry Pi in the Saved Sessions field and click on Save.

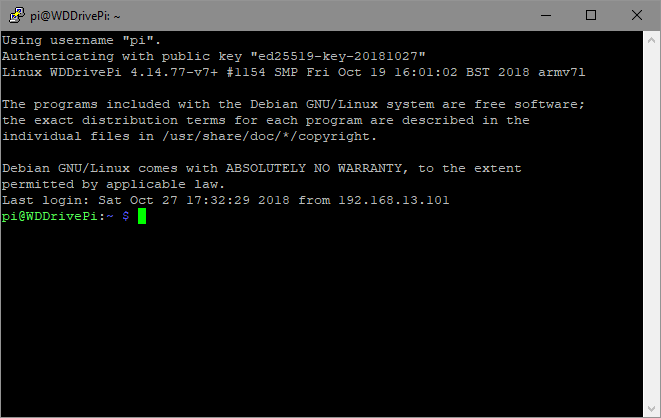
Now click on Open. This will open an SSH terminal to your Raspberry Pi with you logged in:

Completing the Set-Up
Disabling Logging in with Password
Once you have tested logging in with the key pairs, you can now DISABLE logging in with username/password to complete the setup.
The ‘ssh daemon’, the service on the Raspberry Pi that allows you to login using ssh, needs to stop being able to ask for a username/password. To do this, ssh into your Raspberry Pi and edit the sshd_config file with:
sudo nano /etc/ssh/sshd_config
Edit the PasswordAuthentication line by uncommenting the line (getting rid of the ‘#’) and changing the option from ‘yes’ to ‘no’:
PasswordAuthentication no
You will then need to restart the ssh daemon by restarting the Raspberry Pi with:
sudo reboot
Protecting the ‘authorized_keys’ File
If there are other users who have accounts on the Raspberry Pi, other than ‘pi’ itself, then they may be able to view and authorized_keys file, either changing what is there or adding their own. Therefore it is good practice to protect the file from all but the ‘pi’ user by only allowing the ‘pi’ user to see and edit it. Do this by issuing the following from a terminal window:
chmod 700 ~/.ssh/authorized_keys
Conclusion
Now every time you use PuTTy to log into your Raspberry Pi you will get straight in, without being prompted for a password.


2 comments
Gabriel
Thank you! Simple guide and very useful.
Thank you! Simple guide and very useful.
Matt Gessner
Nice article. It’d be a really nice addition if you explained how to use this from the RPi itself using ssh-keygen and something like
cat .ssh/id_rsa.pub | ssh user@rpihost “cat >> .ssh/authorized_keys”
Nice article. It’d be a really nice addition if you explained how to use this from the RPi itself using ssh-keygen and something like
cat .ssh/id_rsa.pub | ssh user@rpihost “cat >> .ssh/authorized_keys”