Ryanteck SnowPi - Soldering Guide
In this guide we will go through all of the steps to solder up your new SnowPi.
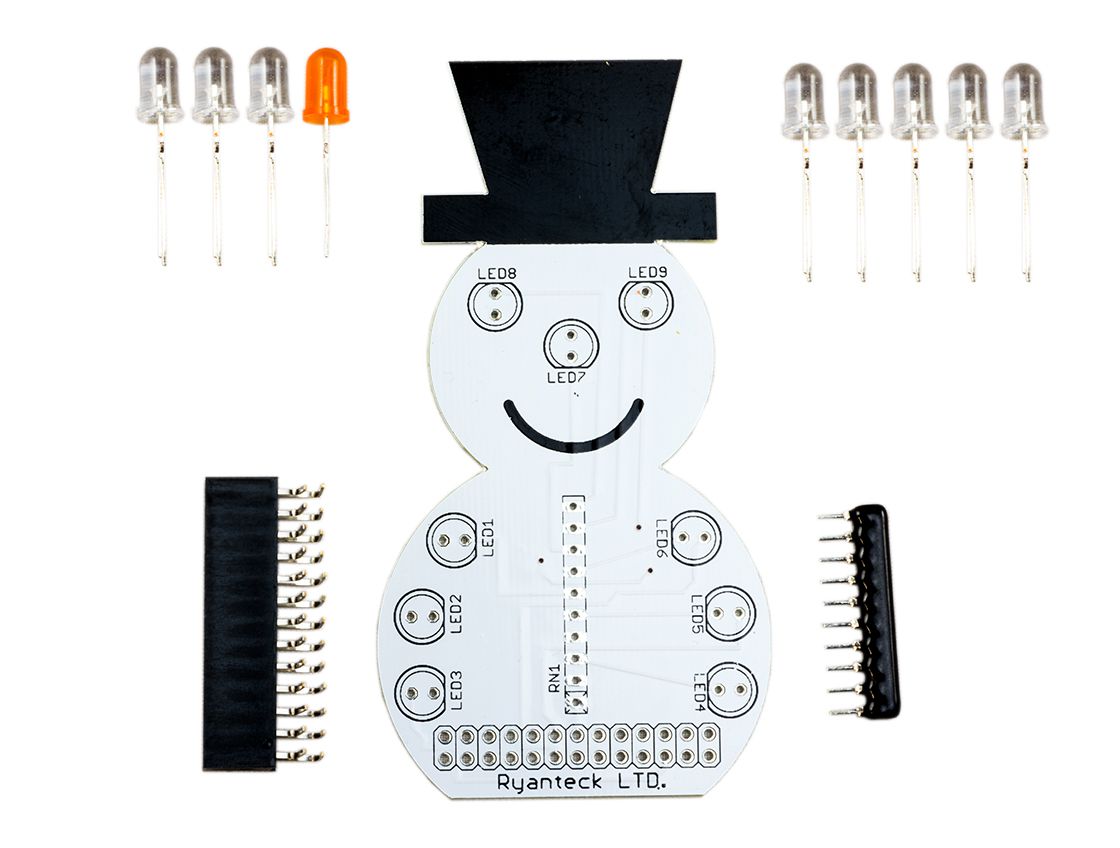
Checking the components
First begin by checking that you have all of your components.
You should have:
- 1 X Snow Pi PCB
- 1 X 5MM Diffused Orange LED
- 1 X 330 Ohm Resistor Array
- 1 X Right Angle 26 Way GPIO header
- 2 X 5MM Clear Blue LED
- 6 X 5MM Clear White LED
To figure out which are the Blue and White LEDs are actually quite simple. While both are transparent if you look into them from the top there is a clear difference between the two.


The image on the left which has a cloudy view is the white LED. The more almost fully transparent on the right is the blue LED.
Even if you count out the 2 Blue LEDs still check every LED.
If you are missing any components then please | contact us via our website.
Lets begin soldering!
1. GPIO Header
First begin by pushing the GPIO header into the PCB. Be careful while you do this as they can be a little fiddly to fit. I found it easier to push the top in first and then twiddle the bottom into the PCB.

After then solder the header to the board.

2. Resistor Network
Next we need to solder the resistor header, we used a resistor network instead of induviudal LEDs as its quicker & easier to solder.
First take note of where the text is on the resistor network. The bottom pin here is pin 1.
Next put the resistor network in the PCB with pin 1 at the bottom of the PCB which is nearest the header.
And then solder it up. You will find a sponge, piece of foam or something to hold the network in place handy for it to be perfectly straight. If not it will solder with a little angle which doesn't matter. It will still work :)
3. Light Emitting Diodes
Finally you will need to solder on all of the LEDs to the SnowPi.
Begin by first checking the polarity for each LED. The longer Leg is positive and the shorter negative.
All of the shorter leads need to be closest to the flat edge. You should also have the flat edge of each LED be in line with the silkscreen.

Continue for each LED double checking that you put the two blue LEDs in the eyes. (Of course if you wish them to be in the middle of his belly you can).
As you put each LED in bend the legs at the base to keep them in place while soldering.
Once all put in the PCB you can turn it upside down and they should all keep in place fine.

And then solder them all up!

Finally snip the legs on each of the LEDs! If you're not happy with any of the solder joints then you can just go over them again with your iron once snipped.

5. Put the SnowPi on your Raspberry Pi!
The SnowPi goes on your Raspberry Pi pointing towards the HDMI Port. On the A+, B+ and Pi 2 it goes on the GPIO Pins closest to the LEDs.

Once aligned correctly push all the way down to seat the SnowPi to the GPIO header!

And you're all done!**


