
Ryanteck Motor Controller - Soldering Guide
These are the instructions on how to solder the RTK-000-001 Kit up ready for use. These instructions apply for both the kits on their own and the kits packaged with the robots as they are identical.
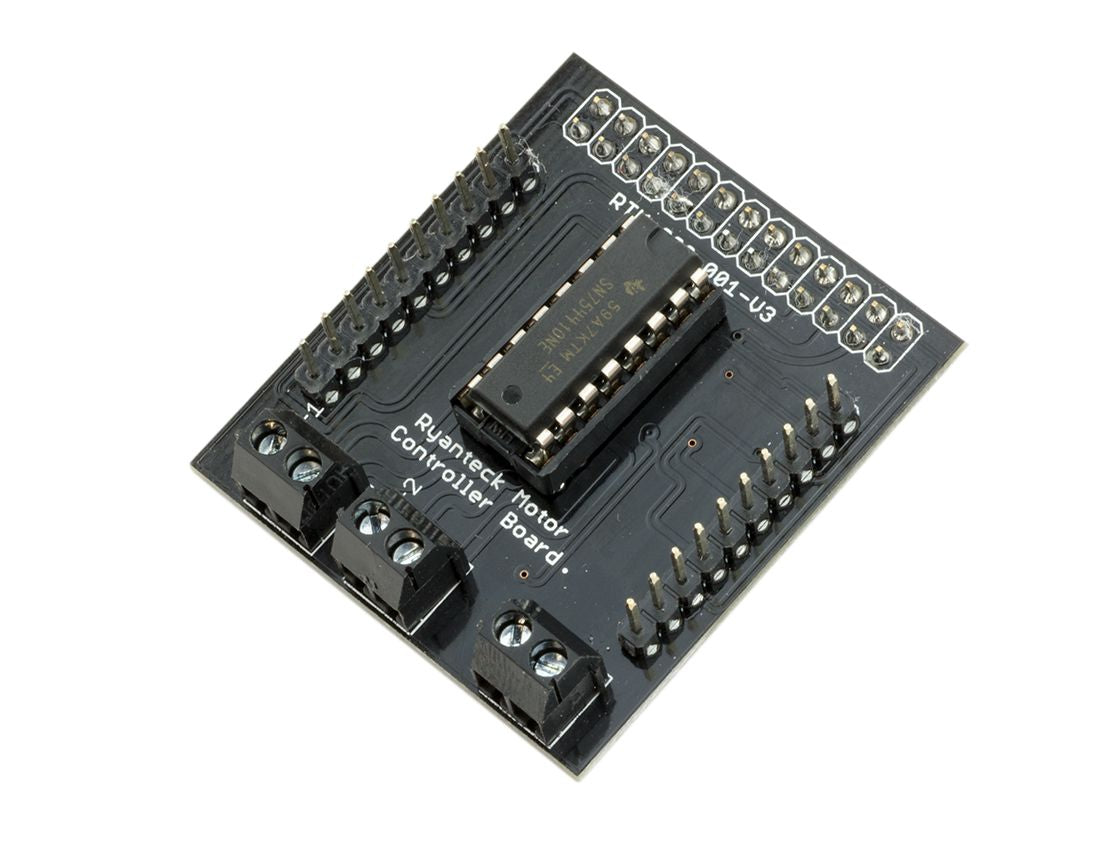
From the 4th of April 2016 all new orders by Ryanteck LTD. include the new Version 3 Board.
Tools Required:
The following tools are required for assembly:
Soldering Iron (30W or above is recommended) with a small tip. Solder (Lead Free is recommended) Solder Cleaner, Brass shavings are recommended but sponges are handy too. Raspberry Pi, we find it easier to solder one part on while on a Pi. If you have a dead / old one for this use that. Helping hands can help with assembly but are not required.
Warning - Soldering Irons
Use with care, when using a soldering iron you can burn yourself if not careful. Lead Free solder is also recommended over Lead solder as it contains no lead, but requires the soldering iron to be hotter. I find I normally need to have my soldering iron at 300-350 Degrees. Most 30W soldering irons get into and above this range easily.
Tutorial:
First start by confirming that you have all of the pieces out of the pack, it should contain:
- 1 X RTK-000-001 PCB
- 1 X SN754410NE (The IC)
- 1 X 16 Pin IC Socket
- 1 X 26 extra tall 26 way pin header
- 3 X Two Way terminal screw blocks
- 3 X Two Pin Headers


2. Soldering the IC Socket
First start by soldering the IC socket to the board, to do this insert the socket in with the notch lining up on the PCB, turn upside down and then solder. You can use a piece of foam or sponge to help keep the PCB stable if required.
Here's a before


And After


3. Raspberry Pi GPIO Header
I find the easiest way to solder a header is to use an Raspberry Pi. If you have an old one use this. If you have a newer one just be careful as soldering one board shouldn't cause any damage.
MAKE SURE YOUR RASPBERRY PI IS NOT POWERED UP OR PLUGGED IN WHILE SOLDERING WITH IT - Most soldering irons should ground themselves which while soldering would then cause damage to the Pi.


Next put the board on-top and tack the pin shown to keep it flat onto the header.


After then start soldering.
If you have a bridge happen like in the middle of this photo don't panic.


Just re-heat the joint and remove your soldering iron a few times and cleaning it each time. This should take away the solder and fix it.

Continue to then solder the rest of the pins and you should end up with something like:


4.Soldering the terminal blocks
Finally we need to solder the terminal blocks.
Begin by putting the terminal blocks into the 3 spaces and turn the board upside down. You will find soldering this easier with a extra board which has an edge you can put the header over. I use a spare chopping board that came with some cheese originally for soldering.


I find it best to tack one of each pin first to make sure that they're all flat and the correct way around. Like so:


After checking solder the other pins for the terminal blocks.
5. Putting the chip in
Finally we need to put the chip in. Get your board and the chip ready.


And then put the chip into the IC socket in the middle with the notch towards the left.


And you're now ready to go!


Other Notes
It is not recommended to put the black conductive foam from the IC socket and the IC on the board to protect any pins. The foam is conductive so could cause issues to the board or your Raspberry Pi. You can store with the foam on when not in use and when there is no power applied as long as there is no foam when power is applied.
This board has been tested up to 12V at 0.5A a motor, even tough the chip is capable of more these are the guidelines we recommend. The motors we provide with 4AAs work perfectly fine with the chip getting warm, any higher voltages or amperage may cause the chip to get extremely hot.


