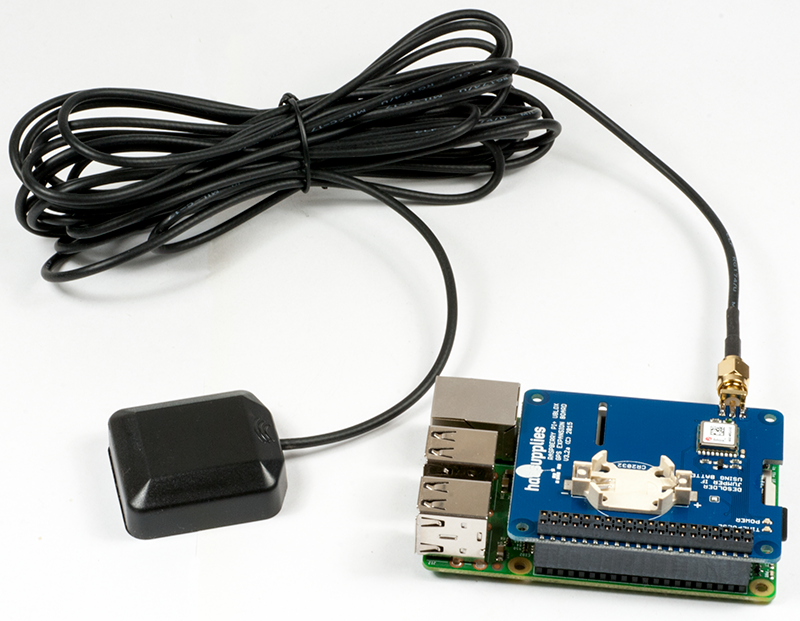
Raspberry Pi GPS HAT and Python
This tutorial assumes you are using an up-to-date Raspbian install, have access to either LXTerminal or SSH and have an internet connection!
We're going to go through the steps on how to use a GPS module with your Raspberry Pi! In this tutorial we're going to use the HAB GPS HAT!
By default, the Raspberry Pi serial port console login is enabled. We need to disable this before we can use the serial port for ourselves.
To do this, simply load up the raspberry pi configuration tool:
sudo raspi-config
Then go to option 8 – Advanced Options

Then go to option A8 – Serial

Over to “No”

And finally “Ok”

Now go to “Finish”.
If you are using a Raspberry Pi 3, there are some additional steps to free up serial. If you are not using a RPi3, skip to the "Power off your Pi with:" section.
First we need to edit the boot config file
sudo nano /boot/config.txt
and change the line:
enable_uart=0
to:
enable_uart=1
Then we need to add the following lines:
dtoverlay=pi3-miniuart-bt
force_turbo=1
Next, we need to edit the cmdline txt file
sudo nano /boot/cmdline.txt
and remove any "console=" references, for example, if your cmdline txt file looks like this:
dwc_otg.lpm_enable=0 console=tty1 root=/dev/mmcblk0p7 rootfstype=ext4 elevator=deadline fsck.repair=yes rootwait
change it to this:
dwc_otg.lpm_enable=0 root=/dev/mmcblk0p7 rootfstype=ext4 elevator=deadline fsck.repair=yes rootwait
Lastly, we need to edit the hciuart service file:
sudo nano /lib/systemd/system/hciuart.service
Change this line:
After=dev-serial1.device
to this:
After=dev-ttys0.device
And then change this line:
ExecStart=/usr/bin/hciattach /dev/serial1 bcm43xx 921600 noflow -
to this:
ExecStart=/usr/lib/hciattach /dev/ttys0 bcm43xx 460800 noflow -
Power off your Pi with:
sudo shutdown -h now
With the Raspberry Pi powered off, we can now plug our GPS HAT in and attach an aerial.

Once everything is plugged in, we can power up the Pi.
Before we go any further we need to make sure our GPS HAT has a “lock”. To find this out, you’ll need to refer to your GPS HAT manual, or if you are using the HAB Supplies GPS HAT, look for a blinking green led, labelled “timepulse”. Keep in mind that it can take a long time for the HAT to get a lock, so be patient. If you are struggling to get a lock after 30mins try moving you’re aerial. For best results make sure the aerial is outside and has direct line of sight to the sky.

Once we have a GPS lock, we can do a quick test to make sure our Pi is able to read the data provided by the HAT.
So, log in to your Pi. You can do this via SSH or via the normal method! Please Note. We're running Raspian from Terminal and have an internet connection!
Start by setting up the serial port:
stty -F /dev/ttyAMA0 raw 9600 cs8 clocal -cstopb

Now simply run:
cat /dev/ttyAMA0
You should see something like this:

What you are seeing here is the raw GPS “NMEA sentence” output from the GPS module. The lines we are interested in are the ones beginning with $GNGGA (again, this might differ depening on your GPS HAT you have, but look for the line that has “GGA” at the beginning.)
If your $GNGGA lines are looking a little empty, and contains a lot of commas “,” with nothing in between them, then you don’t have a GPS lock.
Now it’s time to access this information in a python script!
We are going to use 2 libraries in our script:
- serial
- pynmea2
The first one, serial, we don’t need to install anything, this is a default library and will be pre-installed with Raspbian.
The second one, pynmea2, we need to install. So let’s do that! (pynmea2 is an easy to use library for parsing NMEA sentences. We could write our own parser, but why re-invent the wheel!)
If you don’t already have “pip” installed, start by installing it:
sudo apt-get install python-pip
Once pip is installed we can then go ahead and install pynmea2 using pip:
sudo pip install pynmea2
Now we're going to start logging our GPS data using a Python script. This is a basic script that reads the serial port, passes each line to our pynmea2 parser and simply prints out a formatted string containing some information.
We now need to download the python script to our Raspberry Pi, you can view it here - https://github.com/modmypi/GPS/blob/master/gps.py. To do this, we need to use the following GitHub Clone command. This command downloads the Git repository to your current directoy, in this case the Raspberry Pi home directory. You can change this or create a new folder if you wish.
git clone git://github.com/modmypi/GPS
We now need to browse to the repo we just downloaded. So change the directory to the GPS folder:
cd GPS
We can now run our Python script! To start, simply type:
sudo python gps.py
You should see some results like these:

That's it! You're now tracking your GPS data!
CODE
import serial

import pynmea2

def parseGPS(str):

if str.find('GGA') > 0:

msg = pynmea2.parse(str)

        print "Timestamp: %s -- Lat: %s %s -- Lon: %s %s -- Altitude: %s %s" % (msg.timestamp,msg.lat,msg.lat_dir,msg.lon,msg.lon_dir,msg.altitude,msg.altitude_units)

serialPort = serial.Serial("/dev/ttyAMA0", 9600, timeout=0.5)

while True:

    str = serialPort.readline()

    parseGPS(str)


