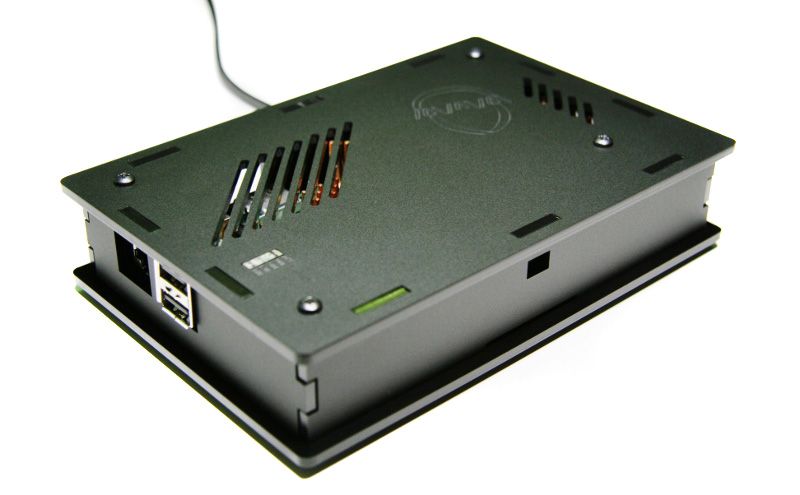
Nwazet Tuxedo Case - Assembly Instructions
Parts list
- 1x Light pipe
- 1x Top plate
- 4x 1/4" Raspberry Pi nylon edge fasteners
- 4x 6-32 x 1/4" black steel screws for the Raspberry Pi nylon edge fasteners
- 1x Back wall (HDMI)
- 2x 4-40 x 3/16" F/F aluminum standoffs (for the optional Nwazet Power Supply)
- 4x 4-40 x 3/16" steel screws (for the optional Nwazet Power Supply)
- 2x 4-40 x 1/4" F/F aluminum standoffs for the Raspberry Pi
- 2x 4-40 x 1/4" black steel screws to secure the 4-40 x 1/4" F/F aluminum standoffs on the case bottom on the exterior side
- 2x 4-40 x 3/16" steel screws to secure the Raspberry Pi on the 4-40 x 1/4" F/F aluminum standoffs on the case bottom on the interior side
- 1x Bottom plate
- 1x Power Supply wall
- 1x Front wall
- 4x 4-40 x 1" aluminum standoffs
- 4x 4-40 zinc hex nuts
- 4x 4-40 x 1/4" black screws to secure the Top plate onto the 4-40 x 1" aluminum standoffs
- 4x rubber feet (not shown on this picture)
Note: the matte side of the plates should be on the outside, and the glossy side on the inside.

Step 0
- Peel off the protective paper from the laser-cut acrylic plates
Step 1
- Secure the 4-40 x 1/4" F/F aluminum standoffs for the Raspberry Pi to the case bottom using the 2x 4-40 x 1/4" black steel screws
- Secure the 4-40 x 3/16" F/F aluminum standoffs to the bottom plate (optional for the Nwazet Power Supply) using 2x 4-40 x 3/16" steel screws


Step 2
- If you are using a stereo cable, insert it into the small arch in the USB / Ethernet wall now (optional)
- Insert the USB / Ethernet wall into the bottom plate
- If you're using a Nwazet Pi Power Supply: insert the USB adapter into the Raspberry Pi and the Nwazet Pi Power supply into the other end of the USB adapter
- Insert the SD card with your favorite distribution into the Raspberry Pi

Step 3
- Insert the USB connector of the Raspberry Pi into the USB / Ethernet wall
- Position the Raspberry Pi and the Nwazet Pi Power Supply together over their respective standoffs
- Secure the Raspberry Pi and the Nwazet Pi Power Supply onto their standoffs using 4x 4-40 x 3/16" steel screws

Step 4
- Position the 4x 1/4" Raspberry Pi nylon edge standoffs along the edges of the Raspberry Pi as shown below


Step 5
- Make sure that the nylon edge standoffs are properly aligned above their respective holes in the bottom plate
- Secure the edge standoffs using the 4x 6-32 x 1/4" black steel screws


Step 6
- Using the 4x 4-40 x 1" aluminum standoffs and the 4x 4-40 zinc hex nuts, secure the standoffs to the bottom plate
- If you are using a right-angle stereo cable, now is a good time to insert it into the Raspberry Pi's stereo jack


Step 7
- Insert the HDMI wall into the bottom plate. Ensure that the hole for the HDMI cable is aligned with the HDMI connector on the Raspberry Pi, the shorter portion of the wall below the HDMI hole near the bottom plate
- Insert the front wall into the bottom plate. Ensure that the small rectangular window in the wall is centered in front of the GPIO connector of the Raspberry Pi. If you have a Nwazet Pi IR Receiver module, you can insert it into the GPIO connector now
- Insert the Power Supply wall into the bottom plate. If you're not using a Nwazet Pi Power Supply, you should run a micro USB cable to the Raspberry Pi's micro USB power connector, passing it through the rectangular hole in the Power Supply wall

Step 8
- Flip the top plate over so that the engraved Nwazet Logo is facing down
- Insert the light pipe into its hole in the top plate
- Secure the light pipe to the top plate with a small piece of tape. This will ensure that the light pipe doesn't fall off when "closing the lid" on the case
- Align the holes in the top plate with the notches at the top of the walls
- Gently, press the top plate down until it rests perfectly flat on the walls. It should be a tight fit but it should not be hard to fit the pieces together
- Secure the top plate with the 4x 4-40 x 1/4" black screws onto the 4-40 x 1" aluminum standoffs


Step 9
- Stick the rubber feet to the bottom plate near the hex nuts
- You're done :) Enjoy!

Original author: Fabien Royer, nwazet.com


