
ModMyPi VESA Star Assembly Guide
If you want to attach your Raspberry Pi to the back of a TV or monitor you'll most likely need a VESA mount! The ModMyPi cases do have a 75mm VESA option pre-drilled, however the ModMyPi VESA Star will allow you to attach the case to anything up to 100mm!
This guide will give you some assembly instructions for the VESA star. You will be able to attach everything finger tight, but it's best to grab a small phillips and flat-head to make sure everything's tight.
Step 1
Make sure you've got everything. The ModMyPi VESA Star consists of:
1 x ModMyPi VESA Star
4 x M4 16mm Nylon Knurled Thumbscrews
4 x 5mm Nylon Spacers
2 x 2.5mm Nylon Bolts
2 x 2.5mm Nylon Half Nuts
You will also need a ModMyPi Raspberry Pi Case, which consists of:
1 x ModMyPi Raspberry Pi Case
2 x 2.5mm Metal Screws
2 x 2.5mm Metal Half Nuts
4 x Rubber Feet. (Unrequired)

Step 2
Grab the following:
1 x ModMyPi VESA Star
1 x Bottom Half of the ModMyPi Raspberry Pi Case
2 x 2.5mm Nylon Bolts
2 x 2.5mm Nylon Half Nuts
2 x 2.5mm Metal Half Nuts

Put the 2 Nylon Bolts through the 75mm VESA holes on the bottom part of the case, and place the metal nuts in their respective alcoves, as below.

Then place the VESA star over the Nylon bolts and use the Nylon nuts to secure it!

Then flip the Raspberry Pi over, and use the 2 x metal screws to secure it to the bottom plate.

Step 3
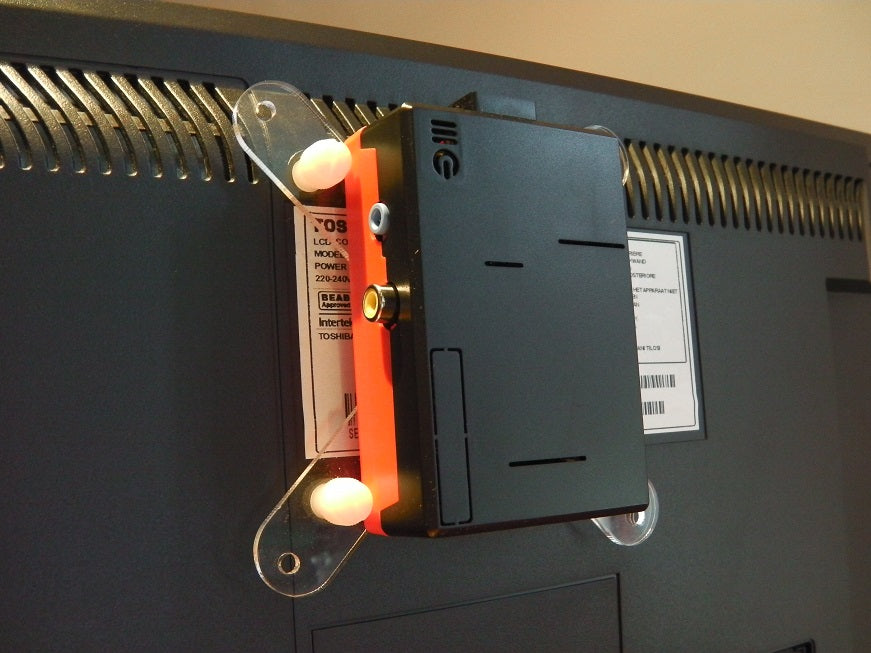
The image blow shows how the Thumbscrews and Spacers are used to connect the VESA plate to a TV or Monitor.

Simply feed the thumscrews through the plate, then place the spacers on those thumbscrews. Then mount the whole lot on the back of the screen! Easy :)

You can then clip the top half of the case on! Finished!


