

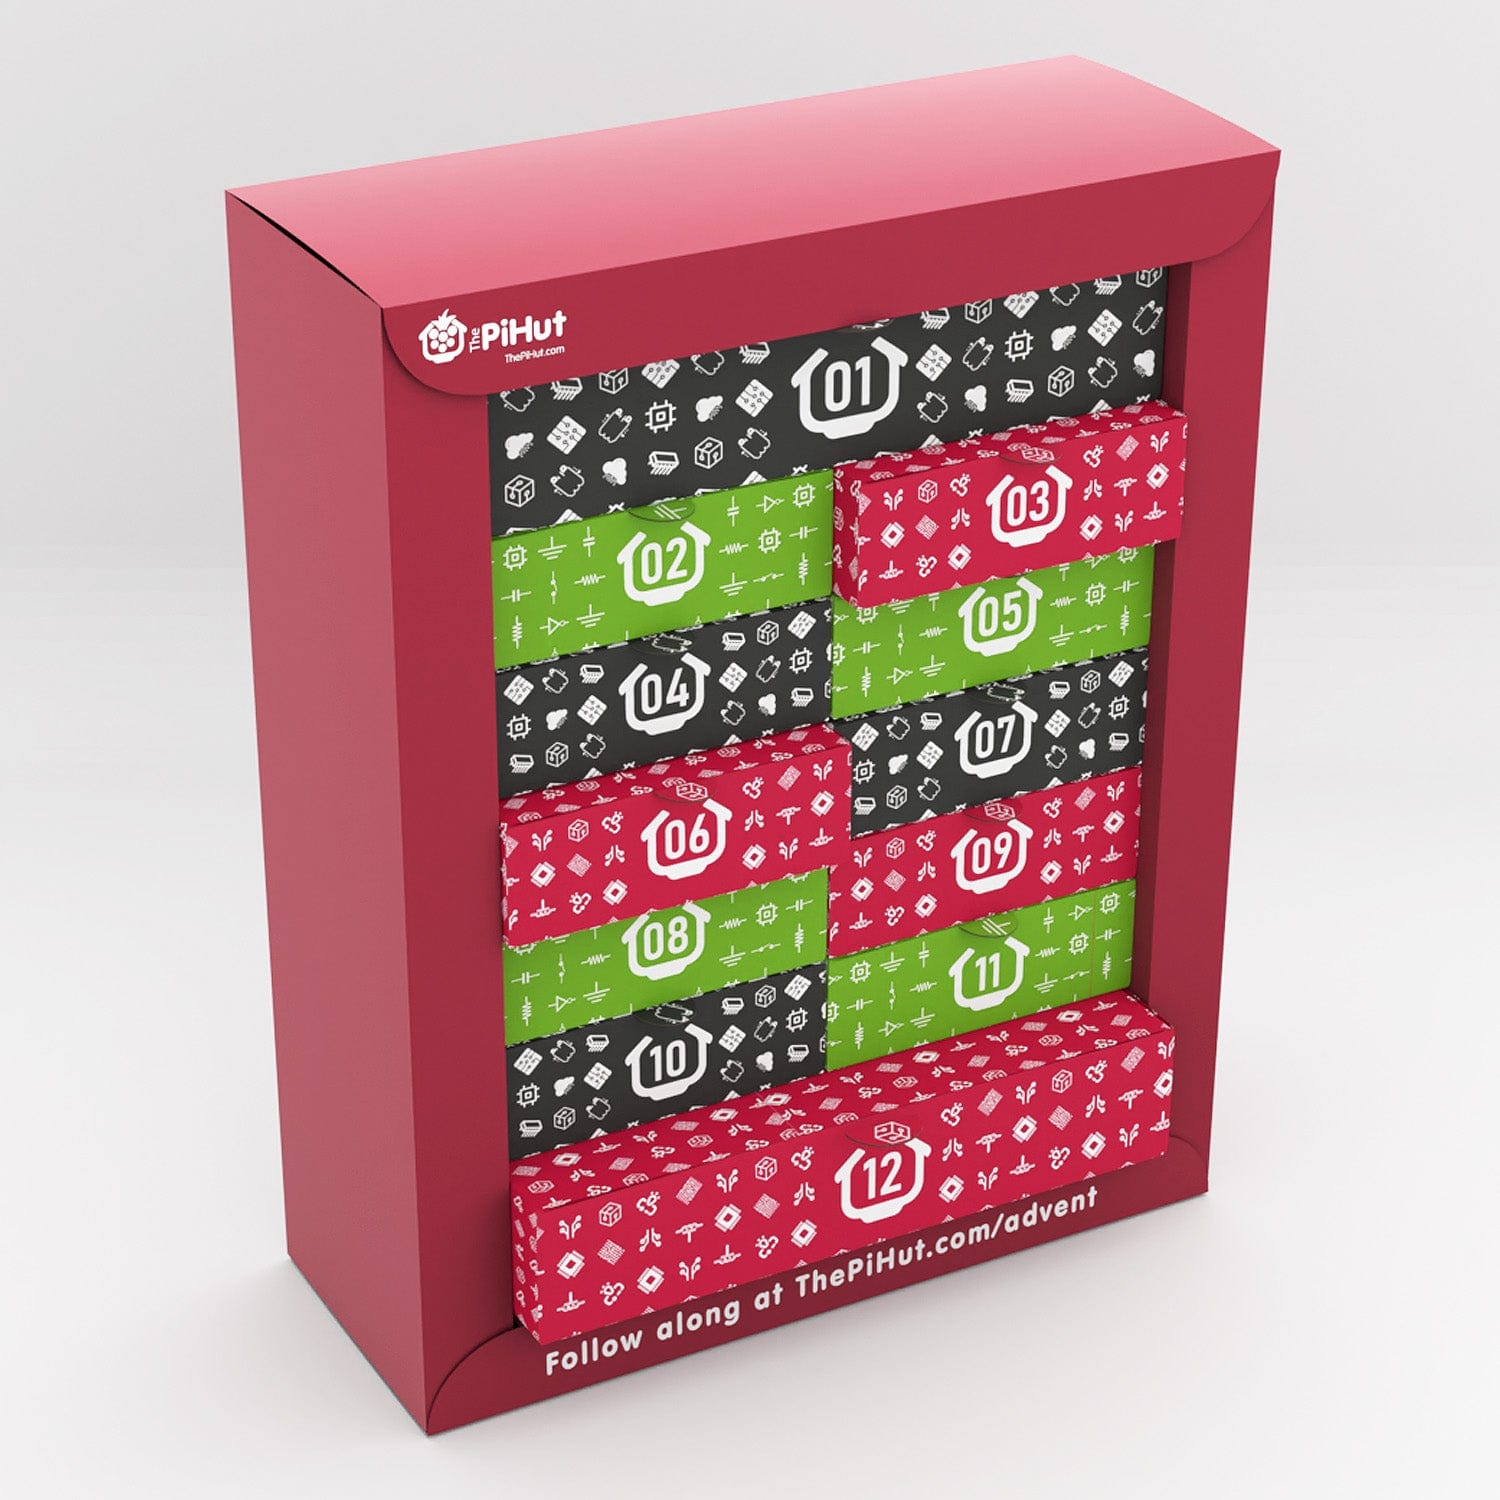
Maker Advent Calendar Day #1: Getting Started!
Welcome to the first day of your 12 Projects of Codemas Advent Calendar. Excited? We are too!
This twelve-day advent calendar will teach you how to code with MicroPython using a Raspberry Pi Pico, using software along with a selection of fun, popular components along the way. We’re going to use code to make hardware interact with the real world!
Each day we’ll show you how to use the fun things you find in each box, explaining what they are, what they do, how to construct the circuit and then how to code them with MicroPython using simple methods.
The best bit – once you’ve completed the 12 projects of Codemas, you’ll have a Raspberry Pi Pico along with a great stash of components, with the knowledge and confidence to make your own projects with them!
Day #1: Getting Started
You’ll have already noticed that the first box is larger than most of the others. This is to give you everything you need to build the foundations for the fun projects you’ll be making over the next 12 days.
Box #1 Contents
In this box you will find:
- 1x Raspberry Pi Pico H (with headers pre-soldered)
- 1x 1m Micro-USB cable
- 1x 400-point solderless breadboard

Today’s Project
Today we’re going to get you set up and familiar with the Raspberry Pi Pico, including installing the software required to program the board as well a running a couple of very easy projects to get to grips with MicroPython.
Introducing the Raspberry Pi Pico
The Raspberry Pi Pico is a powerful, flexible microcontroller board from, you guessed it, Raspberry Pi - the same folks who brought us the Raspberry Pi 5 and Raspberry Pi Zero.
The Raspberry Pi Pico is a different kind of Raspberry Pi, though - it's a microcontroller board, not a microcomputer. The brain of the Pico is the RP2040 microcontroller chip, the little black square in the middle.
Whereas you might use a Raspberry Pi 4 (which has an operating system) to play games, write stories and browse the web, the Raspberry Pi Pico is designed for physical computing projects where it can control components such as LEDs, buttons, sensors, motors and even other microcontrollers.
The board has lots of pins around it called GPIO (General Purpose Input Output) pins, which allow you to connect all sorts of components to make projects. These are controlled by code that you write. A map of the Pico's pins is available here - don't worry too much about the different pins and labels just yet, we'll be covering this over the next twelve days.
The Pico can use many different programming languages; however, the most popular is MicroPython, which is what we'll be using over the next 12 days.
The board has a Micro-USB port, which gives it power and allows it to communicate with our computer for programming. There's a lot more to this little board, but we'll keep to the basics for now.

Software Setup
We’re going to install software called Thonny, which will allow us to program the Pico with MicroPython.
MicroPython is a smaller, more efficient version of the Python 3 programming language, designed to be used with microcontroller boards such as the Raspberry Pi Pico. If you've programmed with Python previously, MicroPython will feel very familiar - but don't worry - we're going to guide you every step of the way over the next 12 days.
Thonny is a Python IDE. An IDE is an Integrated Development Environment. IDEs help us to write code by giving us lots of helpful features to avoid errors, make our code more readable and provide lots of other benefits.
So, let's get Thonny! Head over to https://thonny.org/ and look for this little box:

If you hover over the system you’re using (we’re using Windows in this example), you should see some options, with a recommended option based on the system you’re using. For us, using a 64-bit version of Windows, it’s recommending the 64-bit version (the version number may be different; this is fine). Your system may be different, so it’s best to just go with the version the website recommends:

Download the correct version for your computer, then open the file to start the installation.
Thonny installs like most programs, and will ask you to accept the license agreement and confirm where to install it. We kept all the options as default, and it took just under a minute to install.
Once installed, select ‘Finish’ and then open the program. In Windows 10/11 you can select the Windows Start button and just type in ‘Thonny’. The program should open and look like the example below:

Install MicroPython on the Raspberry Pi Pico
We now need to install the MicroPython firmware on the Raspberry Pi Pico. This gives the Pico the basic software it needs to run MicroPython code that we'll send to it later.
Important Note: A handful of customers are experiencing an issue when using the method we have suggested below (SSL errors and other unfestive nasties). Give it a try, but if you have trouble installing MicroPython on your Pico, try the other method here instead. Thanks to everyone who let us know about this issue.
Plug the Pico into the breadboard (the end where the number 1 is), then plug the Micro-USB cable into the Pico. Your Pico should be fully inserted so that you can't see any of the metal legs/pins. The black plastic on the underside of the Pico should sit flush with the top of the Breadboard. Apply strong pressure evenly at both ends:

Now locate the little button on top of your Pico. This is the ‘BOOTSEL’ button, which, when held in whilst connecting the cable, allows us to install different firmware to the Pico.

Hold down that button whilst plugging in the USB cable into your computer’s USB port at the same time. You may see it pop up as a new device on your computer, but just ignore that for now.
In Thonny, at the bottom-right-hand corner, you’ll see something like 'MicroPython (Raspberry Pi Pico)' and a COM port, like the example below (this may vary, but it doesn’t matter at this stage). Click on this and you’ll see a few options. Select ‘Install MicroPython…’

You’ll now be presented with some options in a new dialogue box. Use the same options as per the screenshot below, selecting the RPI-RP2 target volume, RP2 MicroPython family, Raspberry Pi Pico / Pico H variant, and whatever the latest version is available (at the time of writing, it was 1.26.1):

Select ‘Install’ and you’ll see a small progress bar whilst it installs. Once complete, select ‘Close’.
Setting up Thonny
Thonny can be used with a range of development boards, so we need to tell Thonny that we are using a Raspberry Pi Pico.
From the top menu, select ‘Run’ then ‘Configure interpreter’:

Now just make sure that ‘MicroPython (Raspberry Pi Pico)' is selected in the first drop-down box, select the available device in the ‘Port’ drop-down, then select ‘OK’.
Tip: If you see multiple options in the Port drop-down box, it just means you have other devices connected to your computer. If you’re not sure which one is the Pico, make a note of what COM ports are showing, disconnect the Pico from the USB port, close the Thonny options box, then try again. Whichever one is now missing was the Pico, so connect it again and select that device next time (it’s a lot easier than disconnecting everything else!). As of September 2025, our Pico shows as Board CDC @ COM9 (but that last number will be different for everyone).
You should now see a ‘Raspberry Pi Pico’ panel on the left side of Thonny, and information in the bottom-right 'Shell' panel.
Tip: If you don't see your Pico on the left, try selecting 'View' from the top navigation bar and selecting 'Files'.

That’s the setup out of the way, we’re ready to code!
Activity 1: Your First Program - Print
Let’s make a very simple program and run it on your Pico.
We’ll tell the Pico to ‘print’ some words (known as a 'string' of text). These words/strings are then 'printed' to the Shell window. The print function is something you’ll use a LOT when programming. It’s a useful tool to see what’s happening with a program, what part of a program is running and can help when debugging projects.
In the top panel (which should be called <untitled> at the moment as we haven't saved it yet), copy/paste or enter the following line and then select the green run icon (it looks like a ‘Play’ button) from the menu.
print("This is my Pico talking")
You should now see the following in the Shell window:

You did it! Your first program!
A few things to note:
- Print text strings always sit within inverted commas, within brackets
- Letter case is very important with MicroPython and other code languages. Our print is always 'print' and never 'Print'.
Now try changing the text in between the inverted commas - you can write anything you want…“This calendar is going to be awesome” or “I don’t like pineapple on pizza”…or even the famous "Hello, World!".
You can even add multiple print lines one after the other - give it a try!

Activity 2: Light the Onboard LED
We now know where to write code in Thonny and how to run a program. We'll be doing a lot more of that over the coming days, so for now let's jump straight into a bit of blinky!
The Pico comes with a little LED onboard, which is attached to one of the Pico’s RP2040 pins, GPIO25. This pin isn't one of the physical pins available around the edge of the board.
We can tell our program to turn this pin on and off whenever we like, which is a nice, easy first hardware project and can be handy as an indicator for your own projects later on. This is the beginning of getting your code to control physical things!

Inputs and outputs
Our GPIO pins (the green ones from the pin map) can be set as inputs or outputs. We use inputs when we want something to send signals/voltage into the Pico, like a button or a sensor, and we use outputs when we want the Pico to send signals/voltage out to something else, like LEDs or buzzers.
We’re going to use an output here, which will send voltage to the onboard LED to light it up.
Imports
Take a glance at the first line of the example code below. When we write code in Thonny, a lot of the time we need to add imports at the start.
Imports bring in code from other places (called 'modules' or 'classes' - but let's not get bogged down with that for now) that we need to make our program work. Usually, these are from built-in modules.
To use the GPIO pins, we always need to import Pin.
The Code
Take another look at the example below. So, what is it doing?
- The first line imports ‘Pin’ from the 'machine' module on the first line, which simply allows us to use the GPIO pins.
- The second line is setting up one of the pins to allow us to use it in our code. This sets up GPIO25 with the name ‘onboardLED’. We use Pin.OUT at the end there to tell MicroPython to set this pin as an output.
- The third line then finally sets that pin value to ‘1’, which is HIGH (on). 1 is always used for HIGH (on) and 0 is used for LOW (off).
from machine import Pin
onboardLED = Pin(25, Pin.OUT)
onboardLED.value(1)
Copy that code to your top-right panel, then hit the run button. The LED should light up – hooray – you’ve controlled your first physical component!
Now try changing the 1 to a 0 - run the code again and it should turn the LED off. You can also try adding a print line at the bottom to show a message at the same time.
Day #1 Complete!
Well done, fellow maker, today you have:
- Become an owner of your very own microcontroller!
- Learnt about the Raspberry Pi Pico
- Set up your Raspberry Pi Pico with Thonny
- Created your first program
- Learnt about the print function
- Controlled a physical component with code
Now, get some rest and a good night’s sleep, for tomorrow we will continue the fun with day #2 (no spoilers here, and no peeking until the morning!).
We used Fritzing to create the breadboard wiring diagram images for this page.

74 comments
The Pi Hut
@Kristian Oh no, sorry about that. Looks like the packing team mixed up the LEDs in your kit. Please drop us a quick message via support.thepihut.com and Billie will have a replacement pack sent out to you ASAP. You can still use the LEDs you have for the upcoming days and activities until the new ones arrive.
@Kristian Oh no, sorry about that. Looks like the packing team mixed up the LEDs in your kit. Please drop us a quick message via support.thepihut.com and Billie will have a replacement pack sent out to you ASAP. You can still use the LEDs you have for the upcoming days and activities until the new ones arrive.
The Pi Hut
@Keith Glad your first day ran smoothly :) The final screenshot may look slightly different depending on the computer (operating system) you’re using – you may need to select ‘view > files’ to see the same panels.
@Keith Glad your first day ran smoothly :) The final screenshot may look slightly different depending on the computer (operating system) you’re using – you may need to select ‘view > files’ to see the same panels.
Keith
Thanks – this worked flawlessly for me and only took about ten minutes. The only comment I would make is that the screen capture at the end of the Software Setup section is not correct.
Looking forward to day two!
Thanks – this worked flawlessly for me and only took about ten minutes. The only comment I would make is that the screen capture at the end of the Software Setup section is not correct.
Looking forward to day two!
Kristian
It seems you sent me 2 green LEDs and 1 red LED or have I messed something up in the process of building the circuit? I haven’t changed the code on activity one and when they light up there is no amber light.
It seems you sent me 2 green LEDs and 1 red LED or have I messed something up in the process of building the circuit? I haven’t changed the code on activity one and when they light up there is no amber light.
giles
Love the advent calendar. Thanks for nice instructions for the initial day!
Someone gave me the idea of Saying “Happy Christmas” in Morse Code. Here is some (rather over engineered) Micro Python to do just that!! :-)
https://github.com/gilesknap/pico-xmas
Love the advent calendar. Thanks for nice instructions for the initial day!
Someone gave me the idea of Saying “Happy Christmas” in Morse Code. Here is some (rather over engineered) Micro Python to do just that!! :-)
https://github.com/gilesknap/pico-xmas
Bob
I’m pleased others have set off before me, they can hammer out the bugs, because my old brain isn’t ready for that just yet 😂
I’m pleased others have set off before me, they can hammer out the bugs, because my old brain isn’t ready for that just yet 😂
Mike G
- Jim P
Hopefully you sorted your “SSL Certificate expired” error.
I also get this yesterday, following the instructions. Didn’t find a solution to that error – so I just downloaded the .uf2 file and installed it manually. (You can find instructions here https://micropython.org/download/rp2-pico/)
- Jim P
Hopefully you sorted your “SSL Certificate expired” error.
I also get this yesterday, following the instructions. Didn’t find a solution to that error – so I just downloaded the .uf2 file and installed it manually. (You can find instructions here https://micropython.org/download/rp2-pico/)
Richard Goodhand
Hi all, I struggled for over an hour to get the Pico talking to Thonny. It ended up being that I’m using Windows 8.1 and a driver needed to be installed for them to communicate over the USB. If you are finding a similar issue check Device Manager in Control Panel. Zadig was the answer to my prayers. https://github.com/raspberrypi/pico-feedback/issues/118
I hope that helps others.
Jim Patience
@The Pi Hut
All sorted now. Figured out to download the uf2 file and drop it on to the “disk” of the Pico. Hey presto! Loving this little course on the basics and looking forward to a lot more.
Have used the Raspberry Pi for years but never the Pico before so this is fresh new territory for me, so even though this was a gift to myself, thank you!
Shaun
I made the light on the board come on. Then I did a google and found some code to make the light flash. I haven’t had such a stupid grin for years and the kids have no idea what’s wrong with me. Thank you Pie Hut!
I made the light on the board come on. Then I did a google and found some code to make the light flash. I haven’t had such a stupid grin for years and the kids have no idea what’s wrong with me. Thank you Pie Hut!
The Pi Hut
Thanks to everyone who let us know about the odd SSL errors when installing MicroPython, it seems to only be impacting a handful of customers (and we can’t seem to re-create it) but it’s a hiccup all the same! We have updated the page to point to the alternative method for installing MicroPython. Love this community! See you all tomorrow for day #2 :D
Thanks to everyone who let us know about the odd SSL errors when installing MicroPython, it seems to only be impacting a handful of customers (and we can’t seem to re-create it) but it’s a hiccup all the same! We have updated the page to point to the alternative method for installing MicroPython. Love this community! See you all tomorrow for day #2 :D
Korhm
I used to do some MicroPython, but you made me discover ThonnyIDE. It’s easier with this IDE :) Thank you !
Is there a Raspberry Pi Pico WH planned ? I’m no bad on soldering, espacialy this tiny PINs…
I used to do some MicroPython, but you made me discover ThonnyIDE. It’s easier with this IDE :) Thank you !
Is there a Raspberry Pi Pico WH planned ? I’m no bad on soldering, espacialy this tiny PINs…
Joe
Hi all,
If others are having issues with installing Micropython like we where this evening, SSL Error.
You can get around this by visiting the micropython site: https://micropython.org/download/rp2-pico/ and downloading the .uf2 file in the firmware section and following the install instructions.
Basically, just drop the file in to the usb drive that shows up when you plug the pico in, this will install and then restart the pico
Thonny should then work fine and you can follow the steps above
Mel
Couldn’t get Thonny to recognise the pico at first, so I used the UF2 method instead: https://www.raspberrypi.com/documentation/microcontrollers/micropython.html , skipped the ‘Install Micropython’ step, and all worked fine after that. Just in case anyone else has issues. (This was on Windows 11)
Couldn’t get Thonny to recognise the pico at first, so I used the UF2 method instead: https://www.raspberrypi.com/documentation/microcontrollers/micropython.html , skipped the ‘Install Micropython’ step, and all worked fine after that. Just in case anyone else has issues. (This was on Windows 11)
David Ian Bartlett
I had a frustrating afternoon! Fell down a hole somewhere between installing the ide and downloading the firmware to the pico. Could not find the com port which eventually materialised! All good now Thanks.
I had a frustrating afternoon! Fell down a hole somewhere between installing the ide and downloading the firmware to the pico. Could not find the com port which eventually materialised! All good now Thanks.
mistie710
Finished today’s stuff although Thonny didn’t quite look the way I though it would (“You should now see a ‘Raspberry Pi Pico’ panel on the left-side of Thonny, and information in the bottom-right ‘Shell’ panel.” Well I had the bottom shell display but the rest appeared to be missing). Looking forward to the rest of it!
Finished today’s stuff although Thonny didn’t quite look the way I though it would (“You should now see a ‘Raspberry Pi Pico’ panel on the left-side of Thonny, and information in the bottom-right ‘Shell’ panel.” Well I had the bottom shell display but the rest appeared to be missing). Looking forward to the rest of it!
The Pi Hut
@Paul Watts – thanks for the tip, no doubt will help others :)
@Paul Watts – thanks for the tip, no doubt will help others :)
Paul Watts
Sorry, me again :)
Also note that the account that Thonny is running in needs to be a member of the ‘dialout’ group or you’ll get ‘permission denied’ errors. You could run Thonny as root, but ……….
Sorry, me again :)
Also note that the account that Thonny is running in needs to be a member of the ‘dialout’ group or you’ll get ‘permission denied’ errors. You could run Thonny as root, but ……….
Paul Watts
Just to note – if you are using Thonny on Linux, the first time you try to ‘run’ anything it will ask you to save the text file first. You can get around this by entering the ‘%Run ….’ command directly to the CLI, but to be honest its easier just to save the file.
Just to note – if you are using Thonny on Linux, the first time you try to ‘run’ anything it will ask you to save the text file first. You can get around this by entering the ‘%Run ….’ command directly to the CLI, but to be honest its easier just to save the file.
Misel
Thank you. Worked flawlessly and my sons and I created a little SOS blinking pattern :D
Thank you. Worked flawlessly and my sons and I created a little SOS blinking pattern :D
The Pi Hut
@Jim Hmm, it might have been a temporary blip (technical eh?!) with the MicroPython servers when you were trying to download. Can you try again? We’ve tested again here and everything is working as expected. Also just make sure everything is up to date on your PC (including date/time).
@Jim Hmm, it might have been a temporary blip (technical eh?!) with the MicroPython servers when you were trying to download. Can you try again? We’ve tested again here and everything is working as expected. Also just make sure everything is up to date on your PC (including date/time).
David
Yes Mike,
I started work with microcomputers almost before the home computer was thought of. I had to assemble and solder memory boards. I remember that they stored 256 bytes!
I then went to work in education and the (University) students were excited about being able to programme and use a computer.
When the IBM PC arrived everything changed. Students knew how to use “Applications” already, and learning to programme the machines took learning and practice. I had a student tell me "You know why we don’t like programming? It’s because we have to think.
Thanks to Eben and the team for encouraging us all to think.
Mike,
You mention Basic. Some of the hardest teaching we had to do in the early days was to re-educate students who had learned basic. The habits developed using basid were not conducive to writing reliable code.
What a perfect recipe. Pi, Linux and Python.
Cheers All
David
Jim P
Anyone else getting a “SSL Certificate expired” when trying to MicroPython? I’ve tried everything I think I can, but it just keeps giving me the error message. Also, I’ve noticed that it doesn’t seem to matter if I press the button on the Pico or not, Windows sees it just the same with the same 2 files in there.
Anyone else getting a “SSL Certificate expired” when trying to MicroPython? I’ve tried everything I think I can, but it just keeps giving me the error message. Also, I’ve noticed that it doesn’t seem to matter if I press the button on the Pico or not, Windows sees it just the same with the same 2 files in there.
Mike
What a fantastically well-written introductory article! Really clear steps and hitting just the right balance in tone between technical and friendly.
I can’t help but reflect on how far our industry has stepped backwards from the simple and approachable BASIC prompts of the 1980s to the IDEs and language complexities of more modern computing. We still have very far to go (back to) but I applaud The PiHut for initiatives such as this to make computing appeal again to our younger generation.
Looking forward to the forthcoming projects and hope my young teens feel the same way.