
How to use ModMyPi's PUD board
If you want to detect an "output" with your Raspberry Pi, like a button being pressed or a motion sensor detecting movement, we can configure our Raspberry Pi's GPIO pin as an "input". That input pin can be in three states (known as Tri-State logic); "high", when 3.3V is applied, "low", when the pin is connected to 0V, and "floating" when the state is undefined. Floating voltages are troublesome in electronics as the input can either read high or low depending on various fluctuations in electrical noise. The idea of using a pull-up or pull-down resistor in your circuit is to prevent floating values, these are values which aren’t fully high and neither fully low, they are floating somewhere in the middle.
Like a gate flapping open and closed in the wind, someone needs to lock the gate closed, or wedge it open. If you leave it flapping, it's likely to hit someone on their bottom on the way through! If the output of your sensor goes high, to 3v3, when it’s triggered but doesn’t get tied, or pulled-down, to ground when it’s not being triggered, you could end up with a floating value, causing false positives. Like our gate, the best way to avoid a floating input is to "tie" your input pin either high or low to create a default state. This is usually achieved through the use of a pull-up or pull-down resistor, either connecting our input pin via a resistor to the Pi's 3.3V to achieve a 3.3V high state, or the GND line to achieve 0V low state.
The PUD (Pull Up/Down) board from ModMyPi features a very simple set of resistors designed to save you the touble of wiring up your own pull-up or pull-down resistor circuit!
In this tutorial, we’ll show you a very basic way to use the PUD board. We are simply going to wire up two buttons. One will be connected to the 3v3 line, so when it’s pressed it will send 3v3 to our input pin. The other will be connected to ground, and when pressed send 0v to our input pin.
These buttons will go through our PUD board, the 3v3 button being pulled down, and our 0v button being pulled high.
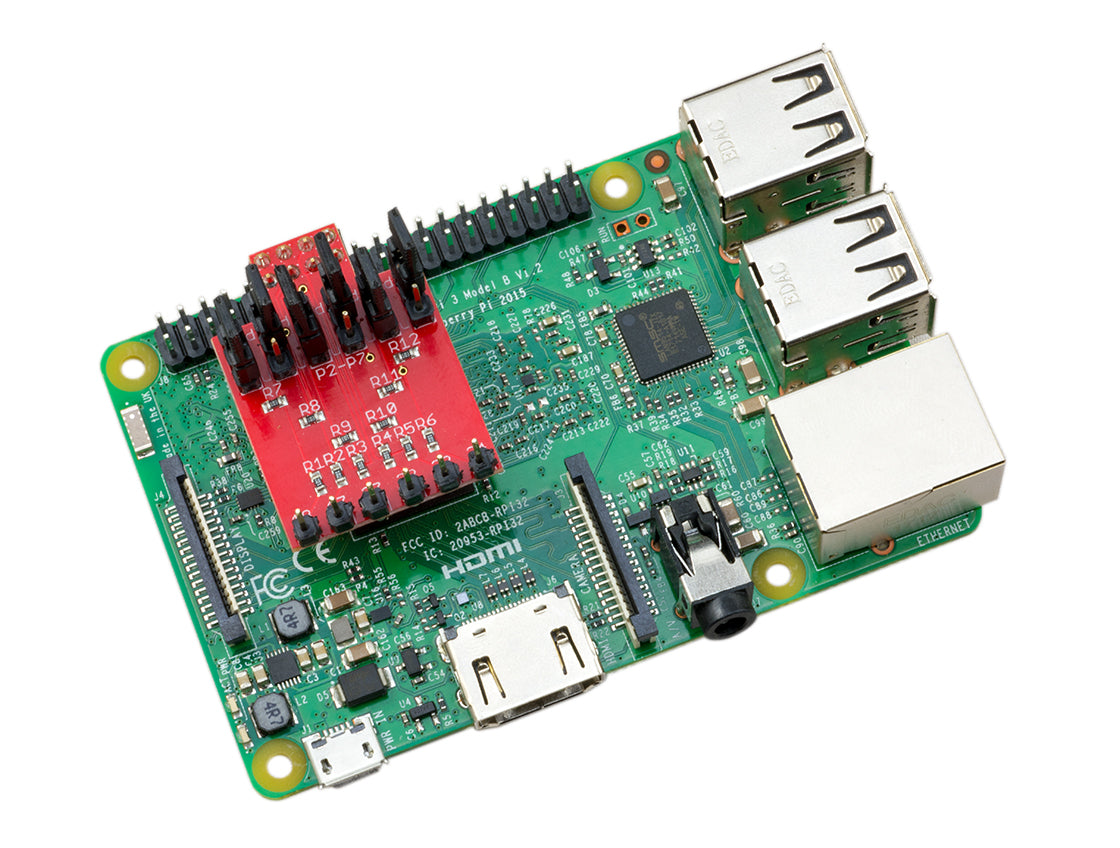
Start by plugging the PUD board onto the Raspberry Pi. Be mindful of position and orientation: the 8 pin connector should sit scross pins 11 to 18 (BCM 17 to 24), and the 6 input pins on the PUD should be facing "inwards" towards the HDMI and Micro USB ports on the Pi.
Then you’ll need to wire up your buttons on a breadboard and connect them to the PUD as illustrated below, as you can see, you can use the "U" pin for 3v3 and the "D" pins for ground:


The button connected to the 3v3 line should be connected to the pin labeled 18 on the PUD, this is GPIO18. The jumper directly above this pin should connect the middle pin to the top pin (labeled “d” on the PUD)
The button connected to the GND line should be connected to the pin labeled 17 on the PUD, this is GPIO17. The jumper directly above this pin should connect the middle pin to the bottom pin (labeled “u” on the PUD)
Once that’s all wired up, you can copy the code below, and execute it. The code will show the initial states of our inputs, which should be 1 for the button pulled up and 0 for the button pulled down. When a button is pressed these values should change. So the button connected to the 3v3 line should change to 1, and the button connected to the ground line should change to 0.
from RPi import GPIO

from time import sleep


GPIO.setmode(GPIO.BCM)


GPIO.setup(17, GPIO.IN)

GPIO.setup(18, GPIO.IN)


print "---- INITIAL INPUT STATE ----"

print "GPIO17 %d" % GPIO.input(17)

print "GPIO18 %d" % GPIO.input(18)

print "-----------------------------"


try:

	while True:

        if GPIO.input(17) == 1:

            print "Button pressed! GPIO17 %d" % GPIO.input(17)

        if GPIO.input(18) == 0:

            print "Button pressed! GPIO18 %d" % GPIO.input(18)

		sleep(0.2)

except:

	GPIO.cleanup()
That's it! Pulling-up or pulling-down there's no longer any need to frown!


