Analog 2-axis Thumb Joystick with Select Button + Breakout Board
Price:
Sale price
£5.70
Stock:
Quantity:
Login / Signup
Cart
Your cart is empty
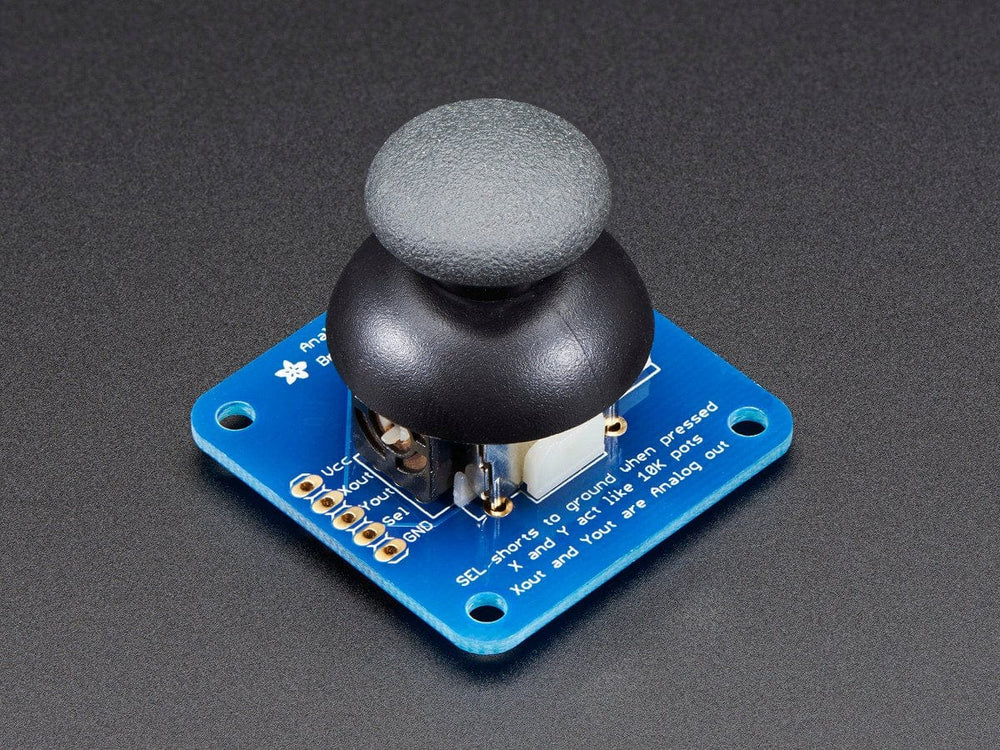

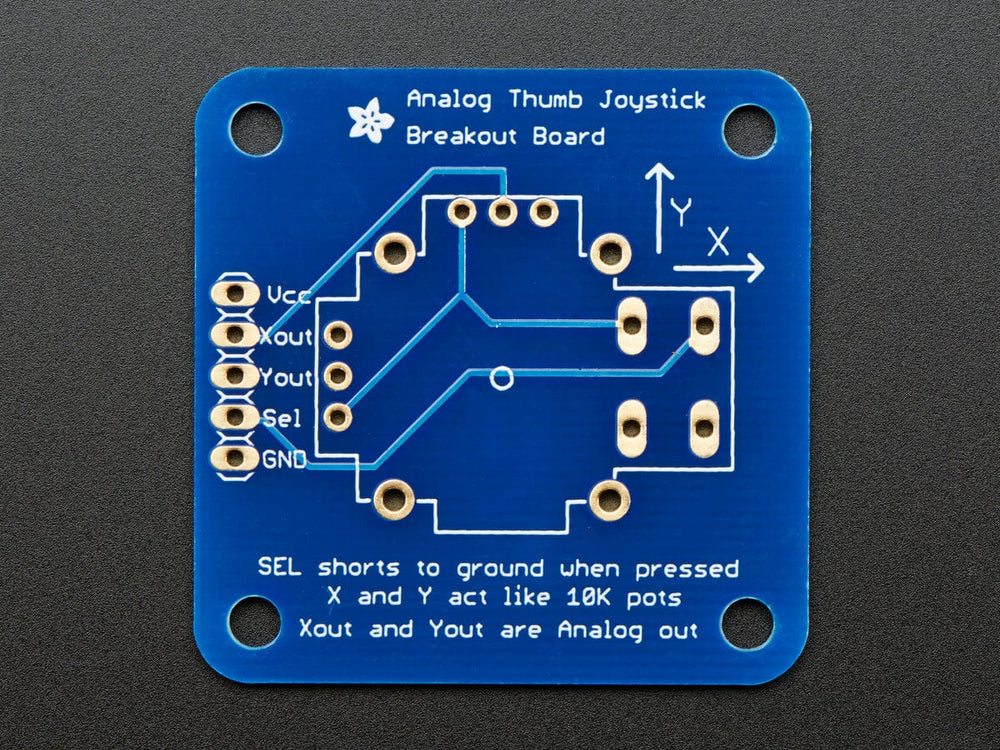

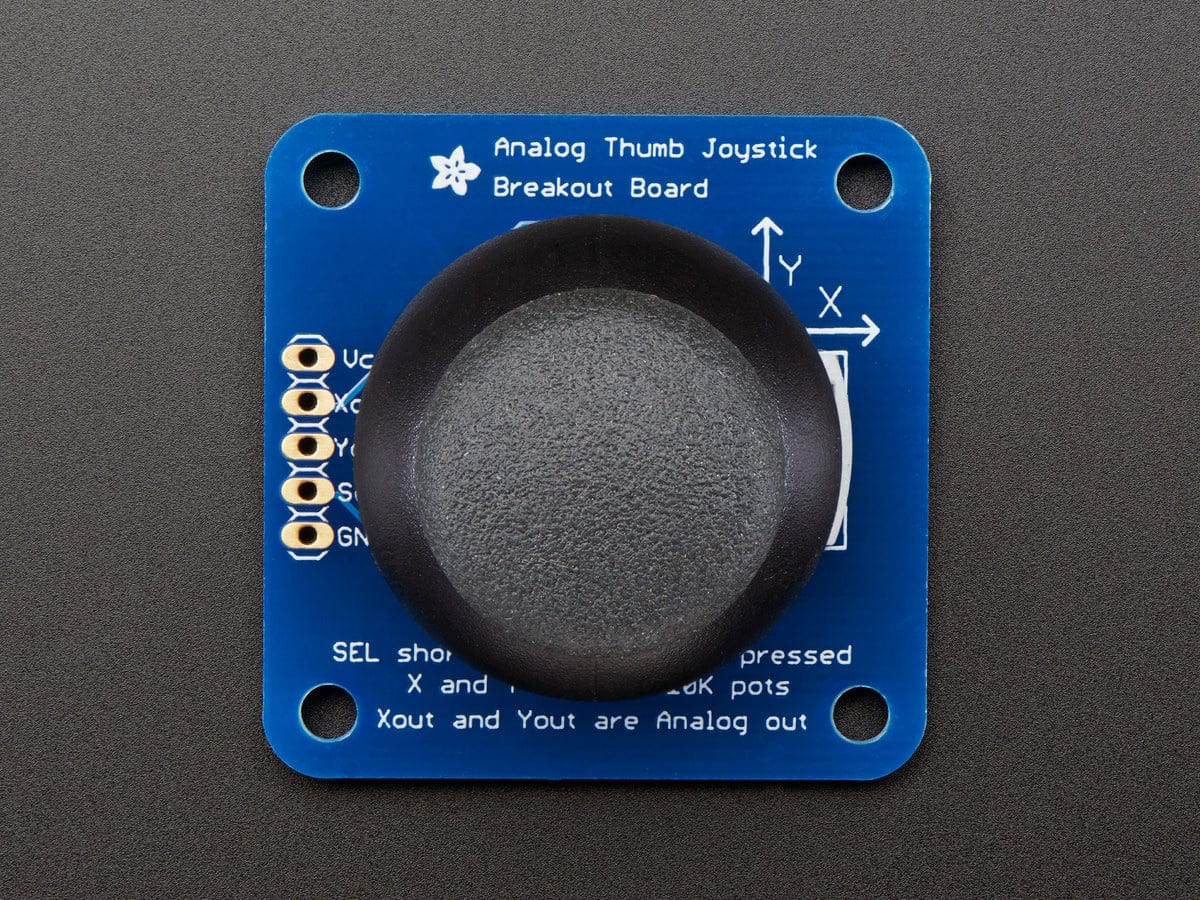
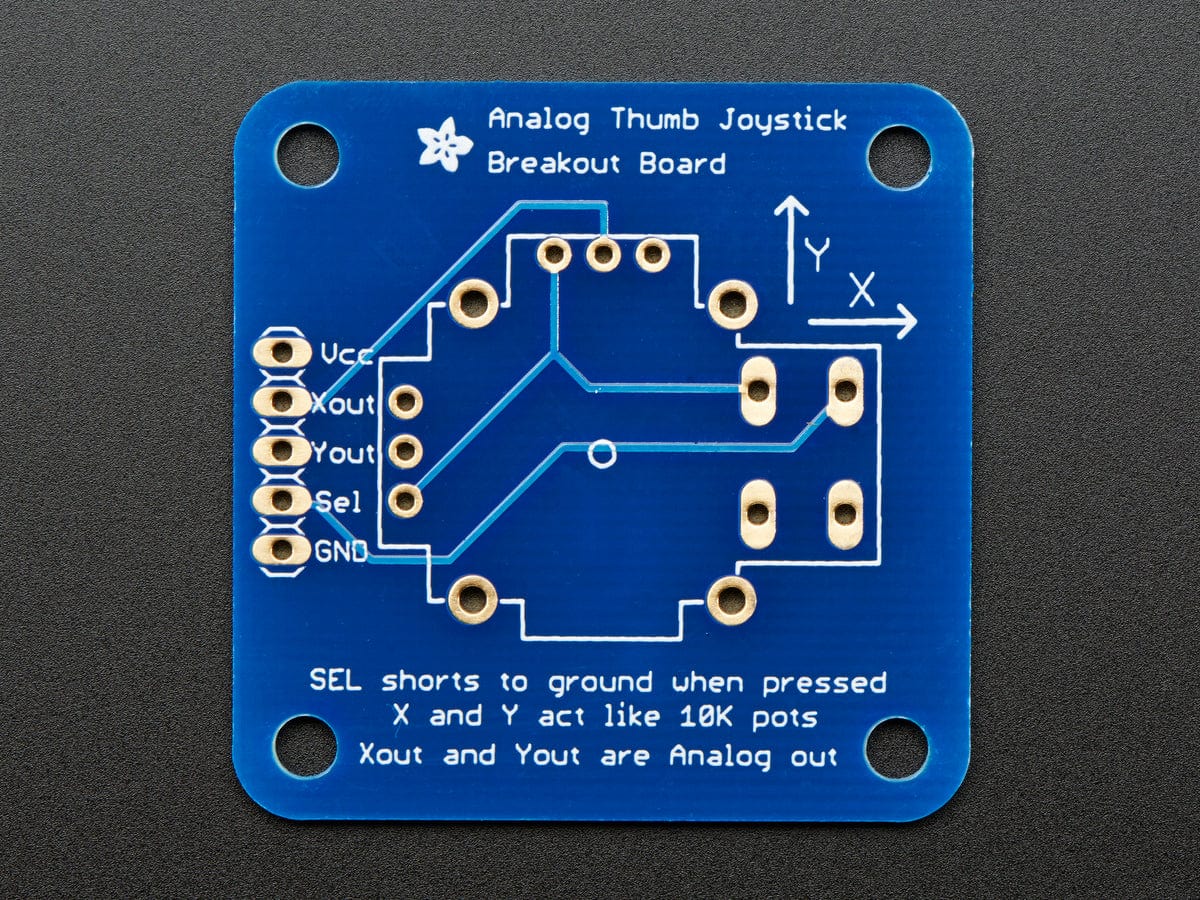
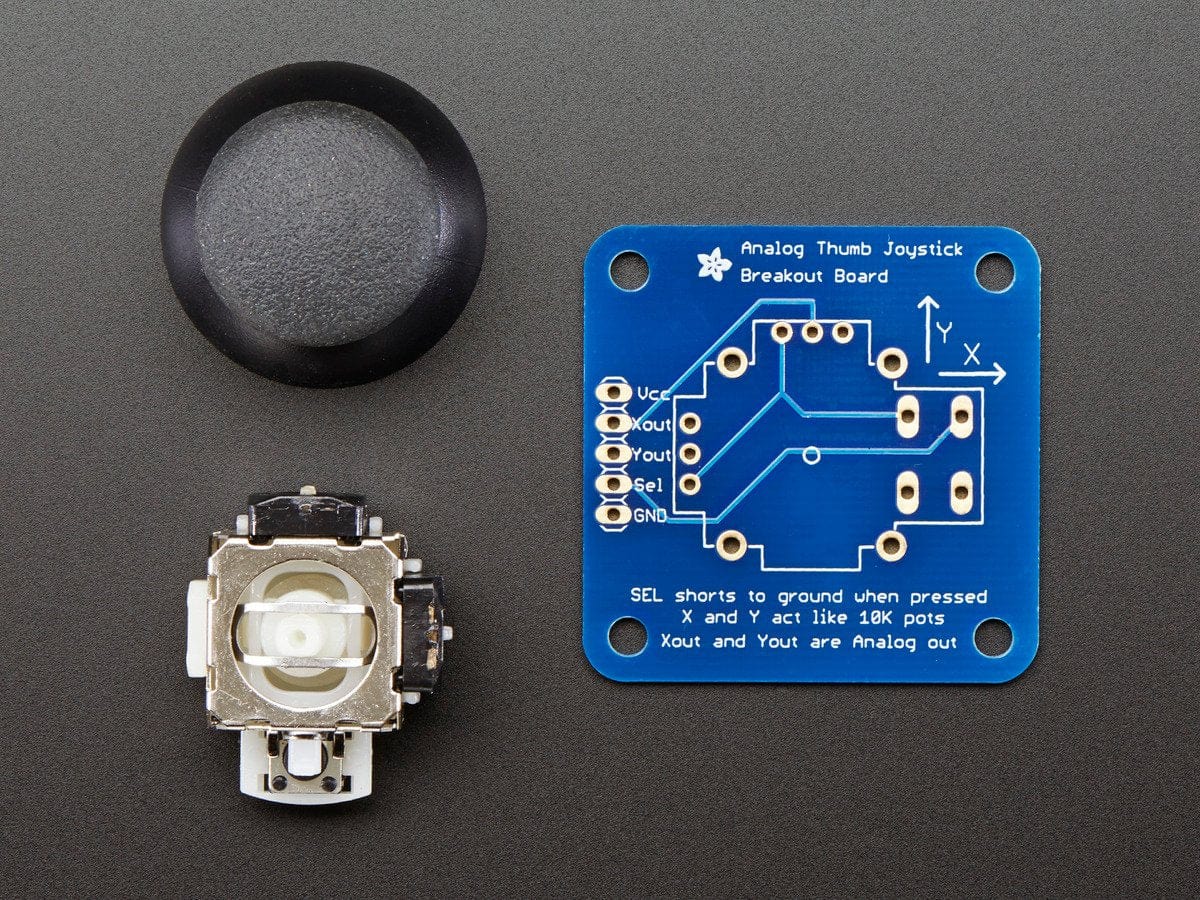
This mini-kit makes it easy to mount a PSP/Xbox-like thumb joystick to your project. The thumbstick is an analog joystick - more accurate and sensitive than just 'directional' joysticks - with a 'press in to select' button. Since it's analog, you'll need two analog reading pins on your microcontroller to determine X and Y. Having an extra digital input will let you read the switch.
The pack comes in three parts - the joystick itself, a soft-touch rubber 'hat' and a nicely designed breakout board. We designed the breakout so that you can attach the joystick to a panel easily - every other breakout we wanted to carry had the mounting holes so they were in the way of the joystick movement! A 5 pin 0.1" spaced header makes it easy to connect either in a perfboard/breadboard setting or free wiring. You'll need to solder the joystick into the PCB using a soldering iron and solder, but its very simple and will only take a minute.
Your payment information is processed securely. We do not store credit card details nor have access to your credit card information.