DINrPlate Universal - PCB DIN Rail Mount

Price:
Sale price £13
incl. VAT
excl. VAT
Stock:
Sold out
Notify me

Compatible with:

Awesome Extras

DINrPlateDINrPlate - Raspberry Pi Zero DIN Rail Mount
Sale price £10 incl. VAT excl. VAT
DINrPlateDINrPlate 2 - Raspberry Pi DIN Rail Mount
Sale price £12 incl. VAT excl. VAT
Raspberry PiRaspberry Pi 4 Model B
Sale priceFrom £35 incl. VAT excl. VAT

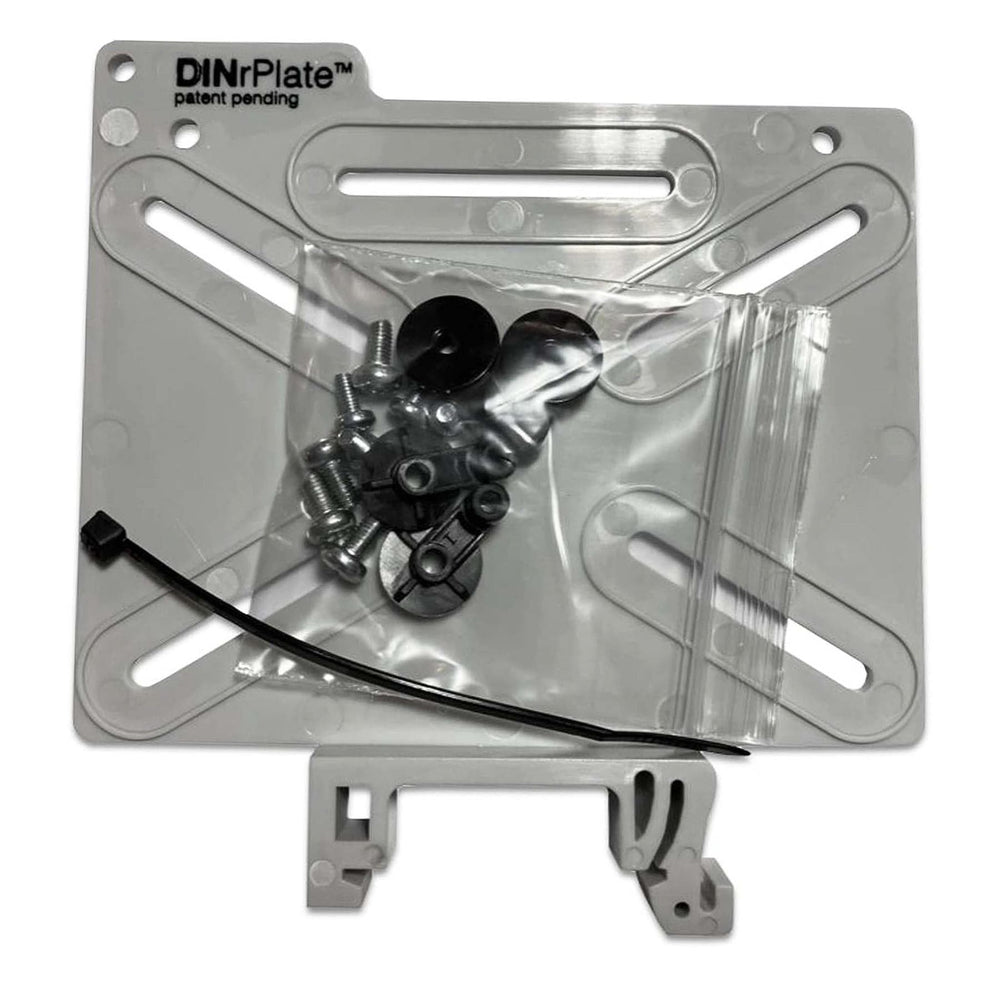
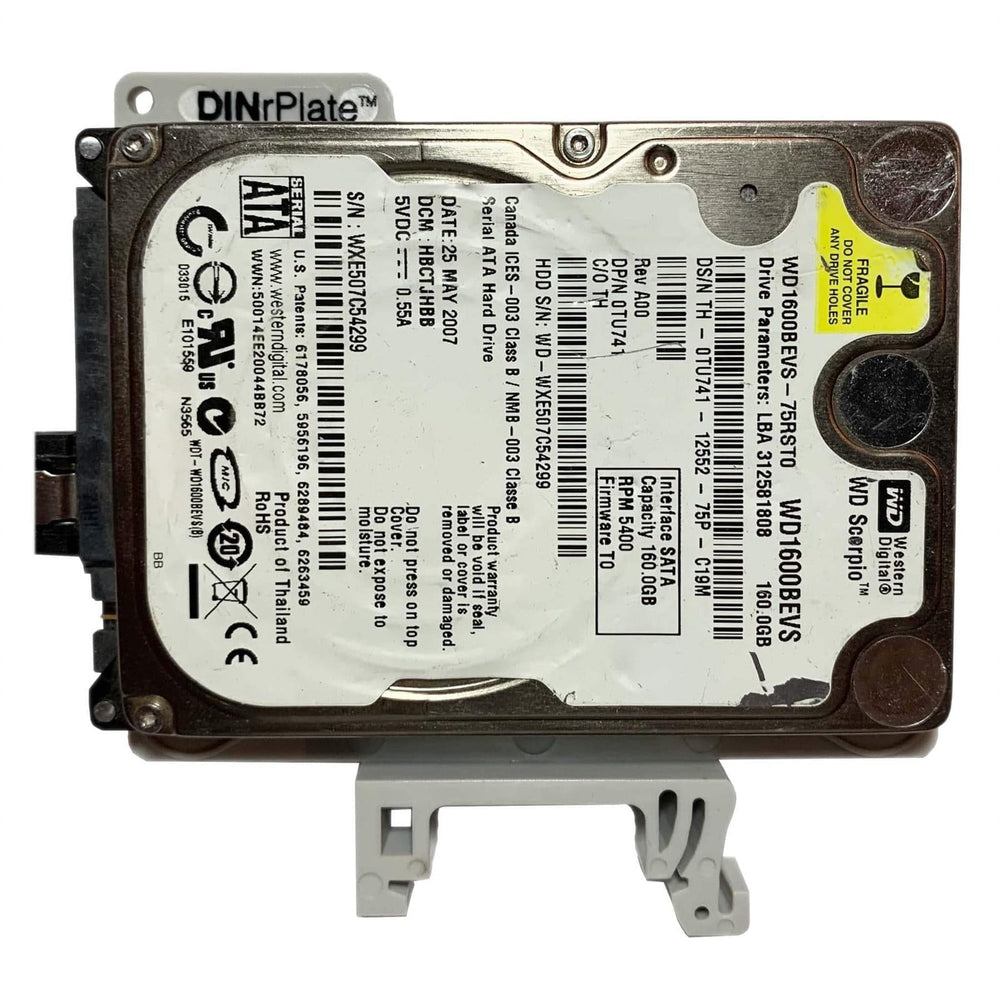
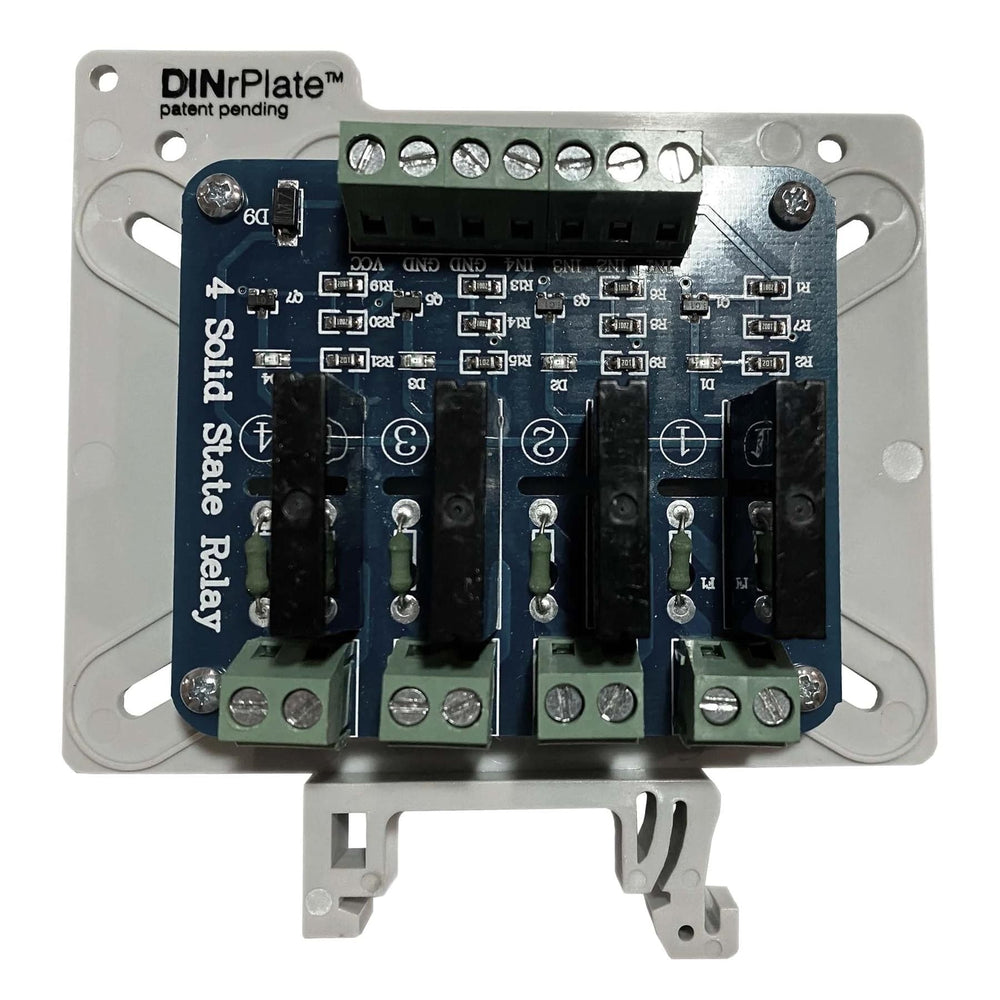
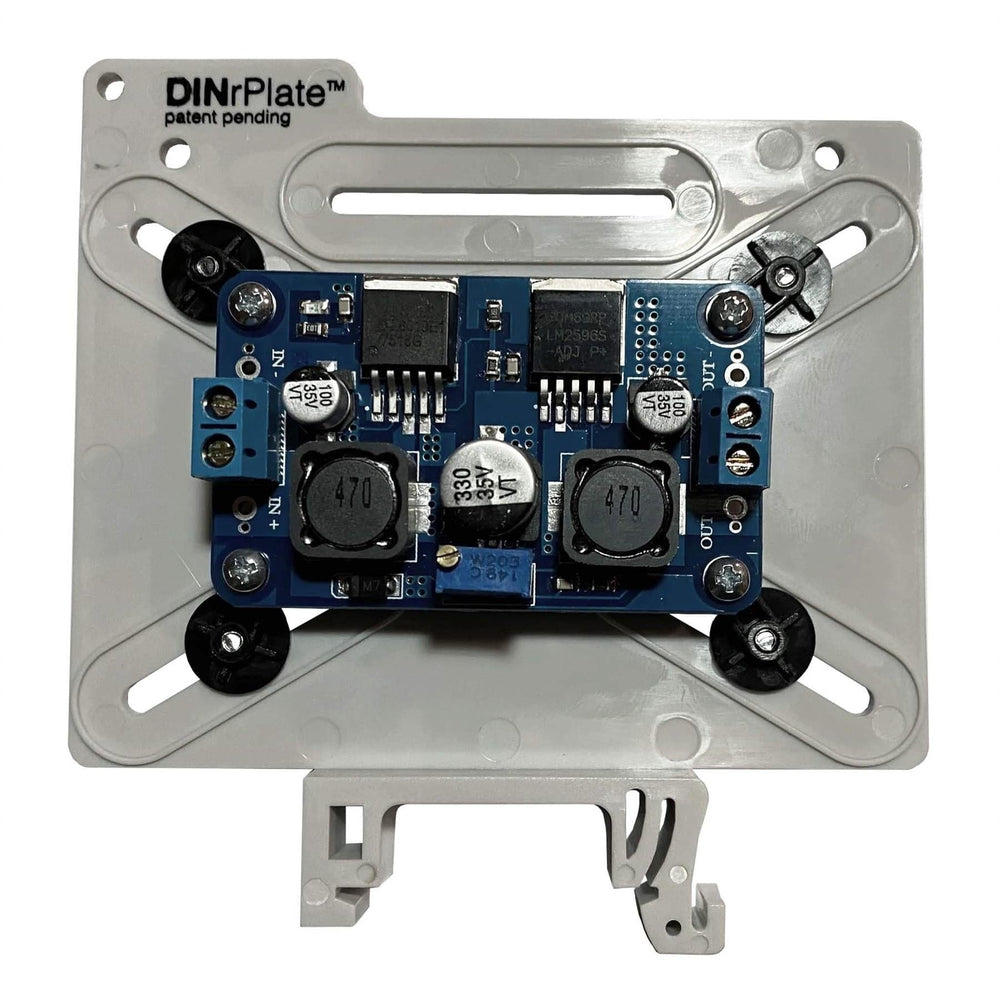
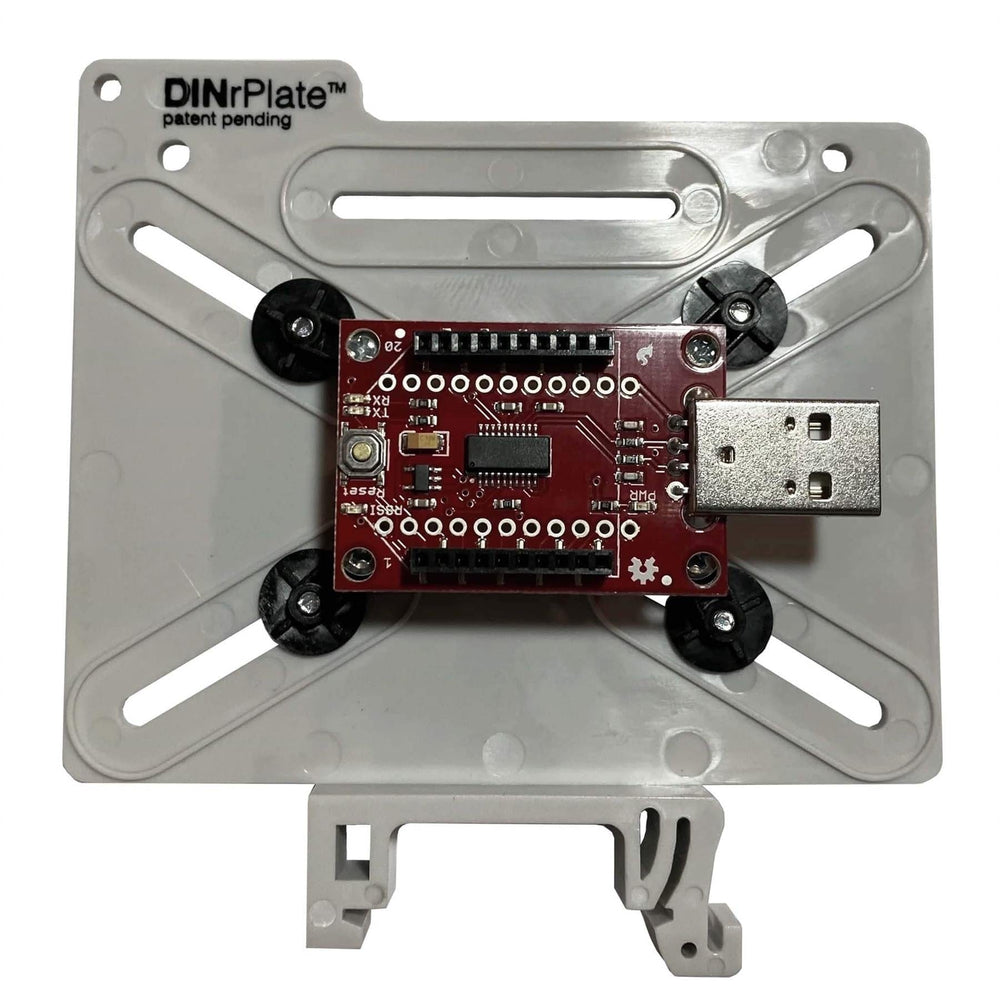
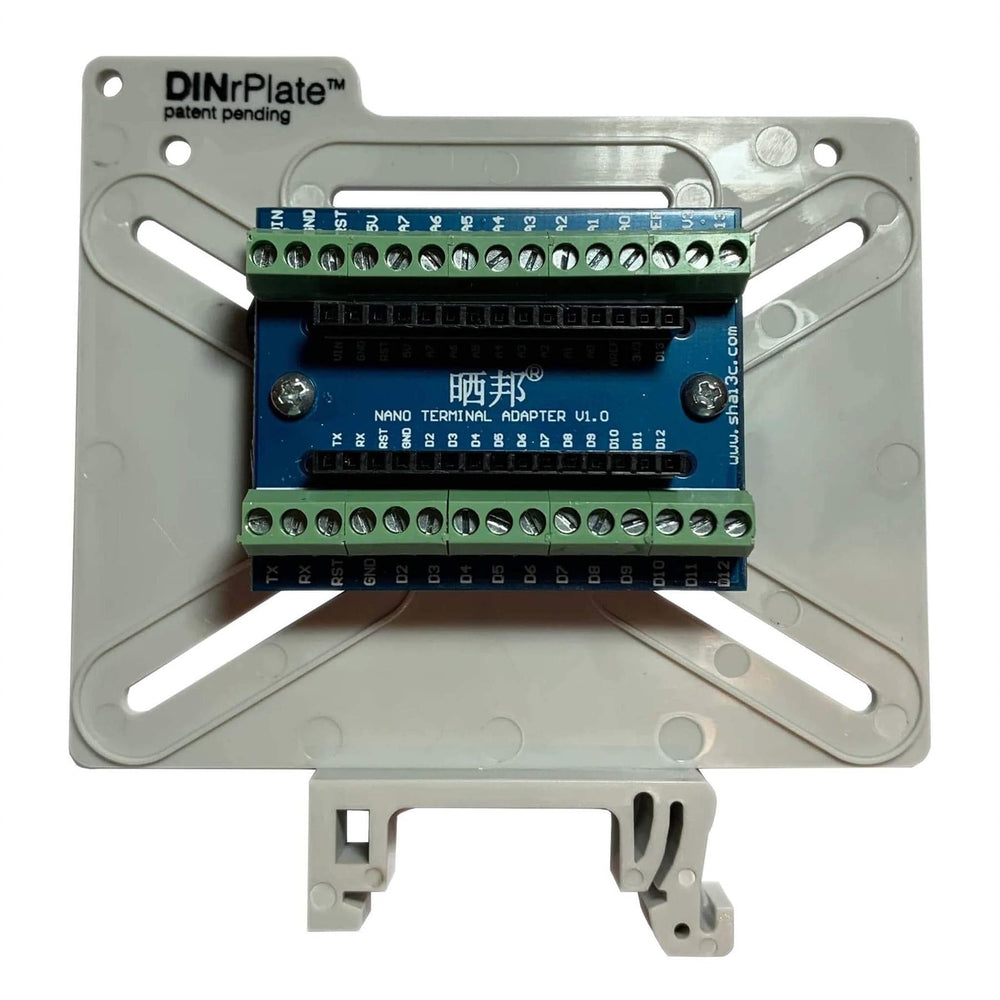
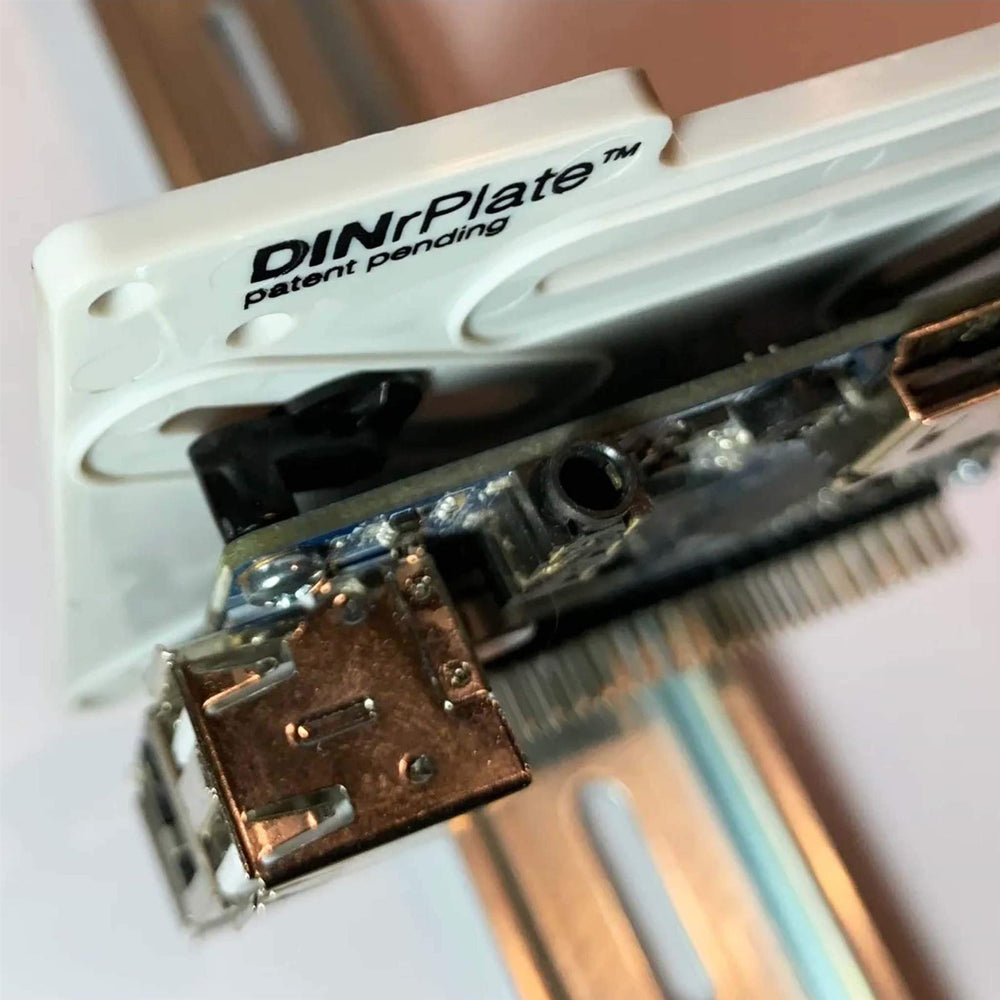
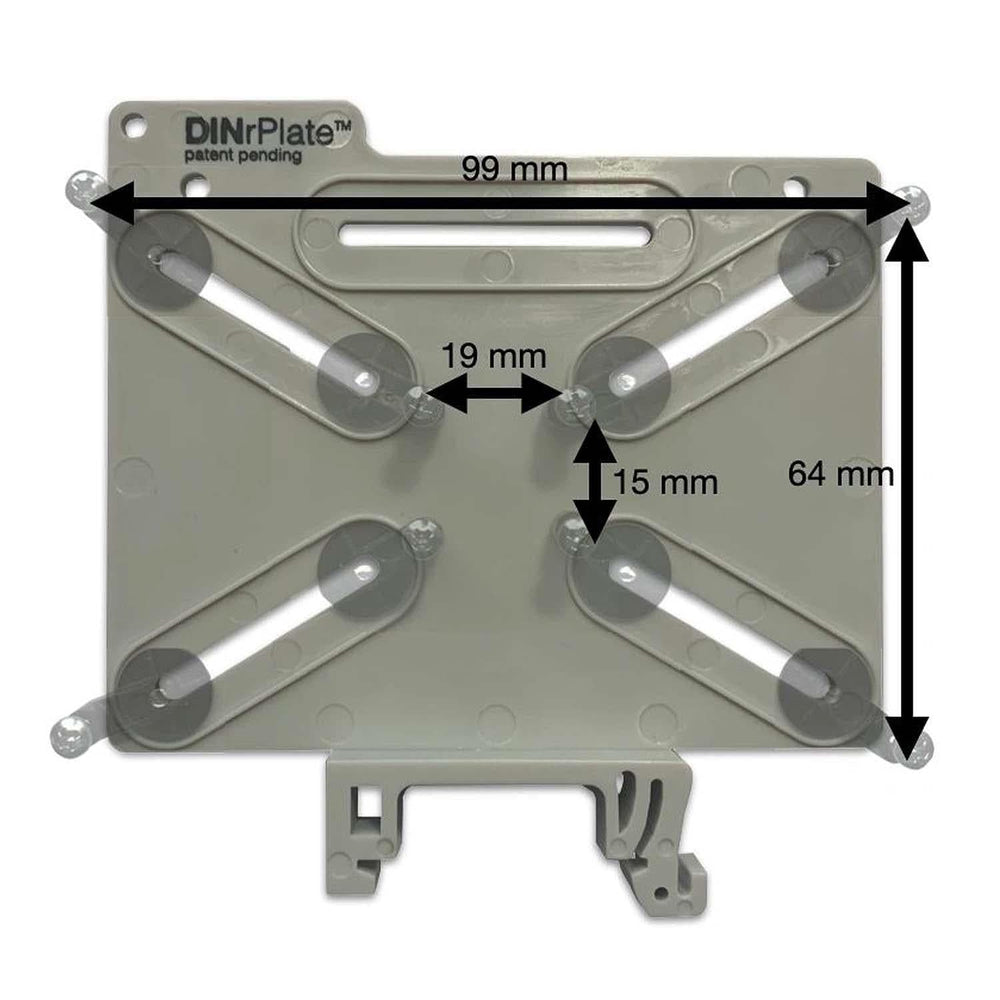
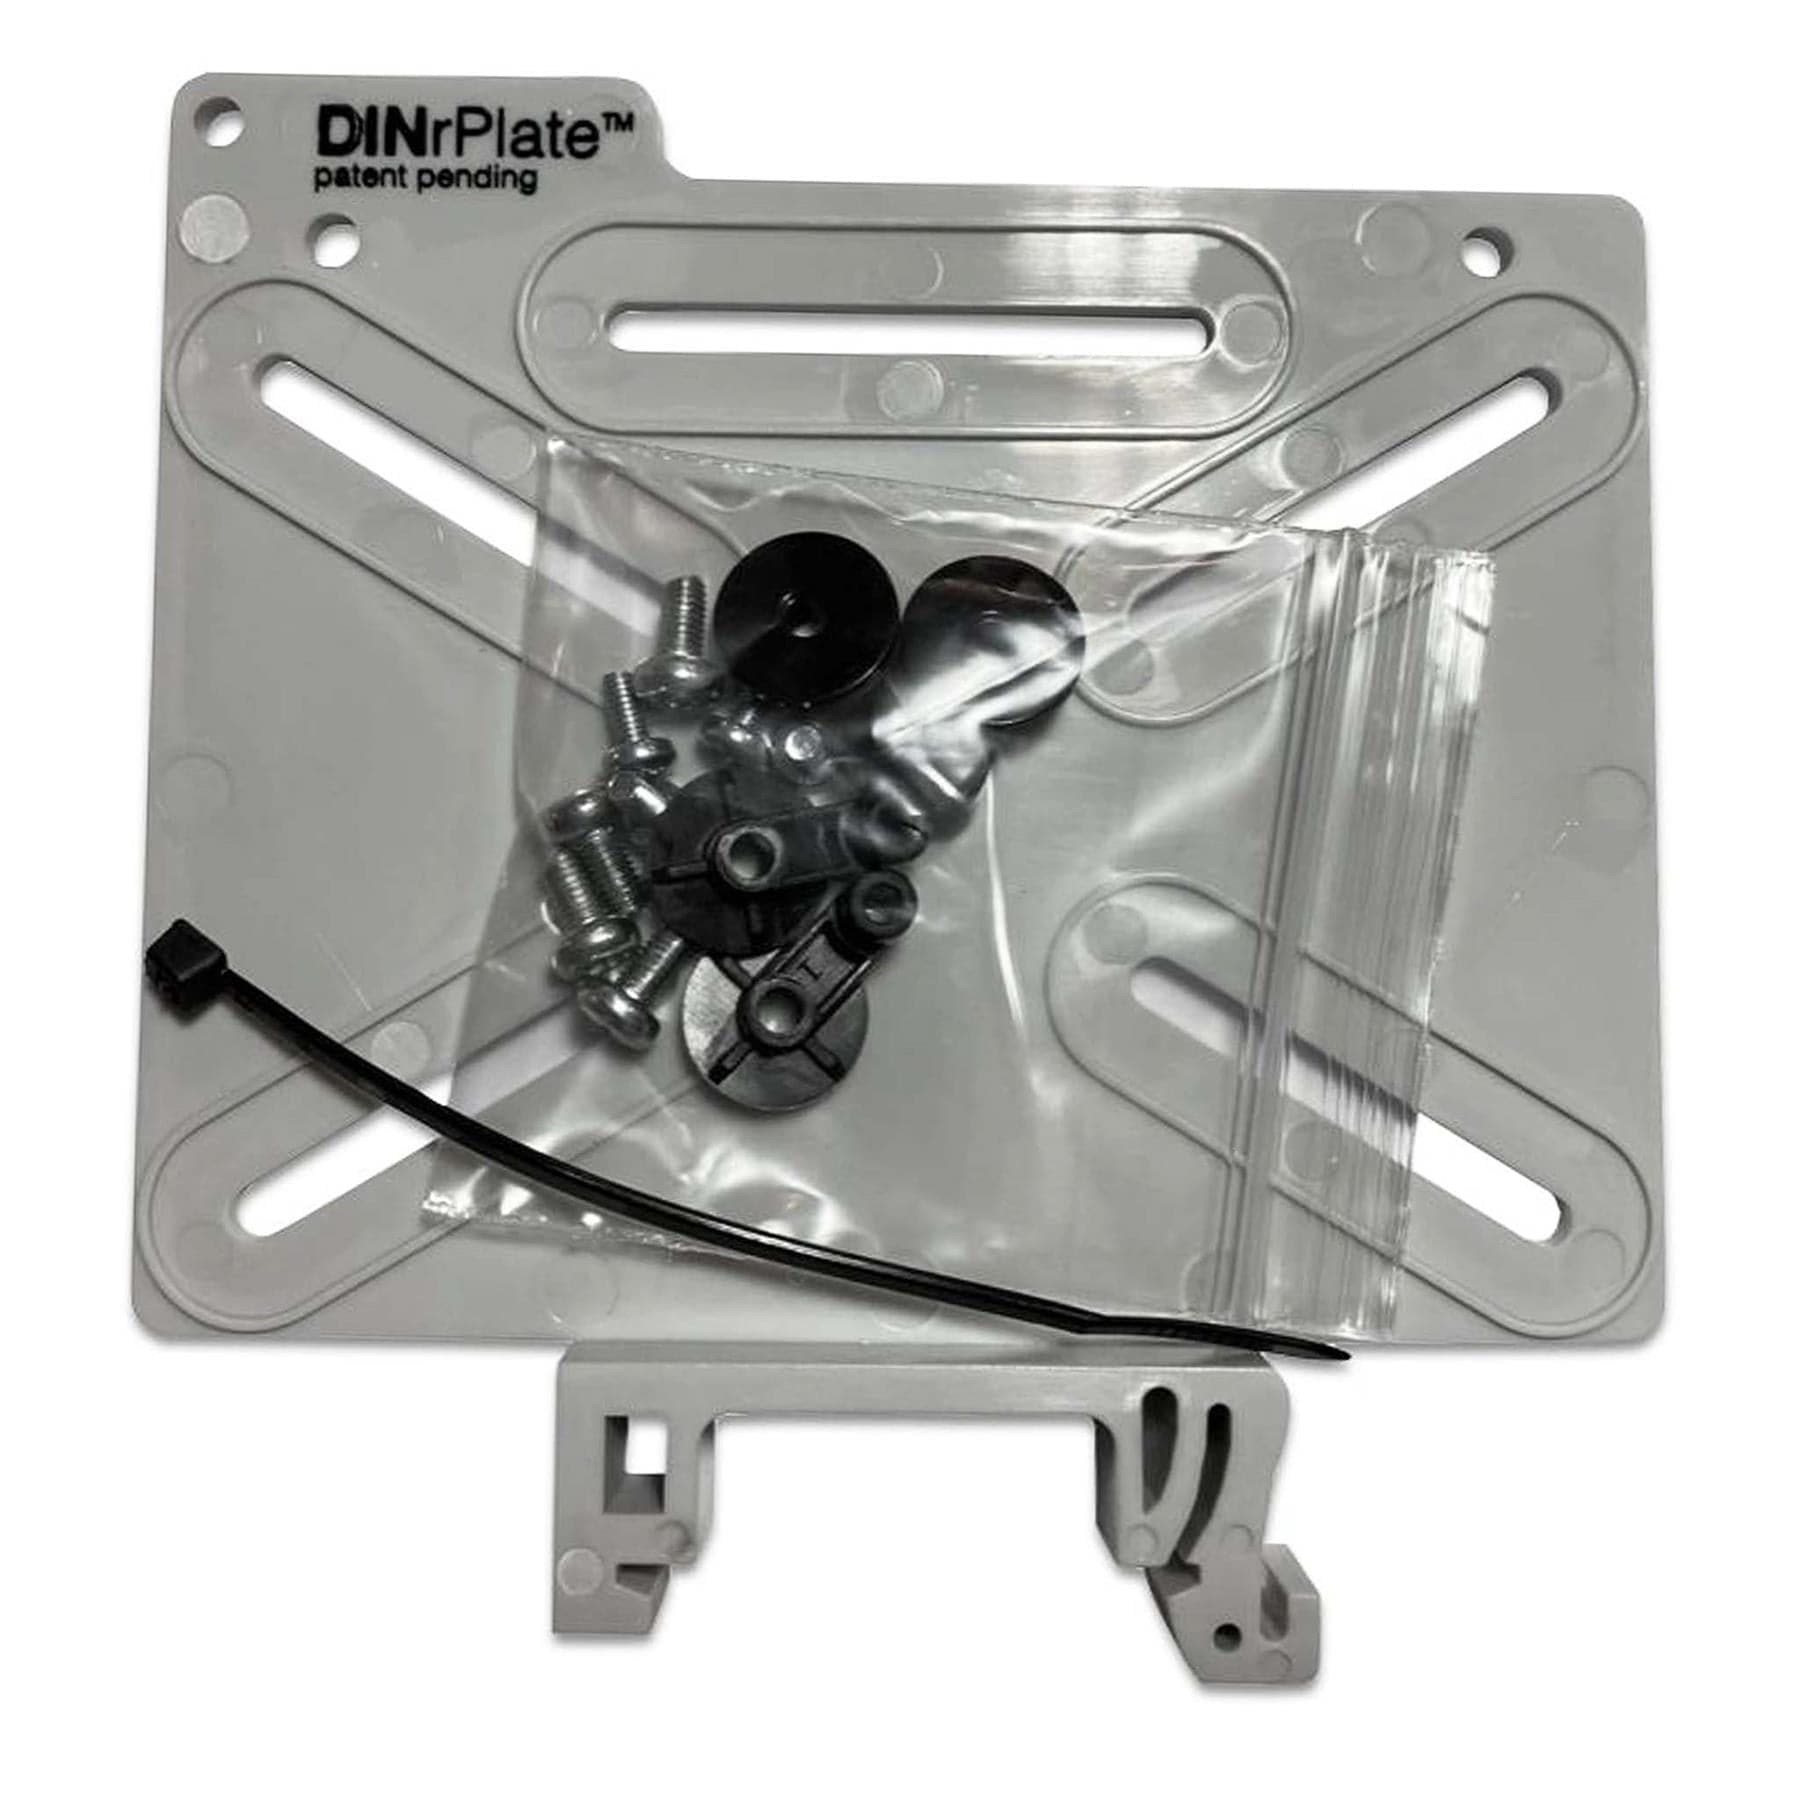
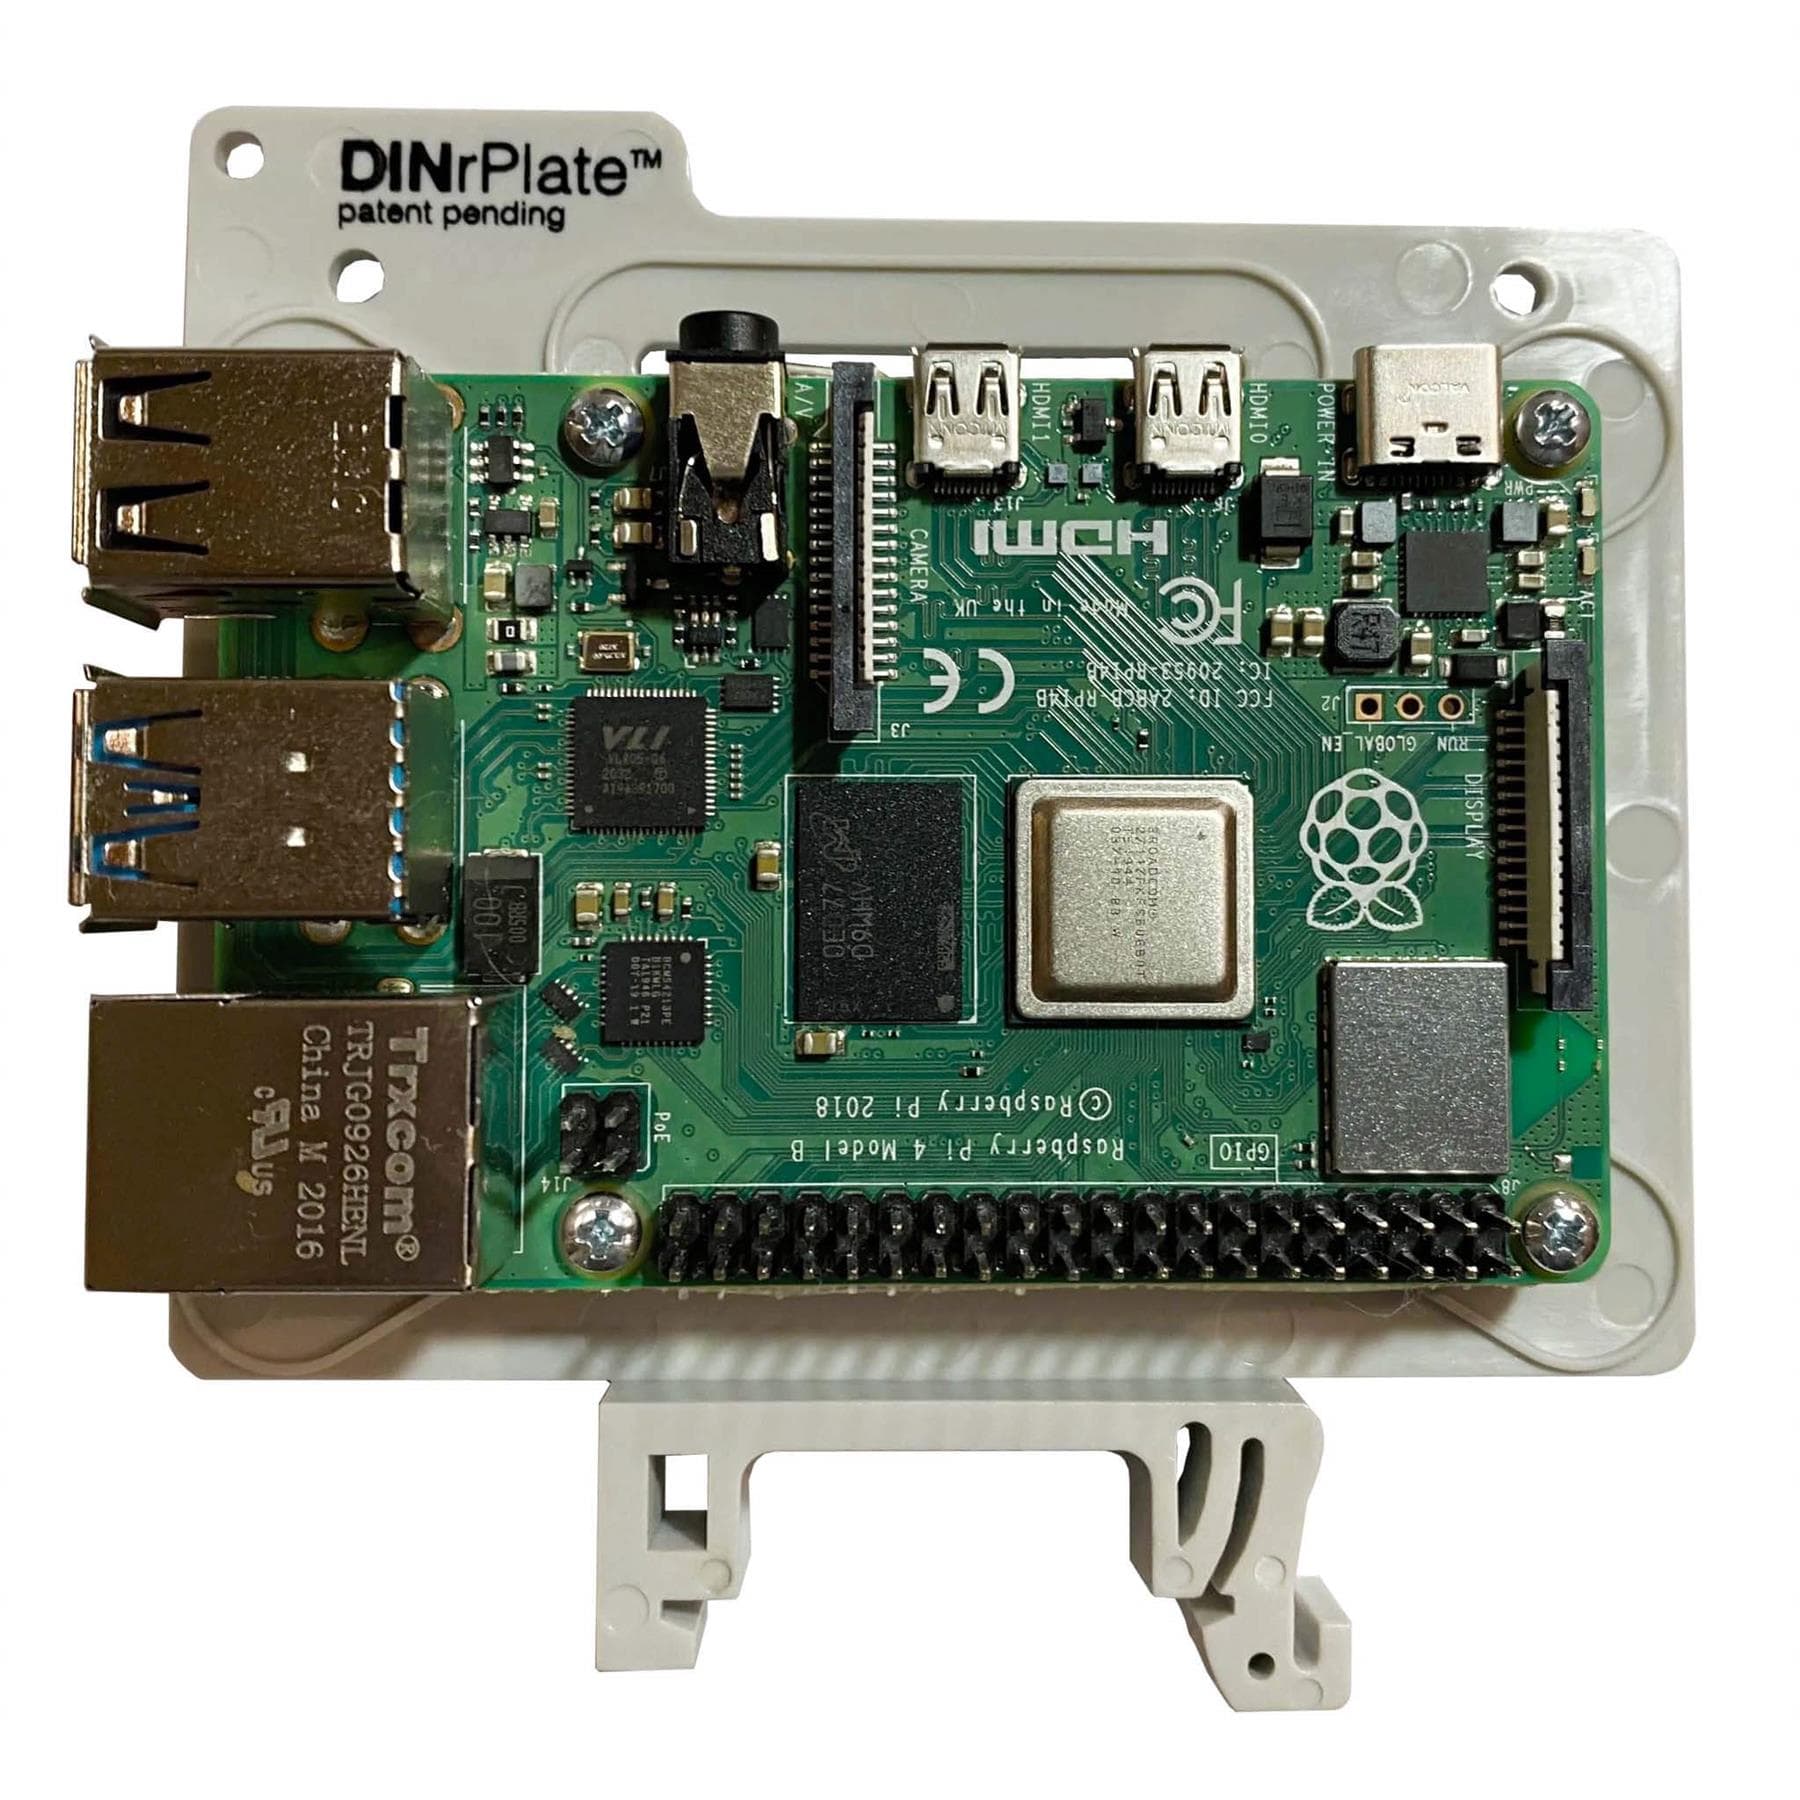
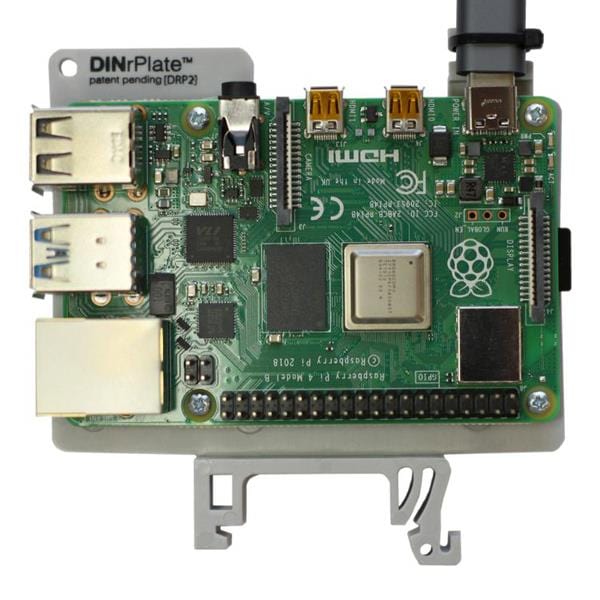
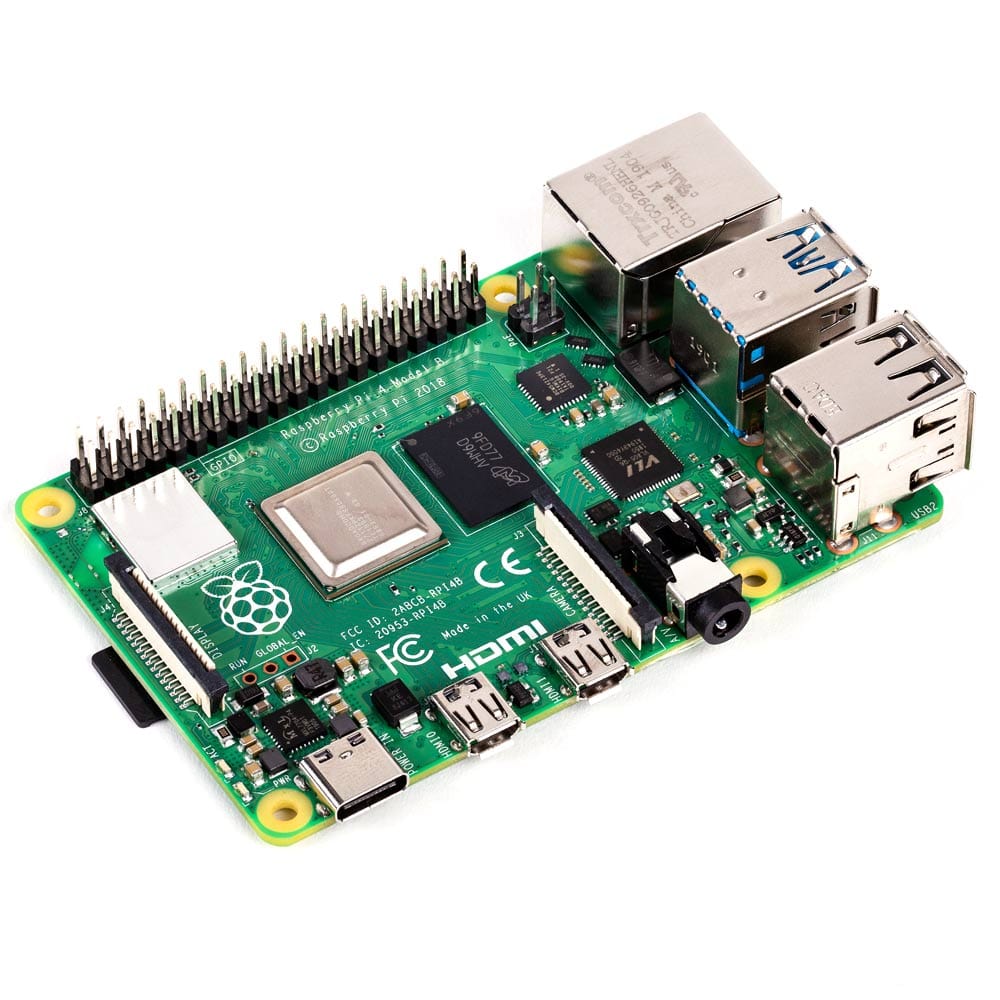
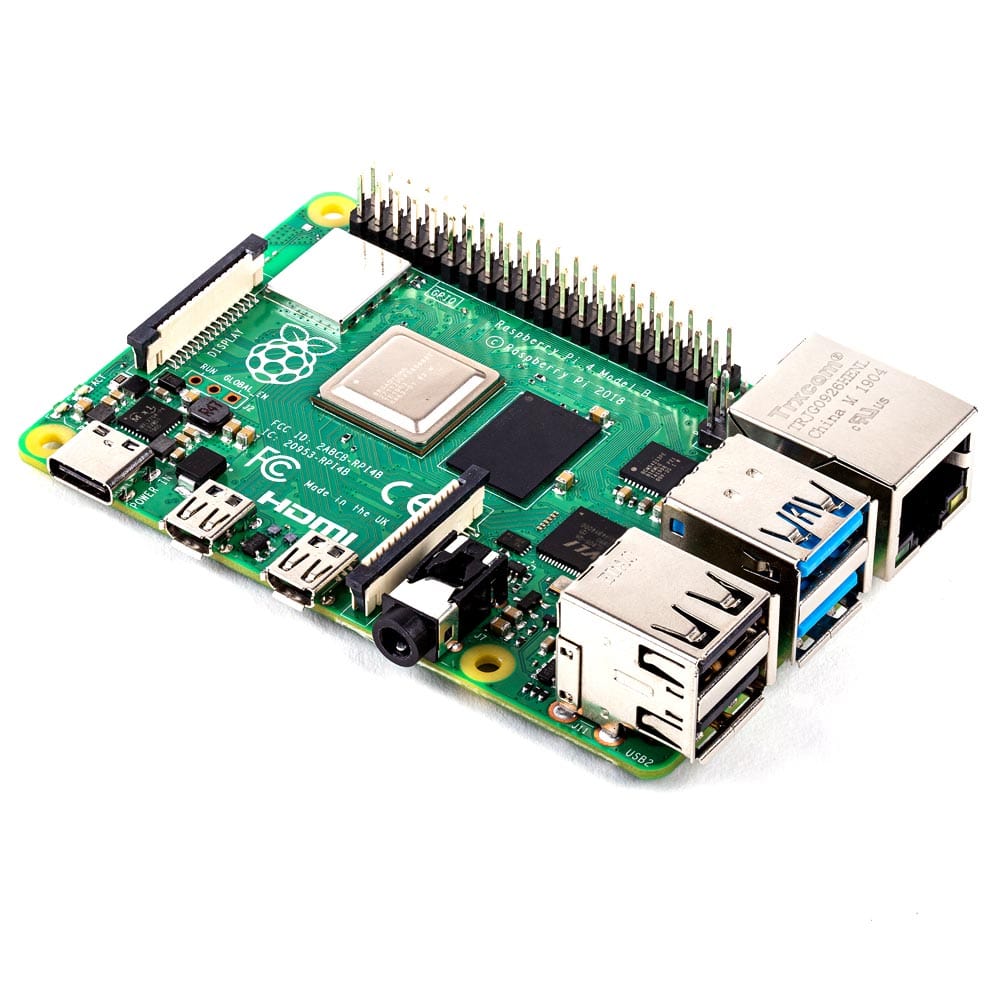
The DINrPlate Universal is an innovative universal DIN Rail mounting solution with sliding, rotating standoffs allowing it to accommodate a wide range of development boards, PCBs, modules, SSDs, HDDs and more!

Professionally mount your Raspberry Pi, relay boards, modules, breakouts, SSDs, HDDs, other development boards and many many more - the list is almost endless! Just slide and rotate the standoffs to the position required and secure your board in place.

The flexible mounting design allows you to mount most boards vertically or horizontally, allowing you to improve port access for your specific setup. The universal nature of this version of the DINrPlate also means you can maintain one part for many uses over time.

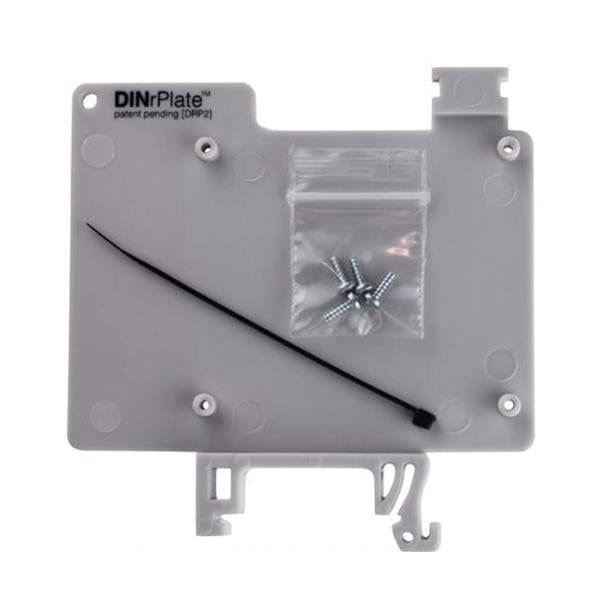
Mounting hardware is included - 4x rotating standoffs, 4x M3 screws (for SSDs/HDDs) and 4x M2.5 screws.

Specifications

  • Compact footprint: 100mm x 100mm x 10mm (L x W X D)
  • Integrated 35mm DIN Rail mounting clip
  • Includes mounting hardware; four (4) rotating stand-offs, four (4) M3 screws & four (4) M2.5 screws
  • Only 30g (base alone)
  • Wide PCB Hole pattern range: From19mm x 15mm 99mm x 64mm
  • Mount a standard 2.5" SSD/HDD (M3 mounting screws included.)

Assembly

  • Attach Standoffs to PCB: Using the smaller M2.5 screws, attach the standoffs to the PCB. Tighten screws just a little, so the standoff can still rotate with your fingers. This will make the next step easier.
  • Align Standoffs in Slots: Gently rotate the standoffs so they align with the respective sliding slot/channels. (If standoffs don't rotate, loosen the M2.5 screws a little.) Hold the PCB in place against the base with one hand, and attach with M3 from the back. Keep screws a little loose.
  • Secure PCB to Mount: When all 8 screws are installed, align the PCB to the desired position, and then tighten all screws. Do not over-torque the screws, it's not necessary
  • Attach Mount to DIN Rail: Hook the rigid side of the DIN clip to the rail, and press down until the clip secures to the other side. (If you need to remove, use a slotted screwdriver with a prying action on the flexible attachment point. Access is only from the side opposite of the PCB)

Video

Payment & Accreditations

Payment methods
Visa Mastercard Maestro PayPal Amazon Klarna

Your payment information is processed securely. We do not store credit card details nor have access to your credit card information.

Accreditations