Skip to content

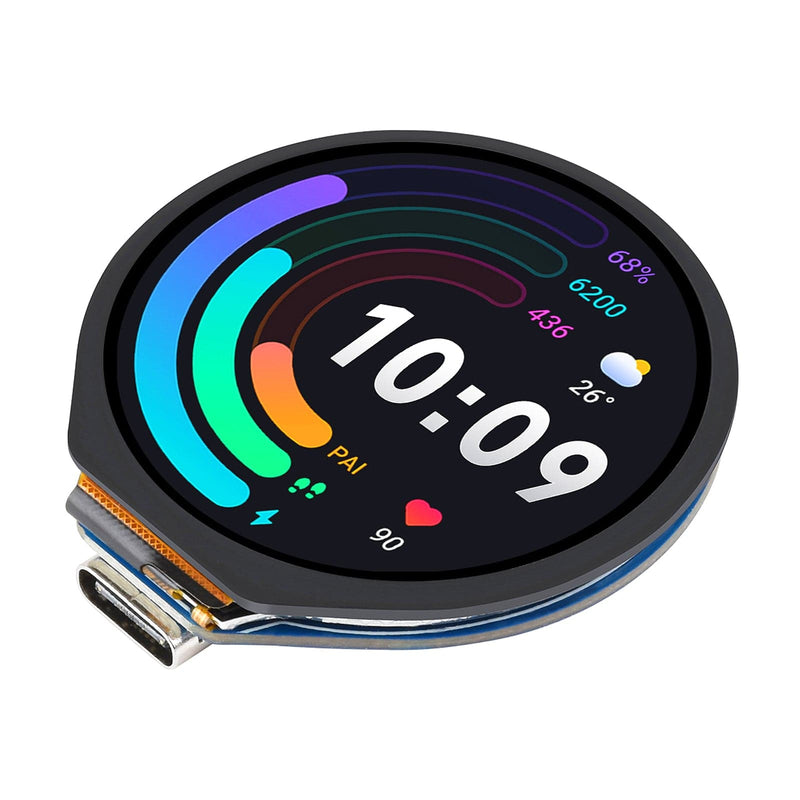
How to use the Waveshare RP2040 1.28" Round Touch LCD
In this tutorial we are going to demonstrate how to control this 1.28" RP2040-based LCD board using MicroPython, including using the capacitive touch display.
You may find it useful to look at our earlier tutorials on how to program graphics and text on Waveshare LCD displays as this one is very similar to the 240x240 featured there – albeit with the corners rounded off!
All the routines and methods from those tutorials work on this display and were used in the watch project we feature.
What you will need
We assume that you have installed Thonny on your computer and set up your Raspberry Pi Pico with the most recent MicroPython firmware (UF2). If not, check out our Raspberry Pi Pico Getting Started Guide where this is covered in detail.
You will need:
Optional items:
Hardware Introduction
This 1.28" LCD RP2040-based board from Waveshare provides makers with a host of features to try out and use in projects. All the features can be easily accessed with MicroPython and include:
- Round 240x240 pixel IPS display
- 65K colours
- Capacitive touch sensor with points and gesture modes
- Powerful inertial measurement unit (IMU) - accelerometer and gyro
- 4MB Flash memory
- 12-pin connection cable to unused RP2040 GPIO pins
- LiPo battery support (1.25mm pitch MX1.25 connector)

Board setup
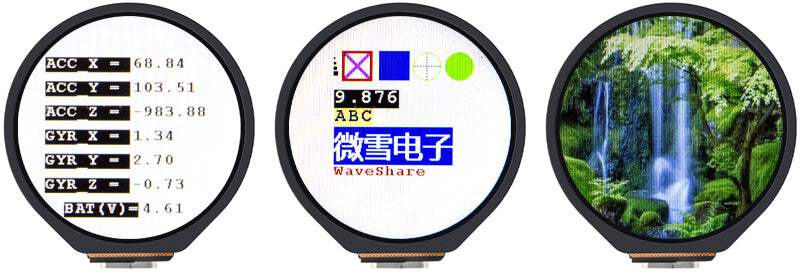
If you plug your USB-C cable into the socket on the board and power it from your computer, you will find that it has a demonstration UF2 file installed. It demonstrates some graphical elements, the IMU and displays a photograph of a waterfall.
We need to replace that installed UF2 with the current RP2040 MicroPython file (Pico version) which you can download from here and install using the instructions on that page.
Programming the board
Grab the demo code
Our examples are based on the demo code for the board available on the Wiki. Waveshare have provided a wealth of documentation for this board in the Wiki (it's well worth reading before you continue).
Go to the link above then scroll down to the resources section and download the demo file.
This downloads a zip file called RP2040-Touch-LCD-Code. Once you have unzipped it you have a MicroPython program which contains all the drivers needed for the board and a demonstration. This is an essential tool and the basis for our own programs.
Run the demo
Open the demo file in Thonny, connect your board via USB-C, then select the correct port and run the demonstration. It should go like this:
- The first screen provides data from the IMU. If you wave the device around you will see the numbers from the accelerometer and the gyroscope change.
- Follow the instructions and gently press a finger onto the display and hold it for a couple of seconds - a long press for the touch sensor.
- The program moves on to demonstrate gesture input - swiping. Follow the screen instructions by swiping in the direction indicated.
- Eventually you get to a screen showing a white square with 4 coloured segments. The red, green and blue segments change the drawing colour when touched. You can write or draw in the white area. The black segment clears the screen to start again.
We were impressed with the speed and accuracy of the drawing!
Writing your own code
Waveshare do not provide separately named MicroPython libraries, but instead include drivers within the demonstration code (above). You can delete the sections you don't need and add others as necessary. It is usually well documented and has a few comments in essential places.
If you look through the demo program you will find the following sections (the demo code may change - line numbers are correct at the time of publishing):
- 1 – 20 Import libraries and allocate GPIO pins
- 21 - 402 Display driver
- 403 – 495 Touch driver
- 496 – 569 IMU driver
- 570 – 633 Drawing writing routines
- 634 – 679 Touch Gestures demo routine
- 680 – 716 IMU demo
- 717 – end Main program
When writing your own programs, you will need the drivers in place. For the following examples please delete just the main program and replace it with the code we provide.
Example 1: Touch & simple graphics
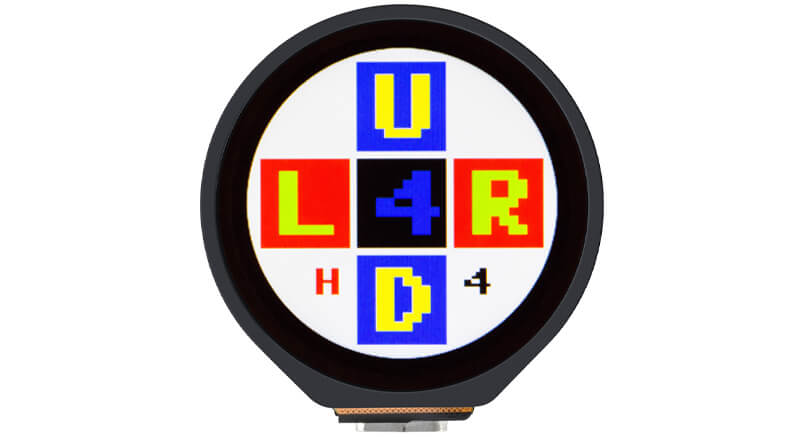
In this example program below, five areas of this screen are touch sensitive:
- The small H: Halts the program (never start anything you cannot stop!)
- The buttons U, D, L and R
- Up and Down add to or subtract 1 from the number in the value in the centre – range 0 to 9
- Left and Right change the colour of the number in the centre
- The small black number is the value of the colour pointer, with a range 0 to 8
Copy the code over to Thonny, give it a try, then read on for information on how it works:
# ========== Main starts here ============
# Demonstrates Touch control
# U = increase number, D = decrease
# L & R control foreground colour
# Tony Goodhew for thepihut.com 20 July 2023

# Set up LCD display screen and Touch sensor
LCD = LCD_1inch28()
LCD.set_bl_pwm(65535)

Touch=Touch_CST816T(mode=1,LCD=LCD) # Touch ON - mode 1

def colour(R,G,B): # Convert RGB888 to RGB565
    return (((G&0b00011100)<<3) +((B&0b11111000)>>3)<<8) + (R&0b11111000)+((G&0b11100000)>>5)

def button(xx,yy,txt,bc,fc): # Square button at (xx, yy) with txt in colour fc and background colour bc
    LCD.rect(xx,yy,70,70,bc,True)        # Background square
    LCD.write_text(txt,xx+8,yy+10,7,fc)  # Large character

# Set up colours
w = colour(255,255,255)
r = colour(255,0,0)
g = colour(0,255,0)
b = colour(0,0,255)
y = colour(255,255,0)
c = colour(0,255,255)
m = colour(255,0,255)
g = colour(100,100,100)
o = colour(255,128,30)

colours = [r,y,g,c,b,m,w,o,g] # List of colours, 0 to 8

mode = 1
Touch.Set_Mode(mode)

def draw_buttons(n,cp):
    LCD.fill(w)
    button(85,10,"U",colour(0,0,255),colour(255,255,0))
    button(85,160,"D",colour(0,0,255),colour(255,255,0))
    button(10,85,"L",colour(255,0,0),colour(0,255,0))
    button(160,85,"R",colour(255,0,0),colour(0,255,0))
    button(85,85,str(n),colour(0,0,0),colours[cp])
    LCD.write_text(str(cp),165,170,3,0) # Colour pointer
    LCD.write_text("H",50,170,3,r) # Colour pointer
    LCD.show()

n = 5 # Central number counter
cp = 5 # Colour pointer
draw_buttons(n,cp)

running = True
try:
    while running:

        if (Touch.X_point > 85 and Touch.X_point < 160) and (Touch.Y_point > 15 and Touch.Y_point < 90): # U touched
            Touch.X_point = 0 # Clear Touch
            n = n + 1
            if n > 9: n = 9

        elif (Touch.X_point > 85 and Touch.X_point < 160) and (Touch.Y_point > 160 and Touch.Y_point < 235): # D touched
            Touch.X_point = 0 # Clear Touch
            n = n - 1
            if n < 0: n = 0

        elif (Touch.X_point > 208 and Touch.X_point < 240) and (Touch.Y_point > 85 and Touch.Y_point < 160): # R touched
            Touch.X_point = 0 # Clear Touch
            cp = cp + 1
            if cp > 8: cp = 8

        elif (Touch.X_point > 0 and Touch.X_point < 160) and (Touch.Y_point > 85 and Touch.Y_point < 160): # L touched
            Touch.X_point = 0 # Clear Touch
            cp = cp - 1
            if cp < 0: cp = 0

        elif (Touch.X_point > 0 and Touch.X_point < 80) and (Touch.Y_point > 165 and Touch.Y_point < 240): # H touched = HALT
            running = False
            break

        draw_buttons(n,cp)
#        print(Touch.X_point,Touch.Y_point)
        Touch.X_point = 0
        Touch.Y_point = 0
        time.sleep(0.4) # Delay to untouch - Debounce

except KeyboardInterrupt:
    pass
# Tidy up after CTRL-C / KeyboardInterrupt
LCD.fill(0)
LCD.show()
How it works
The structure of the code is as follows, in order:
- We start by initialising the display and the touch sensors
- We define the colour mixer procedure, colour (R, G, B) allows 65K colours
- We define how to draw a button
- We define a few useful colours and save them in a list
- We set the mode of the touch sensor to touch and position, mode = 1
- We define a procedure to draw all five buttons on the screen
- We set starting values for the central counter and the colour pointer
The main loop is controlled by the variable called running. It loops while this is set to True and we can stop looping by setting it to False.
In the loop we test if the sensor is registering a touch within the bounds of each of the four outside buttons or the HALT area. If a button is touched, we update the values in n or cp, or reset the variable running to halt the loop.
The position touched uses the same screen co-ordinates (x, y)
Touch.X_point is the x value and Touch.Y_point provides the y value.
These instructions clear the current touch indication:
Touch.X_point = 0 # Clear Touch
Touch.Y_point = 0 # Clear Touch
At the end of the loop, we tidy up by clearing the screen.
This all worked pretty well with only a few ‘button bounce’ issues when the numbers moved by two rather than one.
Example 2: Gestures & simple graphics

This example works in a similar manner but we swipe the screen rather than tap it.
Swiping up or down changes the central number while swiping left or right changes the central colour. A double tap or long press halts the program.
Replace the MAIN part of the program with the following code, then read on for information on how it works:
# ========== Main starts here ============
# Demonstrates Touch control
# U = increase number, D = decrease
# L & R control foreground colour
# Tony Goodhew for thepihut.com 20 July 2023

# Set up LCD display screen and Touch sensor
LCD = LCD_1inch28()
LCD.set_bl_pwm(65535)

Touch=Touch_CST816T(mode=0,LCD=LCD) # Touch ON - mode 1

def colour(R,G,B): # Convert RGB888 to RGB565
    return (((G&0b00011100)<<3) +((B&0b11111000)>>3)<<8) + (R&0b11111000)+((G&0b11100000)>>5)

def button(xx,yy,txt,bc,fc): # Square button at (xx, yy) with txt in colour fc and background colour bc
    LCD.rect(xx,yy,70,70,bc,True)        # Background square
    LCD.write_text(txt,xx+8,yy+10,7,fc)  # Large character

def up():
    x = 0
    for y in range(10,40):
        x = x + 1
        LCD.hline(120-x, y,2*x,r)

def down():
    x = 0
    for y in range(229,199, -1):
        x = x + 1
        LCD.hline(120-x, y,2*x,r)

# Set up colours
w = colour(255,255,255)
r = colour(255,0,0)
g = colour(0,255,0)
b = colour(0,0,255)
y = colour(255,255,0)
c = colour(0,255,255)
m = colour(255,0,255)
g = colour(100,100,100)
o = colour(255,128,30)

colours = [r,y,g,c,b,m,w,o,g] # List of colours, 0 to 8

mode = 0
Touch.Set_Mode(mode)

def draw_buttons(n,cp):
    LCD.fill(0)
    up()
    down()

    button(85,85,str(n),colour(0,0,0),colours[cp])
    LCD.write_text(str(cp),180,180,2,0) # Colour pointer
    LCD.show()

n = 5 # Central number counter
cp = 5 # Colour pointer
draw_buttons(n,cp)

running = True
try:
    while running:

        if Touch.Gestures == 0x01: # UP
            Touch.Gestures = 0  # Clear the current gesture
            n = n + 1
            if n > 9: n = 9

        elif Touch.Gestures == 0x02: # Down
            Touch.Gestures = 0  # Clear the current gesture
            n = n - 1
            if n < 0: n = 0

        elif Touch.Gestures == 0x04: # Right
            Touch.Gestures = 0  # Clear the current gesture
            cp = cp + 1
            if cp > 8: cp = 8

        elif Touch.Gestures == 0x03: # Left
            Touch.Gestures = 0  # Clear the current gesture
            cp = cp - 1
            if cp < 0: cp = 0

        # Double tap or Long Press to HALT
        elif (Touch.Gestures == 0x0C) or (Touch.Gestures == 0x0B):
            running = False
            break

        draw_buttons(n,cp)

        time.sleep(0.4) # Delay to untouch - Debounce

except KeyboardInterrupt:
    pass

# Tidy up after CTRL-C / KeyboardInterrupt or HALT Gesture
LCD.fill(0)
LCD.show()
How it works
The touch sensor in mode 0 identifies six different gestures:
- Swipe UP 0x01
- Swipe DOWN 0x02
- Swipe RIGHT 0x03
- Swipe LEFT 0x04
- Long Press 0x0B
- Double Tap 0x0C
These are tested with the following instruction format:
if Touch.Gestures == 0x01: # UP
We use the instruction Touch.Gestures = 0 to wait for the next gesture.
The rest of the program is very similar to the previous one. The top and bottom buttons have been replaced with indicative red arrow heads using the hline(x , y, l, c) instruction, which draws a horizontal line from (x, y) of length, l and colour, c.
The arrow heads are defined in the procedures, up() and down().
The gestures method was totally reliable with accurate single stepping of both the number and the colours. Nice!
Things to try
- Add blue arrow heads pointing left and right using the vline(x, y, l, c) instruction
- Look at the graphics tutorial and try drawing sloping lines, triangles, grids, circles and rings on your display
Example 3: Bonus Steam Punk Gauge Project!
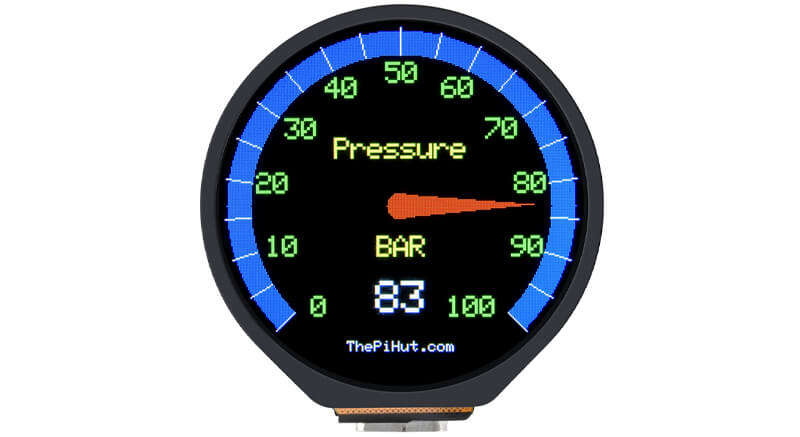
Now here's a fun project for you to try! We'll use the display along with a 10k potentiometer to produce a gauge on the screen.
Check out the video below and then read on for instructions and code:
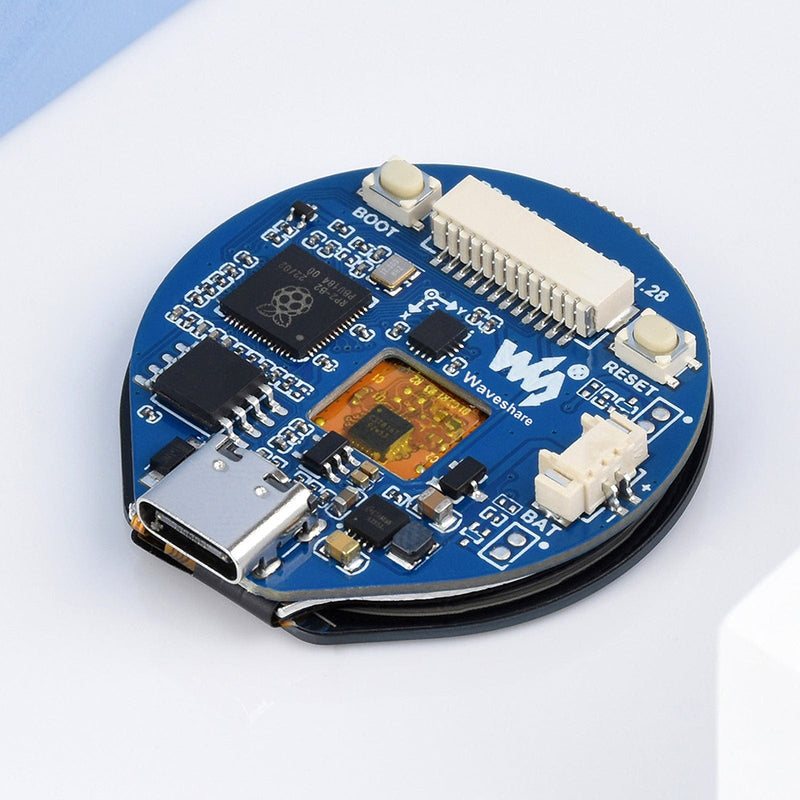
Connect the supplied GPIO cable assembly to the connector on the back of the board.
Note: you may find the colours are in the reverse order and the grey ends up next to the RESET button. The RED and BLACK wires may not connected to Power and GND!
Look at the pinout in the Wiki and connect a 10K Ohm potentiometer to the board as follows:
- GND to orange
- 3.3v to brown
- Wiper to green (GPIO 26 = ADC0)
The code is quite long so we've uploaded the MicroPython file here for you to download. Enjoy!
About the Author
This article was written by Tony Goodhew. Tony is a retired teacher of computing who starting writing code back in 1968 when it was called programming - he started with FORTRAN IV on an IBM 1130! An active Raspberry Pi community member, his main interests now are coding in MicroPython, travelling and photography.