 Skip to content
Adding a Real Time Clock to your Raspberry Pi
When you switch on your PC or Mac, do you have to change its time? Highly unlikely! Do you have to on your Raspberry Pi? Possibly.
Each time your Raspberry Pi boots it connects to what is called an NTP - Network Time Protocol - server and asks it the time. But what happens if your Pi is not connected to the internet? You're out of luck (or is that time?). Your Pi has no way of knowing what time it is.
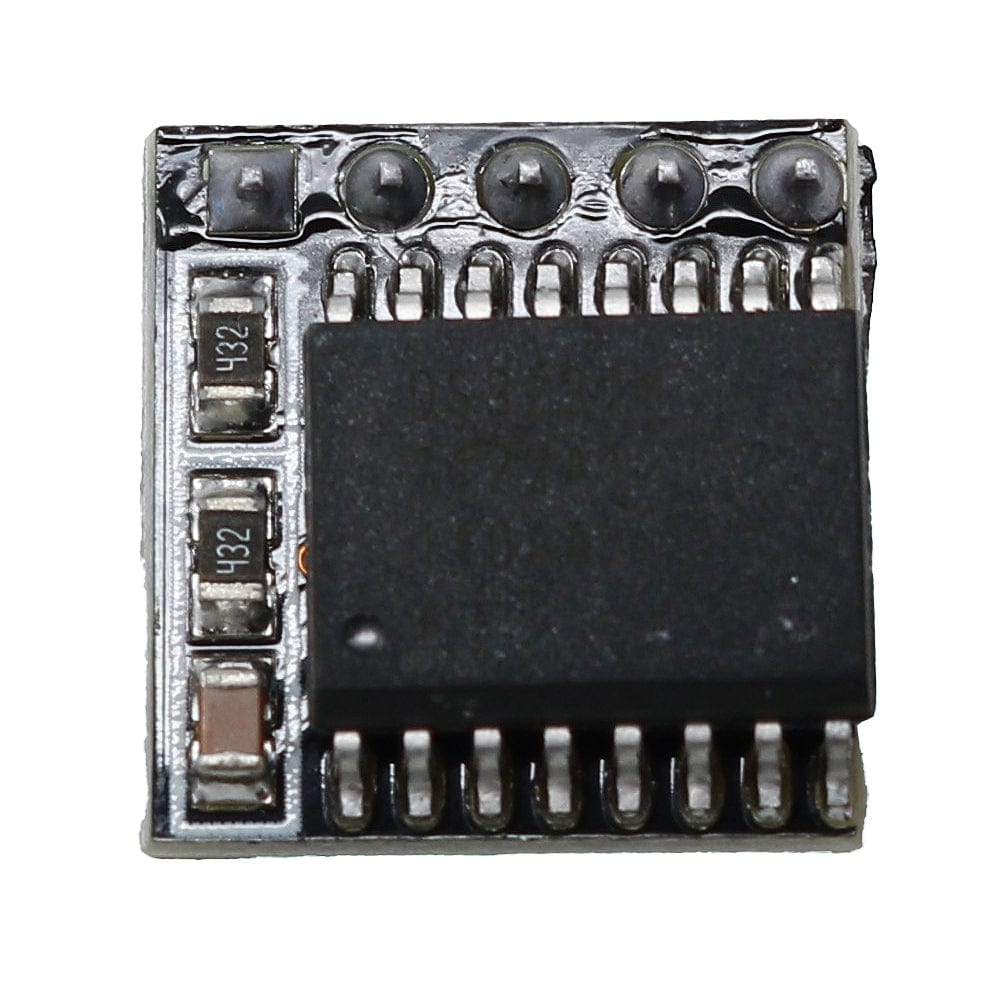
But there is a solution in the form of a 'Real Time Clock' or RTC board. These inexpensive add-on boards plug on top of your Pi's GPIO pins and contains a clock chip and a tiny battery that tell the Raspberry Pi what time it is. The Pi Hut sells such a board.
Setting up I2C
The RTC board uses what is known as the I2C (pronounced 'eye squared see') protocol to communicate between itself and the Raspberry Pi. The I2C allows the Raspberry Pi to communicate with a lot of different devices at the same time that are also connected to the same I2C pins on the Raspberry Pi.
Simon Monk has written very good instructions about how to set up your Raspberry Pi to be able to use i2c on the Adafruit site. Follow the full instructions, including checking that everything has worked by going through the manual instructions too.
Plugging in the Board
It is always best to turn your Raspberry Pi off before plugging anything onto the GPIO pins. Always do this using the sudo halt or sudo shutdown -h now commands.
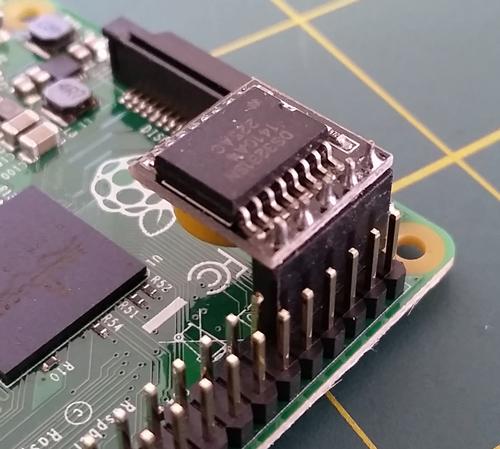
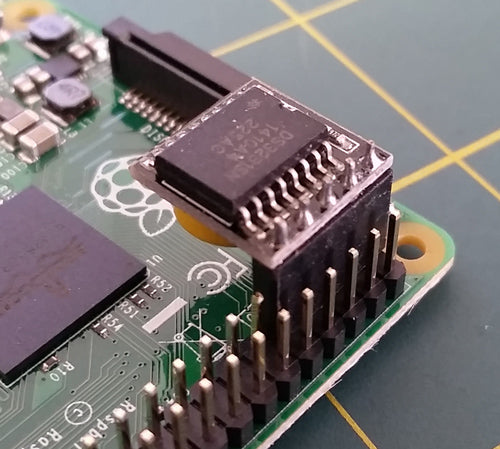
Now plug the board onto your Raspberry Pi GPIO pins on the inside corner with the RTC board pointing inwards, as shown below.
Setting up the RTC
You now need to configure your Raspberry Pi to recognise and use the board.
Turn on the Raspberry Pi and verify that the board is seen by running sudo i2cdetect -y 1 at the command line. You should see ID #68 show up (the I2C address of the DS1307 Real Time Clock chip):

If you have an older Rev. 1 Raspberry Pi, you will have to run sudo i2cdetect -y 0 as the I2C bus address changed from 0 to 1 from rev 2 onwards.
Setting the RTC Clock
The RTC module must be loaded by the kernel by running:
sudo modprobe rtc-ds1307Now you need to be running as the super user; type in:
sudo bashand then, if you have a Rev.2 Raspberry Pi or later:
echo ds1307 0x68 > /sys/class/i2c-adapter/i2c-1/new_deviceOr if you have the older Rev.1 Raspberry Pi, use:
echo ds1307 0x68 > /sys/class/i2c-adapter/i2c-0/new_deviceType exit to stop being the 'root' user.
Check the time on the RTC device using:
sudo hwclock -rIf this is the first time the module has been used, it will report back Jan 1 2000, and you'll need to set the time to the current time.
The easiest way is to connect it up to Ethernet or Wifi. It will automatically set the time from the network. You can check the time using the date command:

Run sudo hwclock -w to write the system time to the RTC board.
You can then verify it with sudo hwclock -r:

So, now the RTC clock is set, is that it? Well, no. The next time you boot your Pi, it will not know that it needs to read the clock from the RTC, so if it is not connected to the internet it will again be showing the wrong time.
Making Your Raspberry Pi Use the Real Time Clock
You will need to add the RTC kernel module to the file /etc/modules so it is loaded when the Raspberry Pi boots. In a terminal window run sudo nano /etc/modules and add rtc-ds1307 at the end of the file:

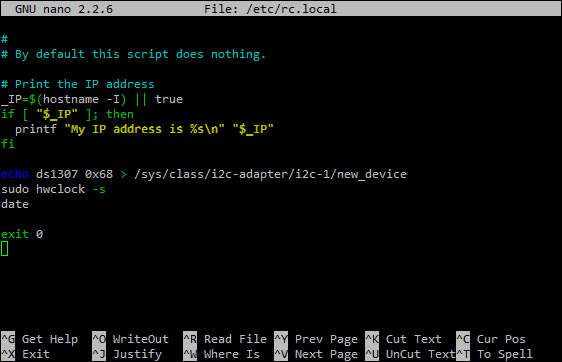
Next you will need to add the DS1307 device creation at boot by editing the /etc/rc.local file by running
sudo nano /etc/rc.localand add the following lines to the file:
echo ds1307 0x68 > /sys/class/i2c-adapter/i2c-1/new_devicesudo hwclock -s
dateJust before the exit 0. Note: If you have a Rev 1 Raspberry Pi, replace i2c-1 by i2c-0 above.
To save the file, press Ctrl+X, Y then return.
To test this out, shutdown your Raspberry Pi, unplug any ethernet cable or wifi dongle and then turn the Raspberry Pi back on. Use the following command in a terminal window to check the date is still set:
date
Now, the next time you reboot your Raspberry Pi it will read the time from the Real Time Clock.

9 comments
Philip Male
If you are installing this on a pi running ubuntu – the above basically works fine with some minor tweaks:
- Enable i2c in raspi-config (interface options)
Phil – hack for no rc.local- Install i2c-tools and util-linux-extra
- Probe the i2c bus with i2cdetect -y 1 (RTC is device 68)
- Load RTC module: sudo modprobe rtc-ds1307
Initialise driver with echo ds1307 0×68 > /sys/class/i2c-adapter/i2c-1/new_device
Check you can read it with hwclock -r
If you need to write the system time to the clock: hwclock -w
Add module to /etc/modules:
Add the line: rtc-ds1307
Create a /usr/local/sbin/sync-rtc script:
#!/bin/sh
echo ds1307 0×68 > /sys/class/i2c-adapter/i2c-1/new_device
/usr/sbin/hwclock -s
exit 0
Then make it run at reboot time using root crontab:
@reboot /usr/local/sbin/sync-rtc
The Pi Hut
@David – What happens if you enable I2C, does this not work?
@David – What happens if you enable I2C, does this not work?
David
Is there an update to this rtc setup for BULLSEYE and BOOKWORM?
Using this and others that were patterned after it when using those versions of software I get:
“please enable I2C interface in the Raspberry Pi configuration and try again” It seems to work
fine for Buster. But I need my Real Time Clock for BULLSEYE to be able to run advanced software
versions of WSJTX in my EMERGENCY radio DIGITAL setup using both BULLSEYE or BOOKWORM.
Thanks for your outstanding help file. 73 Dave
J Jones
Hello All, I enjoyed reading the instructions on adding and using a RTC on the Raspberry Pi, I have a question what are the instructions for adding the DS3231 RTC, will the same information apply for that installation?
Thank in advanced for any and all help with this question.
Hello All, I enjoyed reading the instructions on adding and using a RTC on the Raspberry Pi, I have a question what are the instructions for adding the DS3231 RTC, will the same information apply for that installation?
Thank in advanced for any and all help with this question.
Robert
Thanks for the tutorial! After i2c enable all working fine,
Thanks for the tutorial! After i2c enable all working fine,
Roland
First step: If you get:
sudo i2cdetect y 1
Error: Could not open file `/dev/i2c-1’ or `/dev/i2c/1’: No such file or directory
do
sudo raspi-config
—> interface options // I5 I2C —> enable
:)
First step: If you get:
sudo i2cdetect y 1
Error: Could not open file `/dev/i2c-1’ or `/dev/i2c/1’: No such file or directory
do
sudo raspi-config
—> interface options // I5 I2C —> enable
:)
Russell
Great module and tutorial. It just worked out the box.
Great module and tutorial. It just worked out the box.
The Pi Hut
@Hugh Burnham You’re absolutely right, it does now use a CR927 battery but it seems we didn’t update the page and specs when that change was made. Poor show from us! We’ll get it all updated today. Thanks for the nudge.
@Hugh Burnham You’re absolutely right, it does now use a CR927 battery but it seems we didn’t update the page and specs when that change was made. Poor show from us! We’ll get it all updated today. Thanks for the nudge.
Hugh Burnham
We bought a couple of these to use in a project at work. I was trying to work out how long the supercapacitor would hold the date and time for. It is an important parameter and should be in the spec. If, for example the super cap is 0.1F, then at the discharge rate specified in the I.C. datasheet then it would last only about 4 or 5 days. However I notice that the dimensions of the “supercapacitor” on the board are exactly the same as a CR927 lithium cell, and I suspect that is actually what is fitted. In which case it will last about 4.5 years. (35mAh, 0.84uA). Much better.
Perhaps the misleading reference to supercapacitor should be removed from the advertising?