 Skip to content

Maker Advent Calendar Day #2: Let’s Get Blinky!
Welcome to day two of your 12 Projects of Codemas Advent Calendar. Today we’ll be playing with one of the most popular components for makers - LEDs!
LEDs (Light Emitting Diodes) are a staple component for makers of all experience levels, handy for indication, feedback or just for a fun bit of blinky!
LEDs come in all sorts of shapes, sizes and ratings, and are everywhere in our daily lives – in your PC, your home, car dashboard, vending machines, spaceships and more.
Let's go ho ho!
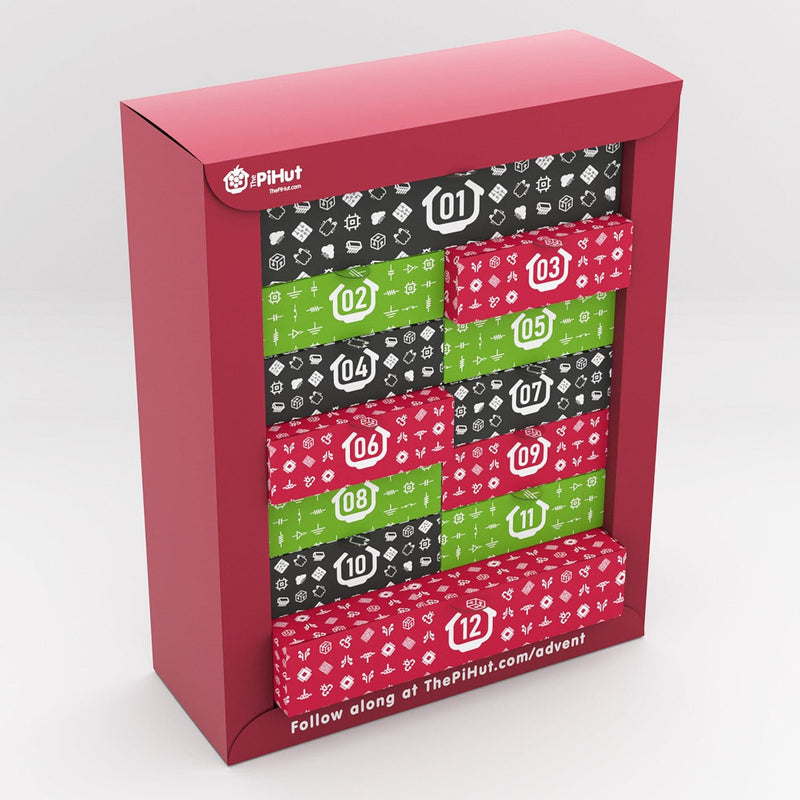
Box #2 Contents
In this box you will find:
- 1x 5mm Red LED (with a clear lens)
- 1x 5mm Amber LED (with a clear lens)
- 1x 5mm Green LED (with a clear lens)
- 3x 330 ohm resistors
- 4x Male to male jumper wires

Today’s Projects
Today we’ll be programming LEDs to light up, flash and display sequences, building on yesterday’s code using GPIO pins to control them.
We'll also be learning some new functions in MicroPython to introduce some new elements to your code. The box includes three different colours to allow us to have some fun making light patterns.
What is an LED?
An LED is a Light Emitting Diode. These components emit light when electrical current flows through them.
Our LEDs have two legs, one longer than the other, as they have a specific polarity - which means that electrical current can only flow in one direction (and if not, the LEDs can be damaged!).
The long leg is the Anode (+) and the short leg is the Cathode (-). Current must always flow from the anode to the cathode, so be sure to read our wiring instructions below carefully to make sure you get this bit right.
Resistors
LEDs usually require a current-limiting resistor when using them with a microcontroller.
Resistors limit the amount of current that can pass through a circuit, which helps avoid the LED trying to pull more current than our Pico's GPIO pins can safely provide, and equally protects the LED from too much current.
It doesn't matter which side of the LED the resistor sits, as long as it's there limiting the flow of current for the entire circuit (take a look at the comment section for an example).
Raspberry Pi Pico Pin Map
Here’s a simplified map of the pins on the Pico (known as a ‘pinout’) to help you with the next steps and the rest of the calendar.
The numbers in the grey squares are the physical pin numbers which are numbered in order around the board. The GPIO pin numbers which we use in our code are in green. You can also download the full PDF version here.

Construct the Circuit
First, make sure your Pico is disconnected from the USB cable. You should always do this when amending a circuit. Then grab the set of jumper wires, resistors and LEDs.
Breadboards
We're going to be adding components to our breadboard. Breadboards allow you to connect and prototype a circuit without soldering, using wires with pins at the end called jumper wires (sometimes called DuPont wires).
These breadboards have two sets of horizontal channels (red/blue) on both sides. All the red pins are connected, as are the blue (but each side is disconnected from the other). We use these to create 'rails' of connections for us to use, such as Ground (GND) for the blue channel and 3.3V for the red.
The holes in the middle are connected in vertical lanes, with each lane having 5 connected pins either side of the divider. The divider stops both sides connecting together.
The Circuit
Place the three LEDs into the lower section of the breadboard, 1 hole apart, with the longest leg to the right as seen in the image below.
You won't know which colour is which yet as these LEDs have clear lenses, but that doesn't matter and we'll come back that in a moment. Your breadboard should look like this:

Tip: The short leg is the Cathode (-) and the long leg is the Anode (+).
We now need to add a resistor to limit the current that the LED can draw from our GPIO pins.
Place a resistor between the left leg of each LED and the lower blue channel, like below. We'll be connecting that blue channel to a Ground (-) pin shortly.

Now grab the jumper wires. You need one wire connecting the blue channel to a Ground pin on your Pico – we suggest using physical pin 38 like we’ve done in the diagram below (remember to refer to the Pico pinout if you need a reminder).
You also need to connect the right leg of each LED leg to a GPIO pin. Use GPIO18 (physical pin 24) for Red, GPIO19 (physical pin 25) for Amber, and GPIO20 (physical pin 26) for Green, like the diagram below.
Tip: It doesn't matter what colour jumper wires you use, they all work the same way. In an ideal world we would reserve black for ground connections and red for voltage, but for simple projects it's not essential.

Everything’s hooked up – let’s code some blinky!
Activity 1: Light each LED
A simple exercise first, using some of the code we learnt yesterday. We’re going to light each LED, wait 5 seconds, then turn them off. To do this we need to introduce a new module to you: time.
Note: assuming you turned off your computer after yesterday’s box, you may need to jump back into Thonny and select Run > Configure interpreter again to tell it which device we’re playing with.
The Time Module
The time module allows you to program delays in your code, making it wait for seconds or fractions of seconds before continuing. It’s another fundamental module you’ll use in most of your projects.
The Code
Our code imports pin again, and also imports time. We then define the pin number for each colour of LED (giving them a sensible name for each) and set them to outputs.
After that it’s a simple case of setting each LED pin HIGH, waiting for 5 seconds using time.sleep(5), then setting them all LOW again.
Here’s the code to copy into Thonny and then run in the usual way by hitting the green button. Once you've lit each LED and know which colour is which, unplug your USB cable and rearrange them to get them in the right order of green/amber/red:
from machine import Pin
import time

red = Pin(18, Pin.OUT)
amber = Pin(19, Pin.OUT)
green = Pin(20, Pin.OUT)

red.value(1)
amber.value(1)
green.value(1)

time.sleep(5)

red.value(0)
amber.value(0)
green.value(0)
Activity 2: Flashing LEDs
Let’s make things a little more interesting by making our LEDs flash!
To do this, we need to introduce while loops into our code. Technically you could just repeat the ON/OFF code above, but that would make your code very long indeed and would eventually end, so let's look at a better way (but perhaps not the best way...we'll show you another way in a future box once we've got the hang of MicroPython).
We also need to introduce variables, indentation and code commentary...
While Loops
While loops are used to repeat a block of code as long as the condition remains true.
Imagine you’re bouncing a ball whilst your friend counts how many bounces you’ve completed. Your condition might be “bounce the ball until you count five bounces”. After five bounces, you would stop.
We can tell a while loop to run a block of code until a count or certain condition is met, or we can just make it repeat forever by using 'while True' which is useful for projects intended to keep running.
So, we’re now going to make our LEDs flash 10 times then stop, and we'll show you how in just a moment.
Code Commentary
We’re also going to start adding commentary in our code examples.
You can add comments in MicroPython code by adding a # before the comment. This will be ignored by MicroPython.
Adding commentary makes explaining your code easier to others or even as a reminder to yourself when you return to a project a number of weeks or months later. It’s a very good habit to get in to and allows us to explain each line clearly:

Variables
A variable is just somewhere to store a value (a 'container'), which we can also update when we want to. When we need to use the variable in a line of code, we just use its name.
In our example below our variable is called counter. We create this before the while loop and set an initial value of 1.
In programming, a variable can be a whole number (an 'integer'), a number with a decimal place (a 'floating-point value' or 'float') or a word/text (a 'string').
Indentation
Our while loop says “If the counter is less than 11, run the the code indented below”.
Indentation is a gap at the front of a line of code, usually a tab space or a number of spaces. It's very important in MicroPython as it tells Thonny that the lines belong to a particular block of code (in our example below, we've indented the lines under the while loop as the code belongs to that loop).
The Code
The code below first imports the things we need as always, sets our pin numbers as we've done before, then creates a variable called ‘counter’ which we’ll use to count how many times we’ve run the block of code.
We start a while loop using while counter < 11: which is saying "while the counter variable is less than 11...".
Our code prints the counter to help us see the value changing in Thonny, then simply turns all the LEDs off then on again, with half-second pauses in-between. Without the pauses, it would be so fast we wouldn’t see the flashes!
At the end of the block we add +1 to our counter, then it starts the loop again. As soon as that counter variable reaches 11, the loop stops running and the program ends.
Copy this code over to Thonny and run it in the usual way using the green button:
# Imports
from machine import Pin
import time

#Set up our LED names and GPIO pin numbers
red = Pin(18, Pin.OUT)
amber = Pin(19, Pin.OUT)
green = Pin(20, Pin.OUT)

counter = 1 # Set the counter to start at 1

while counter < 11: # While count is less than 11...

    print(counter) # Print the current counter

    # LEDs all on
    red.value(1)
    amber.value(1)
    green.value(1)

    time.sleep(0.5) # Wait half a second

    # LEDs all off
    red.value(0)
    amber.value(0)
    green.value(0)

    time.sleep(0.5) # Wait half a second

    counter += 1 # Add 1 to our counter
Try changing both of the time.sleep values to different numbers and see what happens. It should change the speed of the flashing LEDs.
You can also change the while loop to run forever. Swap the line out with the line below to give that a try - the counter will still continue to increase and print but won't change what the code does:
while True:
Activity 3: LED Sequence
We’re now going to make our LEDs flash one after the other in a sequence – yes, like a festive decoration!
Whilst there are more advanced ways of achieving this (using lists for example which we'll cover in a future box), we’re going to keep things simple whilst we continue to learn MicroPython.
The program for this is very similar, however we change the LED control section to turn each LED on one by one, turning off the others as we go.
Try the code below, paying attention to the OFF/ON comments next to each LED control line:
# Imports
from machine import Pin
import time

#Set up our LED names and GPIO pin numbers
red = Pin(18, Pin.OUT)
amber = Pin(19, Pin.OUT)
green = Pin(20, Pin.OUT)

counter = 1 # Set the counter to 1

while counter < 11: # While count is less than 11

    print(counter) # Print the current counter

    # Red ON
    red.value(1) # ON
    amber.value(0) # OFF
    green.value(0) # OFF

    time.sleep(0.5) # Wait half a second

    # Amber ON
    red.value(0) # OFF
    amber.value(1) # ON
    green.value(0) # OFF

    time.sleep(0.5) # Wait half a second

    # Green ON
    red.value(0) # OFF
    amber.value(0) # OFF
    green.value(1) # ON

    time.sleep(0.5) # Wait half a second

    counter += 1 # Add 1 to our counter
Day #2 Complete!
Another great day of learning how to code with the Raspberry Pi Pico and MicroPython! Today you have:
- Created your first circuit!
- Learnt how to use the time module to add delays to programs
- Learnt how to use while loops and conditions
- Learnt about variables (our counter)
- Learnt about code commentary
- Created a dashing, flashing sequence of LEDs
Please do not disassemble the circuit as we're going to be using it again with the contents in the next box...see you all tomorrow!
We used Fritzing to create the breadboard wiring diagram images for this page.


63 comments
Alan Breward
I managed to complete and finish with LED’s “OFF”
Importsfrom machine import Pin
import time
#Set up our LED names and GPIO pin numbers
red = Pin(18, Pin.OUT)
amber = Pin(19, Pin.OUT)
green = Pin(20, Pin.OUT)
counter = 1 # Set the counter to 1
while counter < 11: # While count is less than 11
print(counter) # Print the current counter Red ONred.value(1) # ON
amber.value(0) # OFF
green.value(0) # OFF time.sleep(0.5) # Wait half a second Amber ON
red.value(0) # OFF
amber.value(1) # ON
green.value(0) # OFF time.sleep(0.5) # Wait half a second Green ON
red.value(0) # OFF
amber.value(0) # OFF
green.value(1) # ON time.sleep(0.5) # Wait half a second green.value(0) # OFF counter += 1 # Add 1 to our counter
print (“HAPPY BOY”)
Alan Breward
From Grandad, Please.
How do I clear all LEDs to 0 after a count of 10 cycles?
As I have the Green LED still “lit”
From Grandad, Please.
How do I clear all LEDs to 0 after a count of 10 cycles?
As I have the Green LED still “lit”
The Pi Hut
@Steve – We did change the approach a little in our second calendar (“Let it Glow”). We use a single chunky LED for example, rather than having a few small ones that some find fiddly. We also cut back on resistors on one of the days by using an easier-to-fit ‘network resistor’. Appreciate the feedback, we’re always improving :)
@Steve – We did change the approach a little in our second calendar (“Let it Glow”). We use a single chunky LED for example, rather than having a few small ones that some find fiddly. We also cut back on resistors on one of the days by using an easier-to-fit ‘network resistor’. Appreciate the feedback, we’re always improving :)
The Pi Hut
@Luke – We have a section on the Pico pinout before you start wiring anything up, to share the pin numbers and diagram. You’ll see that it says: “The numbers in the grey squares are the physical pin numbers which are numbered in order around the board. The GPIO pin numbers which we use in our code are in green.”.
Re the resistors, we could get into ohms law and have a section explaining exactly why we chose the specific values in the box, but we’re trying to hit that balance between ‘scary offputting detail overload on the second day’ and ‘something simple and informative’. We chose to keep this part high-level and just explain what resistors do.
Luke
i wish it explained why each socket was chosen, or even what the numbers mean…
“Now grab the jumper wires. You need one wire connecting the blue channel to a Ground pin on your Pico – we suggest using physical pin 38 like we’ve done in the diagram below (remember to refer to the Pico pinout if you need a reminder).
You also need to connect the right leg of each LED leg to a GPIO pin. Use GPIO18 (physical pin 24) for Red, GPIO19 (physical pin 25) for Amber, and GPIO20 (physical pin 26) for Green, like the diagram below.”
you lost me… none of those numbers (18, 24, 19, 25…) are pictured in the diagram, or in the text above. How do you decide where to put each one? why did you choose the resistors, and how did you know which ones are right for the LEDs?
Steve
Good project for day 2! The boy hates being dragged off his screens to engage with this, but once he’s got some lights flashing, he’s off, changing delay rates and sequences, thinking about how it could “play a beat” with the right delay values.
I share @Elizabeth’s issue. I noticed both that the legs on the resistors were somewhat thin and that the breadboard was somewhat stiff in accepting components. Compared to the other breadboards and resistors I have kicking around in the den, this was a fiddlier build than it needed to be for small, unfamiliar fingers. If iterating on the design, I’d look at that for next year and for any other my first breadboard type offerings. Looking forward to “tomorrow’s” project (where “tomorrow” means “next time I can bully him to get off roblox for 30 mins” :-) )
The Pi Hut
@Elizabeth – They can break eventually after a lot of use (they’re almost a consumable in a way), but not usually this quickly. You will get more most days so you’ll have enough for the calendar, however we can help with some replacements if you send us a quick message via support.thepihut.com
@Elizabeth – They can break eventually after a lot of use (they’re almost a consumable in a way), but not usually this quickly. You will get more most days so you’ll have enough for the calendar, however we can help with some replacements if you send us a quick message via support.thepihut.com
Elizabeth
Just starting on this today in the run up to Christmas, and one of the jumper cables pins snapped when I tried to put it into the breadboard. Not sure I can do day 2 now? Any way to fix?
Thanks
Just starting on this today in the run up to Christmas, and one of the jumper cables pins snapped when I tried to put it into the breadboard. Not sure I can do day 2 now? Any way to fix?
Thanks
Richard
Some randomness :-)
Importsfrom machine import Pin
import time
import random as rnd
#Set up our LED names and GPIO pin numbers
red = Pin(18, Pin.OUT)
amber = Pin(19, Pin.OUT)
green = Pin(20, Pin.OUT)
counter = 1 # Set the counter to 1
while counter < 100: # While count is less than 11
print(counter) # Print the current counter Red ONred.value(rnd.randint(0,1)) # ON
amber.value(rnd.randint(0,1)) # OFF
green.value(rnd.randint(0,1)) # OFF time.sleep(0.1) # Wait half a second Amber ON
red.value(rnd.randint(0,1)) # OFF
amber.value(rnd.randint(0,1)) # ON
green.value(rnd.randint(0,1)) # OFF time.sleep(0.1) # Wait half a second Green ON
red.value(rnd.randint(0,1)) # OFF
amber.value(rnd.randint(0,1)) # OFF
green.value(rnd.randint(0,1)) # ON time.sleep(0.1) # Wait half a second counter += 1 # Add 1 to our counter
CL4W
I just made a simple traffic light example using a function to reduce the number of times I type red.value and sleep. Go me! :-)
from machine import Pin
import time
amber = Pin(18, Pin.OUT)
red = Pin(19, Pin.OUT)
green = Pin(20, Pin.OUT)
light_delay = 3 # seconds
def traffic_light(r, a, g):
red.value®
amber.value(a)
green.value(g)
time.sleep(light_delay)
counter = 1
while counter <11:
traffic_light(1, 0, 0) traffic_light(1, 1, 0) traffic_light(0, 0, 1) traffic_light(0, 1, 0) counter += 1print(counter)
Darian
I wrote a program that counts in binary using the lights!
from machine import Pin
import time
red = Pin(18, Pin.OUT)
amber = Pin(19, Pin.OUT)
green = Pin(20,Pin.OUT)
onboardLED = Pin(25, Pin.OUT)
red.value(0)
amber.value(0)
green.value(0)
onboardLED .value(0)
def binaryByLED(myInteger):
green.value(int(BinaryInt[5:6])) #The 2^0 column amber.value(int(BinaryInt[4:5])) #The 2^1 column red.value(int(BinaryInt[3:4])) #The 2^2 column onboardLED.value(int(BinaryInt[2:3])) #The 2^3 columnmod16Integer = myInteger % 16
BinaryInt = “0b” + (“0000” + (bin(mod16Integer)[2:]))[-4:]
print(str(myInteger) + " mod 16 is " + str(mod16Integer) + " which is " + BinaryInt + " in binary.")
counter = 0
sleeptime = 0.5
print(“Lets do some binary counting!”)
while True:
time.sleep(sleeptime) counter += 1binaryByLED(counter)
Richard Smith
‘use a jumper wire- poking it in the hole to ‘re-seat’ the internals of the breadboard’ <- Best advice ever :) Made things so much easier, thank you.
‘use a jumper wire- poking it in the hole to ‘re-seat’ the internals of the breadboard’ <- Best advice ever :) Made things so much easier, thank you.
igi
from machine import Pin
import time
red = Pin(18, Pin.OUT)
amber = Pin(19, Pin.OUT)
green = Pin(20, Pin.OUT)
for i in range(1000):
red.value(not bool(i%3))
amber.value(not bool((i+1)%3))
green.value(not bool((i+2)%3))
time.sleep(0.1)
red.value(0)
amber.value(0)
green.value(0)
from machine import Pin
import time
red = Pin(18, Pin.OUT)
amber = Pin(19, Pin.OUT)
green = Pin(20, Pin.OUT)
for i in range(1000):
red.value(not bool(i%3))
amber.value(not bool((i+1)%3))
green.value(not bool((i+2)%3))
time.sleep(0.1)
red.value(0)
amber.value(0)
green.value(0)
Matt
@Tracey Nettleship
This diagram might help explain how breadboards are wired underneath:
https://wiring.org.co/learning/tutorials/breadboard/
@Tracey Nettleship
This diagram might help explain how breadboards are wired underneath:
https://wiring.org.co/learning/tutorials/breadboard/
The Pi Hut
@Tracey Nettleship – You don’t need to re-install MicroPython every time you fire up the Pico, it should just be there ready to go every time you plug it in. If not, you may find that pressing the red stop button will get Thonny to refresh and see the board.
@Tracey Nettleship – You don’t need to re-install MicroPython every time you fire up the Pico, it should just be there ready to go every time you plug it in. If not, you may find that pressing the red stop button will get Thonny to refresh and see the board.
The Pi Hut
@Zac Meir – this is very normal as the internals of the breadboard can shift around through use. You’ll find most makers just move to a different set of holes on the breadboard, or use a jumper wire- poking it in the hole to ‘re-seat’ the internals of the breadboard (a little twist/rotation can help).
@Zac Meir – this is very normal as the internals of the breadboard can shift around through use. You’ll find most makers just move to a different set of holes on the breadboard, or use a jumper wire- poking it in the hole to ‘re-seat’ the internals of the breadboard (a little twist/rotation can help).
Zac Meir
Sorry for the inconvenience, but when I try to place transistors into the breadboard, the legs just bend. If I try and place it into one of the outer rows, it is fine, and it seems that it is only that one row that does not allow me to connect the transistor to. What should I do?
Sorry for the inconvenience, but when I try to place transistors into the breadboard, the legs just bend. If I try and place it into one of the outer rows, it is fine, and it seems that it is only that one row that does not allow me to connect the transistor to. What should I do?
Tracey Nettleship
Have just finished day 2 and am having a blast with it. I did need the extra code to turn off my final light so I am glad that was in the comments. I would also like to see how the wiring works under the breadboard to help me understand what I am doing with the connections. Also, I probably sound like an idiot here, but do I need to re install Python every time I unplug the micro controller? Thanks :)
Have just finished day 2 and am having a blast with it. I did need the extra code to turn off my final light so I am glad that was in the comments. I would also like to see how the wiring works under the breadboard to help me understand what I am doing with the connections. Also, I probably sound like an idiot here, but do I need to re install Python every time I unplug the micro controller? Thanks :)
The Pi Hut
@Martyn @Emma @Janice @Robert – Sorry about that, please get in touch with our support team via support.thepihut.com and we’ll help with replacements
@Martyn @Emma @Janice @Robert – Sorry about that, please get in touch with our support team via support.thepihut.com and we’ll help with replacements
Janice Davey
hi, really loving this however, our PicoH stopped working after the second day. We’ve only just got around to doing it due to sickness over christmas but were really enjoying it. We can connect it to Thonny but it’s now not lighting any leds etc. HELP please :)
hi, really loving this however, our PicoH stopped working after the second day. We’ve only just got around to doing it due to sickness over christmas but were really enjoying it. We can connect it to Thonny but it’s now not lighting any leds etc. HELP please :)
SM
from machine import Pin
import time, random
LEDS = [Pin(18,Pin.OUT),Pin(19,Pin.OUT),Pin(20,Pin.OUT)]
states = [0,0,0]
delay = 0.5
while True:
for index,LED in enumerate(LEDS): delay = random.uniform(0.1,1) index = random.randint(0,len(LEDS)-1) changeStateTo = 0 if(states[index] == 0 ): changeStateTo = 1 states[index] = changeStateTo LEDS[index].value(changeStateTo) time.sleep(delay)from machine import Pin
import time, random
LEDS = [Pin(18,Pin.OUT),Pin(19,Pin.OUT),Pin(20,Pin.OUT)]
states = [0,0,0]
delay = 0.5
while True:
for index,LED in enumerate(LEDS): delay = random.uniform(0.1,1) index = random.randint(0,len(LEDS)-1) changeStateTo = 0 if(states[index] == 0 ): changeStateTo = 1 states[index] = changeStateTo LEDS[index].value(changeStateTo) time.sleep(delay)Emma Johnson
We are just starting this kit this week, as daughter got it for Xmas, but was then away.
Our day 2 pack only has two LEDs, not 3. We are missing the yellow/Amber one.
We are just starting this kit this week, as daughter got it for Xmas, but was then away.
Our day 2 pack only has two LEDs, not 3. We are missing the yellow/Amber one.
Martyn
Hello guys,
Little late to the party but just started going through this now. Ive opened day two to find I have the 4 jumper wires, but nothing else at all.
Hello guys,
Little late to the party but just started going through this now. Ive opened day two to find I have the 4 jumper wires, but nothing else at all.
Robert
This set is really awesome and my son (7) really is loving it. The best intro to coding and electronics that I have found so far!
We were however a little disappointed to find two amber LEDs in our set. Fortunately, I have some red ones at my office but thought you guys should know.
I also live in Europe (Poland) and had to pay an extra ~£10 for import when I picked it up from the post office which was rather annoying.
Despite this, it is great and I am a huge supporter of you guys for building such a great intro set!
The Pi Hut
@Roby That will happen as we keep these early examples as simple/short as possible with nothing to handle what happens when the sequence ends. If you want to turn all LEDs off after the sequence, just add the following at the bottom of the code (not indented/within the while loop:
red.value(0)
amber.value(0)
green.value(0)
The while loop will run and then end, then after this, it will run any code below it, which will then turn all your LEDs off if you add this at the bottom.
Roby
Hi,
I got a problem with the sequences code.
The code runs smooth, but, when the counter is finished, my green LED light stays on forever.
I use the code from this site i copied.
Hi,
I got a problem with the sequences code.
The code runs smooth, but, when the counter is finished, my green LED light stays on forever.
I use the code from this site i copied.
The Pi Hut
@Roz W-M – Sorry about that, sounds like a packing error. If you wouldn’t mind sending us a quick message via support.thepihut.com, we’ll get a replacement pack sent out to you.
@Roz W-M – Sorry about that, sounds like a packing error. If you wouldn’t mind sending us a quick message via support.thepihut.com, we’ll get a replacement pack sent out to you.
Mark Jeffery
I wrote a traffic lights program!
from machine import Pin
import time
red = Pin(18, Pin.OUT)
amber = Pin(19, Pin.OUT)
green = Pin(20, Pin.OUT)
for i in range(1,20):
print(“Stop”)
red.value(1)
amber.value(0)
green.value(0)
time.sleep(5)
print(“Get Ready to go”)
red.value(1)
amber.value(1)
green.value(0)
time.sleep(1)
print(“go!!!!”)
red.value(0)
amber.value(0)
green.value(1)
time.sleep(5)
print(“Slow down!”)
green.value(0)
amber.value(1)
time.sleep(1)
Roz W-M
My box had three resistors but only 2 LEDs (Amber and green). Not a huge issue as I have plenty lying around – there are uses being an electronic engineer but a disappointment for my son as mine are the coloured dome rather than clear dome LEDs.
My box had three resistors but only 2 LEDs (Amber and green). Not a huge issue as I have plenty lying around – there are uses being an electronic engineer but a disappointment for my son as mine are the coloured dome rather than clear dome LEDs.
Jason Jhuboo
Got the box set on Christmas day – having great fun with it. I’m not python expert, but I managed to make some festive Christmas lights using this code:
#
Importsfrom machine import Pin
import time
#Set up our LED names and GPIO pin numbers
red = Pin(18, Pin.OUT)
amber = Pin(19, Pin.OUT)
green = Pin(20, Pin.OUT)
counter = 1 # Set the counter to 1
for y in range(0, 100):
time.sleep(0.10)red.value(y % 3 == 0);
amber.value(y % 3 == 1);
green.value(y % 3 == 2);
ERobbins
Is there by chance a wiring diagram for this circuit? Just want to see how it would look, I think I have an idea but wanted to confirm if my thinking was right.
Either way been having a great time going through this activity!
Is there by chance a wiring diagram for this circuit? Just want to see how it would look, I think I have an idea but wanted to confirm if my thinking was right.
Either way been having a great time going through this activity!
LED
Cool code
from machine import Pin
import time
red_ongus = Pin(18, Pin.OUT)
amber_bugus = Pin(19, Pin.OUT)
green_among = Pin(20, Pin.OUT)
loop codecounter1 = 0
while counter1 < 5:
counter = 1 while counter < 5: red_ongus.value(1) amber_bugus.value(0) green_among.value(0) print(counter) time.sleep(0.5) red_ongus.value(0) amber_bugus.value(1) green_among.value(0) print(counter) time.sleep(0.5) red_ongus.value(0) amber_bugus.value(0) green_among.value(1) print(counter) time.sleep(0.5) counter=counter+1 counter=0 while counter < 5: red_ongus.value(1) amber_bugus.value(1) green_among.value(1) time.sleep(0.5) red_ongus.value(0) amber_bugus.value(0) green_among.value(0) time.sleep(0.5) counter=counter+1 counter1+=1Cool code
from machine import Pin
import time
red_ongus = Pin(18, Pin.OUT)
amber_bugus = Pin(19, Pin.OUT)
green_among = Pin(20, Pin.OUT)
loop codecounter1 = 0
while counter1 < 5:
counter = 1 while counter < 5: red_ongus.value(1) amber_bugus.value(0) green_among.value(0) print(counter) time.sleep(0.5) red_ongus.value(0) amber_bugus.value(1) green_among.value(0) print(counter) time.sleep(0.5) red_ongus.value(0) amber_bugus.value(0) green_among.value(1) print(counter) time.sleep(0.5) counter=counter+1 counter=0 while counter < 5: red_ongus.value(1) amber_bugus.value(1) green_among.value(1) time.sleep(0.5) red_ongus.value(0) amber_bugus.value(0) green_among.value(0) time.sleep(0.5) counter=counter+1 counter1+=1The Pi Hut
@Matthew Hmm that’s a new one. We’ve had a look around online but most of the reports of that error are when users are using the WebREPL. My first instinct (considering the lack of obvious causes from search results) would be to uninstall and re-install Thonny again, then perhaps try an alternative machine if you have access to one (just to rule out any kind of hardware error on the Pico or USB cable).
@Matthew Hmm that’s a new one. We’ve had a look around online but most of the reports of that error are when users are using the WebREPL. My first instinct (considering the lack of obvious causes from search results) would be to uninstall and re-install Thonny again, then perhaps try an alternative machine if you have access to one (just to rule out any kind of hardware error on the Pico or USB cable).
Matthew
Hi ,
I keep getting the error message below despite hard reset. Day# 3 .Any idea as to the cause?
>>> %Run -c $EDITOR_CONTENT
PROBLEM IN THONNY’S BACK-END: Exception while handling ‘Run’ (ConnectionError: EOF).
See Thonny’s backend.log for more info.
You may need to press “Stop/Restart” or hard-reset your MicroPython device and try again
AndrewC
My advent calendar arrived and I have a big smile on my face. I am a teacher and used many different microcontrollers in the past. I am finally learning about the 2040! Great instructions so far.
@thepihut – having a sideview photo of the 2040 seated on a breadboard would help beginners know how it should be seated. Lots of folks new to ucontrollers are timid about pushing down hard on a new setup to open up the breadboard clips.
To those with cables a bit too tight, you will appreciate the snugness later when they start to loosen up and connections don’t work properly. Just keep wiggling for now!
The Pi Hut
@Simon – Yes our Picos are the same. Given the choice, we prefer a tight fit as we tend to leave that end plugged in and just move the USB-A side between computers (plus it means a solid connection so one less place to look when a project isn’t behaving). It should get a little looser over time.
@Simon – Yes our Picos are the same. Given the choice, we prefer a tight fit as we tend to leave that end plugged in and just move the USB-A side between computers (plus it means a solid connection so one less place to look when a project isn’t behaving). It should get a little looser over time.
The Pi Hut
@Joe – Have you pushed the Pico fully into the breadboard so that you can’t see any of the metal legs? The black plastic section should sit flush with the top of the breadboard. Breadboards aren’t ever perfect (we find they sometimes need a wiggle here and there) but usually the metal internals settle into place after a few uses.
@Joe – Have you pushed the Pico fully into the breadboard so that you can’t see any of the metal legs? The black plastic section should sit flush with the top of the breadboard. Breadboards aren’t ever perfect (we find they sometimes need a wiggle here and there) but usually the metal internals settle into place after a few uses.
Joe Edwards
The connectors to the breadboard are giving trouble. I can connect to GPIO18 but 19 and 20 are giving lots of trouble. I used 12 and 13 instead and this works but the patch cables don’t seem to connect properly. Also the weight of the USB cable means that it pulls the PICO out of the board if you move it so I currently have it fixed with two rubber bands. I like the tutorial but the hardware be a real pain to a child or a beginner without my 78 years of experience. I may comment later on PYTHON but so far (day 3) the code is simple and clear.
The connectors to the breadboard are giving trouble. I can connect to GPIO18 but 19 and 20 are giving lots of trouble. I used 12 and 13 instead and this works but the patch cables don’t seem to connect properly. Also the weight of the USB cable means that it pulls the PICO out of the board if you move it so I currently have it fixed with two rubber bands. I like the tutorial but the hardware be a real pain to a child or a beginner without my 78 years of experience. I may comment later on PYTHON but so far (day 3) the code is simple and clear.
Simon
Is it normal for the PICO’s USB port to be such a tight fit for the cable? I mean it is a really tight fit and takes a lot of wiggling to get the cable in and out :(
Is it normal for the PICO’s USB port to be such a tight fit for the cable? I mean it is a really tight fit and takes a lot of wiggling to get the cable in and out :(
The Pi Hut
@Tom – Sorry about this, looks like a packing error. If you can fire over a quick message to support.thepihut.com, Billie will get a replacement pack sent out to you ASAP. Sorry for the inconvenience :(
@Tom – Sorry about this, looks like a packing error. If you can fire over a quick message to support.thepihut.com, Billie will get a replacement pack sent out to you ASAP. Sorry for the inconvenience :(
Tom LC
Hi
My day 2 box seems to be missing the LEDs and resistors.
Tom
Hi
My day 2 box seems to be missing the LEDs and resistors.
Tom
The Pi Hut
@Ben Thanks for your comment, and we agree! We’re purposely being excessive with the code comments to ensure there’s no confusion about what each line does to those who are very new to this. This came up in our testing, where one of our less-experienced testers mentioned that they preferred to run the code and read the comments first, rather than reading the descriptions – just their preferred learning style. We hope this approach caters for everyone. Thanks again.
@Ben Thanks for your comment, and we agree! We’re purposely being excessive with the code comments to ensure there’s no confusion about what each line does to those who are very new to this. This came up in our testing, where one of our less-experienced testers mentioned that they preferred to run the code and read the comments first, rather than reading the descriptions – just their preferred learning style. We hope this approach caters for everyone. Thanks again.
Ben
Really enjoying playing with electronics — takes me back to when I studied GCSE electronics in school!
I’m not sure about the section on “code commentary” — it feels like the comments are simply repeating what the code says (e.g. “counter = 1 # Set the counter to start at 1”). In my opinion this is bad practice — if the code can explain itself (and Micro Python makes this quite easy) then it should — otherwise the code and the comments can disagree. See also thoughts from “Uncle Bob” on comments: either in video form (https://www.youtube.com/watch?v=2a_ytyt9sf8&t=296s) or within his book, “Clean Code”.
Andy Lakin-Hall
I’m working through the projects and did box 2 today. My 18yo disappeared for half an hour with it and proudly came back with a text to morse code converter. “I did this project in computer science last year, but I was able to use the code ‘cos it’s Python and it’s better with the lights.”
My plan to get him interested in digital control is working! Thanks PiHut.
Si
Brilliant stuff – a big kid here (35 and first time coding!) and absolutely loving it. Great instructions and easy to follow. Even tweaked the final program to turn off all LEDS at the end… simple things please simple minds but definitely teaching a (slightly) old dog new tricks! Here’s to tomorrow :)
Brilliant stuff – a big kid here (35 and first time coding!) and absolutely loving it. Great instructions and easy to follow. Even tweaked the final program to turn off all LEDS at the end… simple things please simple minds but definitely teaching a (slightly) old dog new tricks! Here’s to tomorrow :)
Fran
Running a couple of days behind, fun little distraction, I have updated your code a little to turn it into a UK traffic light, even threw in the random module to make it a little more unpredictable
https://github.com/frantek/PiHut-Advent/blob/master/Day%202/led_traffic.py
Hopefully that will give people some more ideas
The Pi Hut
@Gerald Dachs Oh dear :( sorry about that. If you can send us a quick message via support.thepihut.com, Billie will get a replacement pack sent out to you ASAP. Don’t worry, you will still be able to complete the upcoming boxes and activities whilst we get the right colour LEDs out to you.
@Gerald Dachs Oh dear :( sorry about that. If you can send us a quick message via support.thepihut.com, Billie will get a replacement pack sent out to you ASAP. Don’t worry, you will still be able to complete the upcoming boxes and activities whilst we get the right colour LEDs out to you.
The Pi Hut
@Eric Glad your daughter is enjoying it :) We’re using variables for the time delay in one of the next boxes (where we use a time delay in multiple lines to make updates quicker/easier). The aim is to gradually increase the complexity and number of ‘things going on’ as we progress through each day :)
@Eric Glad your daughter is enjoying it :) We’re using variables for the time delay in one of the next boxes (where we use a time delay in multiple lines to make updates quicker/easier). The aim is to gradually increase the complexity and number of ‘things going on’ as we progress through each day :)
Eric
Hi,
Great exercise, my daughter liked it a lot!
I would suggest to define another variable for the sleep time (wait = 1 for example) in the time.sleep(wait) command, indeed it’s funny for children to discover the impact of the wait time modification!
Hi,
Great exercise, my daughter liked it a lot!
I would suggest to define another variable for the sleep time (wait = 1 for example) in the time.sleep(wait) command, indeed it’s funny for children to discover the impact of the wait time modification!
Paul
I’m not new to coding or circuits, so I created a traffic light sequence, and learned about Tuples in the process! These projects offer challenge to everyone including people with previous experience – it’s just brilliant!
I’m not new to coding or circuits, so I created a traffic light sequence, and learned about Tuples in the process! These projects offer challenge to everyone including people with previous experience – it’s just brilliant!