 Skip to content

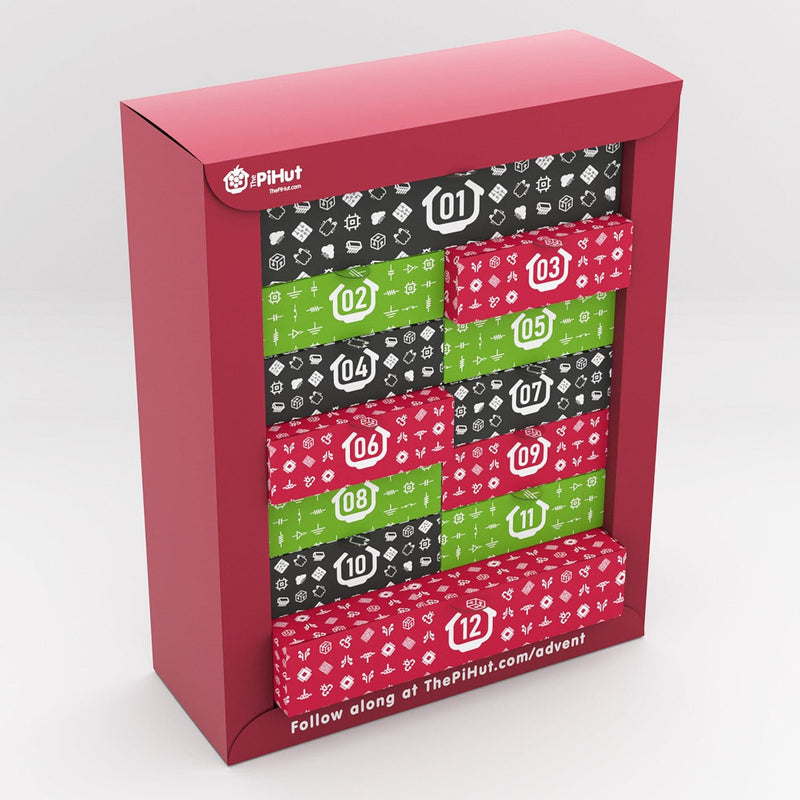
Maker Advent Calendar Day #12: RGB LED Strip!
It’s the final day of your 12 Projects of Codemas Advent Calendar! Today we're playing with an RGB LED Strip, but these aren't regular LEDs, these are addressable LEDs - meaning we can code all sorts of colours, patterns and sequences!
Time for some ultra-festive blinky!
Warning: Some of today's activities contain flashing lights which may not be suitable for those with photosensitive epilepsy.
Box #12 Contents
In this box you will find:
- 1x Custom addressable LED Strip with male jumper wires

Today’s Project
Today's a BIG one! We're going to learn how to light up the LEDs in our strip individually, how to code different colours and colour lists, how to create a light chaser, then a light chaser speed-controller using our potentiometer from day #4, some button colour control then fading effects - PHEW!
Before we start, let's talk about what an addressable LED is...
Addressable RGB LEDs
The LEDs in your strip are WS2812 Addressable LEDs, sometimes called 'NeoPixels' (which is a branded version from our good friends over at Adafruit).
These are are a special kind of LED that actually contain three small LEDs inside each - one red, one green and one blue, which we mix to create lots of different colours with our code. This is why it's called an RGB strip - Red, Green, Blue! We'll talk more about that in a moment.
Each of these LEDs has a tiny controller chip inside that allows us to address (talk to) them individually in our code, unlike more traditional lighting options which light the entire strip in a single colour. However, because of this, they always need a microcontroller to tell them what to do.
With much longer strips you would usually have to worry about external power, resistors and other technicalities, however the compact custom strip in your box is short enough to allow us to avoid all of these distractions. We will be powering it from a different pin this time though, the VBUS pin (physical pin 40) as this will provide the full 5V the strip needs rather than the 3.3V pin we've used so far.
We’ve also had this LED strip made especially for this calendar with handy jumper wires so you don’t need to mess around with connectors and tools.
Step 1: Construct the Circuit
Disconnect your Pico from the USB port on your PC so that it's safe to amend our circuit.
We're starting with a mostly bare breadboard so remove any other parts that may still be in place from yesterday, which should look like this:

Next grab your LED strip and fit the three wires as follows:
- Place the red wire into the VBUS pin (physical pin 40) - NOT the 3V3 pin this time!
- Fit the black wire into the GND pin, which is physical pin 38.
- Fit the green wire to GPIO 28 (physical pin 34)

Next we add one of our buttons and the potentiometer. Fit them to the left of the Pico as shown below - remember that your potentiometer will have a gap between each of the legs unlike our diagram:

Let's wire the button next. Our button will need the usual 3.3V, not the 5V on the VBUS pin we're using for the LED strip:
- Connect the left leg of the button to the upper red channel
- Connect the the right leg of the button to GPIO 15 (Physical pin 20)
- Then use another wire to connect the 3.3V pin (physical pin 36) to the upper red channel

Finally we connect the potentiometer with three wires as follows:
- Connect the left leg to the GND pin on physical pin 18
- Connect the middle leg to GPIO 26 (physical pin 31)
- Connect the right leg to the upper red channel (3.3V)

Activity 1: Minimal Starter Program - One LED
Time to twinkle - plug your Pico back in to the USB port on your computer and we'll get this thing all lit up!
Now, whilst we could just straight into something flashy and colourful with all the bells and whistles, we want to guide you through some easy examples first so you can understand how the code works.
This minimal example lights the first LED in red, just to get to grips with how the library works, which is now included within MicroPython so we don't need to install anything. Handy!
These strips can show lots of different colours as they are RGB strips - let's cover that first.
What is RGB?
RGB stands for Red Green Blue - it's a colour system used in computing to display colours on a computer display.
The three colours can be combined to show a huge range of different colours. With RGB each of the three colours can be set to an intensity value between 0 and 255. As each of the three colours has 255 possible different intensity values, technically there are 16777216 possible colour combinations (although your eyes probably wouldn't notice the difference between a lot of these when they're used with LEDs).
RGB with LEDs
How does this relate to our LED strip? Well, as we mentioned earlier, inside each of these clever LEDs are three smaller LEDS - one red, one green and one blue. We send code to the strip to set the RGB intensity value for each LED allowing it to mix and show different colours. Cool huh?!
There are lots of online tools to help you find the RGB values for your desired colour, such as this handy page from RapidTables. For example, basic red is 255,0,0.
The Code
Our example code imports 'neopixel' which is the name of the library now included in MicroPython to drive these kinds of addressable LEDs.
To set the LED strip up, line 7 sets the pin number for the strip (GPIO28) and the number of LEDs on the strip (15). We can now refer to it using 'strip' in our code.
To send data to the LED strip, we first write what we want it to do, then use strip.write() to send it to the strip - a bit like how our OLED display worked yesterday.
In the example below, we use strip[0] = (255,0,0). The [0] is telling our strip to drive the first LED only, because the first LED starts at 0, the second is 1 and so on. The numbers in the brackets are for the RGB value - we're using 255,0,0 which is red at the brightest intensity.
Copy the example below over to Thonny, run the code, then try the following tasks to get the hang of things:
- Try changing the 255 to 10, what happens? It should reduce the intensity.
- Try changing the RGB value to 0,10,0 - what happens? It should change the colour to green.
- Now try changing the [0] to [7] - what happens? It should light the 8th LED (because remember, the LED numbering starts with 0)
- Use an online RGB colour finder tool to identify and display your favourite colour
# Imports
import time
from machine import Pin
from neopixel import NeoPixel

# Define the strip pin number (28) and number of LEDs (15)
strip = NeoPixel(Pin(28), 15)

# Select the first pixel (pixel 0)
# Set the RGB colour (red)
strip[0] = (255,0,0)

# Send the data to the strip
strip.write()
Activity 2: Using Multiple LEDS
Our next step is to drive more LEDs in our strip. We'll first show you a basic method of doing this, then a more efficient method, and then a much better method which will keep your code nice and compact.
To light more of our LEDs, we need to tell MicroPython which LEDs we want to send data to. So far we've only told MicroPython to light up LED 0 (the first LED).
A Basic Method
A basic way to do this is to just add more lines, changing the [0] to whatever number LED we want to light up.
The example below does exactly this, which will light up the first five LEDs in red on your strip. Give it a try then keep adding additional lines until you have a line for each of the 15 LEDs in the strip. Then we'll show you a better way...
# Imports
import time
from machine import Pin
from neopixel import NeoPixel

# Define the strip pin number (28) and number of LEDs (15)
strip = NeoPixel(Pin(28), 15)

# Select the first pixel (pixel 0)
# Set the RGB colour (red)
strip[0] = (255,0,0)
strip[1] = (255,0,0)
strip[2] = (255,0,0)
strip[3] = (255,0,0)
strip[4] = (255,0,0)

# Send the data to the strip
strip.write()
A Better Method
Let's improve our code to save the number of lines we're using whilst making things a bit clearer.
The only thing our code is changing is the pin number for each of the 15 LEDs, so we can make use of a for loop and the range function that we've used previously.
We use a for loop to iterate over each LED on our strip. We know we have 15 LEDs, so we use for i in range(15): to tell this code block to iterate over a range of 15.
This range (using i) is 'injected' into our LED strip line as we use strip[i] = (255,0,0). It does this for the entire range of 15 LEDs, then once the for loop has completed, the final line writes this data to the strip which makes them all light up.
This still isn't the best way to simply fill the entire strip, but this example will be useful later on when we want to run some effects - so it's a good one to try!
Try the example code below to see for yourself (we went for yellow this time):
# Imports
import time
from machine import Pin
from neopixel import NeoPixel

# Define the strip pin number (28) and number of LEDs (15)
strip = NeoPixel(Pin(28), 15)

# iterate over 15 leds
for i in range(15):

    # Set each LED in the range to yellow
    strip[i] = (255,255,0)

# Send the data to the strip
strip.write()
An Even Better Method!
Want to simply light the entire strip without any flexibility? It's super-simple - just use strip.fill((255,0,0)) and it'll light as many LEDs as you have defined in the setup line (15 for us). Make sure you use two sets of brackets with this one!
Try the simple example below (splash of turquoise anyone?), then have a play around with the RGB colour codes:
# Imports
import time
from machine import Pin
from neopixel import NeoPixel

# Define the strip pin number (28) and number of LEDs (15)
strip = NeoPixel(Pin(28), 15)

# Fill the strip with turquoise
strip.fill((72,209,204))

# Send the data to the strip
strip.write()
Activity 3: Better Colour Management
We now know how to light multiple LEDs, and we know how to create RGB colours. Let's show you a few tricks to help you manage colours a little easier, then we can move on to some really fun stuff!
Your program currently uses the RGB values to set a colour, but when you're looking back and reviewing your code it can be difficult to remember what they are. A better way is to create colour variables with the colour's name.
Colour variables
We've used variables a lot over the last twelve days, so you might already know what to do here but we're going to show you just in case!
We're going to take the example above (activity 2) and add variables for five different colours. We can then use these colours in our LED strip code to easily change the colour by just using the colour's name - such as strip[i] = (red).
Give the code below a try and then try changing the colour name in the brackets to one from our variables:
# Imports
import time
from machine import Pin
from neopixel import NeoPixel

# Define the strip pin number (28) and number of LEDs (15)
strip = NeoPixel(Pin(28), 15)

# Colour variables
red = 255,0,0
green = 0,255,0
blue = 0,0,255
yellow = 255,255,0
pink = 255,20,147

# iterate over 15 leds
for i in range(15):

    # Set each LED in the range to pink
    strip[i] = (pink)

# Send the data to the strip
strip.write()
Colour Lists
Now that we have our colour variables set up, we can also create a list of these colours which we can use later in a for loop to iterate over, allowing us to work through a selection of colours in our code. But what are lists in MicroPython?
Lists
Lists are another handy tool for your MicroPython toolbox. They are essentially a variable with multiple items inside. The items inside can be any data type - strings, integers, variables etc...simple!
Let's run a quick example, then we'll use lists in the next activity.
The short example below creates a list called 'mylist' and includes four strings inside square brackets separated by commas. That's it - lists are as simple as that!
In our example we then print this list by using the list name (variable) in the print line. Pop this into Thonny and give it a try:
mylist = ["Dasher","Dancer","Prancer","Vixen"]

print(mylist)
Activity 4: Light Chaser
Let's step it up a gear and create something really cool - a light chaser. How very festive!
In our example below we've created a list of colour variables called colours. We have also placed our LED code in an endless while loop, which contains a for loop with a nested for loop inside it.
Why use a nested for loop?
A nested for loop allows us to iterate over the colours first, then iterate over the LEDs.
The code is saying "For every colour in the colours list, run my code block" - and that code block then includes another for loop that runs this colour through our range of 15 LEDs. Once the range has run out, it jumps back to the initial for loop for the next colour and does it all over again.
We use j for colours and i for the LED range - if you remember from previous boxes, it doesn't matter what we use here. We could use 'colour' instead of 'j' and 'led' instead of 'i'. There are no rules here, just traditions!
When to Write Data
Another key change is when we write the data to the strip.
Earlier the strip.write() was outside of and after the for loop, waiting for the loop to finish setting all of the 15 LEDs before writing data. This time we write the data within the for loop after each iteration (after each single LED is set).
This means the for loop finds the next LED in the range and lights it up before moving on to the next LED, which gives a chasing effect to the LED strip rather than writing all 15 at the same time.
We also use a simple time delay before writing the data to set the speed for the chaser.
That's a lot to take in, so try the code below and re-read the above whilst watching it dazzle. We'd also encourage you to add more colours and play with the time delay (setting it to 0.01 makes it super blinky!):
# Imports
import time
from machine import Pin
from neopixel import NeoPixel

# Define the strip pin number (28) and number of LEDs (15)
strip = NeoPixel(Pin(28), 15)

# Colour variables
red = 255,0,0
green = 0,255,0
blue= 0,0,255

# Define colour list
colours = [red, green, blue]

while True: # Run forever

    # Iterate over the colours
    for j in colours:

        # Then iterate over 15 leds
        for i in range(15):

            # Set each LED in the range to red
            strip[i] = (j)

            # Delay - the speed of the chaser
            time.sleep(0.1)

            # Send the data to the strip
            strip.write()
Activity 5: Speed-Controlled Light Chaser
We're now going to re-introduce our potentiometer to our code to allow us to control the speed of the light chaser. We will use the potentiometer ADC reading and use this to drive a variable for the time delay - just like we did in box #4 to control the speed of the flashing LEDs.
The Code
We don't have to change our original light chaser code much to achieve this, we simply:
- Add ADC to our imports
- Set up the GPIO pin for the potentiometer
- Add a line of code within the nested for loop to read the potentiometer into a variable, then divide that number to make it more useful as a time delay
- Use that reading variable to drive our time delay
Tip: If we didn't divide the sensor reading, we would be sending values from 0 to 65535 to our time delay (as seconds), which would be far too slow for the effect we're looking for.
Copy this over to Thonny and give it ago. As you turn the potentiometer left, it should reduce the time delay and make the lights chase faster.
You can change the number we divide the reading by to increase/decrease the minimum delay, or perhaps add some more of your favourite colours as variables and include them in the list?
# Imports
import time
from machine import Pin, ADC
from neopixel import NeoPixel

# Define the strip pin number (28) and number of LEDs (15)
strip = NeoPixel(Pin(28), 15)

# Set up the potentiometer on ADC pin 26
potentiometer = ADC(Pin(26))

# Colour variables
red = 255,0,0
green = 0,255,0
blue= 0,0,255

# Define colour list
colours = [red, green, blue]

while True: # Run forever

    # Iterate over the colours
    for j in colours:

        # Then iterate over 15 leds
        for i in range(15):

            # Set the next LED in the range to light with a colour
            strip[i] = (j)

            # Read the potentiometer
            # Divide the reading to make it more usable as a time delay
            mydelay = potentiometer.read_u16() / 50000

            # Delay - the speed of the chaser
            time.sleep(mydelay)

            # Send the data to the strip
            strip.write()
Activity 6: Button Colour Control
We're going to hop back to using strip.fill to completely fill our LED strip with a single colour, however this time we're going to use our button to change the colour of the strip. This sounds simple but we need to change our approach to make it work.
Instead of entering the colour directly into the code using something like strip.fill((red)), or using a for loop to automatically iterate through our list of colours in order, we're going to use another method which uses the index of each colour in our colour list...but what is an index?
What is a List Index?
Each item in a list is given an index. This means that each item in a list is given a number, starting from zero.
Let's take our current list which is [red, green, blue]. The index for this list would be 0, 1 and 2. 0 = red, 1 = green and 2 = blue.
We can use this to pick a specific colour from our list by changing how we use the strip.fill line. For example, strip.fill((colours[1])) will use index 1 from the colours list - which is green.
You're probably thinking "but we could just use strip.fill((green))". This is true, however as the index uses a number, it allows us to easily change that number (and therefore the colour) with our button using variables.
Our code also needs to know the length of our index (how many colours we have in our list) so that our code doesn't try to use an index number that is outside of our list's range. For this we use len...
Wait, who is Len?
No not Len - len! We use len to return the number of items in a list. We simply use 'len' followed by the name of the list in brackets.
If our list looks like this:
colours = [red, green, blue]
Then we would use len in the following way to count and print how many items are in our list (which would be 3):
print(len(colours)
Try the following quick example to see this in action:
# Colour variables
red = 255,0,0
green = 0,255,0
blue= 0,0,255

# Define colour list
colours = [red, green, blue]

print(len(colours))
The Code
This is where everything above should come together and make sense (we hope!).
Our code example below has some new variables:
- myindex - we use this as an index number to select a colour from our list. We change this number when the button is pressed to move it to the next number in the index (the next colour)
- indexlength - this counts the number of items in our colour list (3, in our example). However, as we're using this to identify the last number in our index, we have to -1 at the end (because there are 3 items in our list, but as these will be indexed as 0,1 and 2, we want our maximum index value to be 2)
The example code below uses a while loop that does nothing (just a delay) until a button is pressed. Once the button is pressed, it uses an if statement to check what the current myindex variable value is.
If the myindex variable is less than the indexlength variable (if myindex is less than 2), it will add +1 to the myindex variable. We also use an else statement under this (to catch when myindex is 3) which resets myindex back to 0.
Regardless of whether the if statement or else statement has triggered, both will alter the myindex variable then move to the code below them.
These final lines of code update the strip.fill with the index number using the myindex variable, and then writes the data to the LED strip. We only write the data to the LED strip here as this means data is only written when there is a change - if the button isn't pressed, nothing happens.
Have a good look through the code example, then copy it over to Thonny to try it for yourself:
# Imports
import time
from machine import Pin
from neopixel import NeoPixel

# Define our button pin
button = Pin(15, Pin.IN, Pin.PULL_DOWN)

# Define the strip pin number (28) and number of LEDs (15)
strip = NeoPixel(Pin(28), 15)

# Colour variables
red = 255,0,0
green = 0,255,0
blue= 0,0,255

# Define colour list
colours = [red, green, blue]

# Create index variable starting at 0
myindex = 0

# Variable with the number of items in our list (3)
# We -1 as the index starts at 0, and we want to use this for the colour list index number (0, 1 or 2)
# This is useful as it means we don't have to count the colours if we add more
indexlength = len(colours) -1

while True: # Run forever

    time.sleep(0.4) # Delay

    if button() == 1: # If button pressed

        # If the index variable is less than or equal to the lengh of the index
        if myindex < indexlength:

            # Add +1 to the index variable
            myindex = myindex + 1

        # If the index variable is over the index length
        else:

            # Set index variable back to 0 (the first item in our list)
            myindex = 0

        ## Now this code runs AFTER the if statements...

        # Fill the strip with the current list index colour
        strip.fill((colours[myindex]))

        # Write the data to the LED strip
        strip.write()
Activity 7: Fading
Now let's try fading our LED strip in and out - it's surprisingly easy with some simple for loop code, and it gives us a chance to show you another way to use the range function.
Our example below uses a while loop with two for loops inside it, both using the range function.
These for loops iterate the red R value (from RGB) used in the strip.fill line below them, so that each iteration is changes the R value. You can see where we use i instead of a value in strip.fill((i,0,0)).
Additional Range Parameters
You'll also notice that the range brackets contain three numbers! Whereas previously we've just specified a single number to iterate over, using the three values (parameters) lets you can specify the:
- Start of the range
- End of the range
- Step for each iteration
Our example below uses for i in range(0,255,1) which is setting the start of the range to 0, the end of the range at 255, and telling the code to increase by 1 step each iteration.
What this does is change our Red value by 1 step every iteration, starting at 1 and ending at 255. This creates a fading effect as the intensity moves from 1 (dim) to 255 (bright) very quickly, using the delay we have set.
The next for loop does the same thing, but in reverse. Yes - you can go backwards with the range function! So we set our range to start at 255 instead of 1, and end at 1 instead of 255. The step is -1 so that we continually take 1 away from that starting 255 value.
Try the code below, then try playing with the colour values - try using i in other places such as strip.fill((i,0,i)) or add fixed values to the other colours such as strip.fill((i,0,50)):
# Imports
import time
from machine import Pin
from neopixel import NeoPixel

# Define the strip pin number (28) and number of LEDs (15)
strip = NeoPixel(Pin(28), 15)

# Variable for the fade speed
delay = 0.005

while True: # Run forever

    # Iterate from 1 to 255 in steps of 1
    for i in range(1,255,1):

        # Fill the strip using the iterated R value
        strip.fill((i,0,0))

        # Write the data to the LED strip
        strip.write()

        # Delay
        time.sleep(delay)

    # iterate from 255 to 1 in steps of -1
    for i in range(255,1,-1):

        # Fill the strip using the iterated R value
        strip.fill((i,0,0))

        # Write the data to the LED strip
        strip.write()

        # Delay
        time.sleep(delay)
Day #12 Complete!
This was a little longer than some of our other days as these LED strips are such a fun and versatile part to play with (and there's so much more you can do!).
We're pretty sure most of you will be turning your strip into a fancy monitor backlight - perhaps some will combine it with the PIR to turn it on when there's motion in front of their PC, or maybe some cleverly hidden break beam sensors will be used as a hand-activated colour changer? Whatever you make, we'd love to hear about your projects in the comments section!
So what did we cover on day #12? Today you have:
- Learnt what an addressable LED is and why they're sooo fun!
- Built a circuit with addressable LEDs
- Learnt about RGB and how to create colours with RGB values (and where to find them)
- Learnt how to code addressable LEDs with MicroPython
- Learnt different ways to light the entire strip...some more efficient than others!
- Created colour variables
- Leant how to create and use lists in MicroPython, including list indexes
- Used nested for loops
- Leant how to use len in MicroPython
- Faded addressable LEDs using range (both counting up and down)
Over to you...
That's it folks, it's the end of the Maker Advent Calendar :( We know many of you wanted this to last the traditional full 25 days, however the world is in a funny ol' place right now and we wanted this to be as affordable and accessible to as many people as possible.
We really hope you've enjoyed following along each day, and we really hope you'll continue your journey as a maker, using your selection of components to make fun projects, experimenting using different parts together to make awesome projects.
We've only just scratched the surface on what's possible with this fantastic little microcontroller and the components you've discovered over the last 12 days - there's so much more to learn and experience!
If you would like to expand your selection of components for the Pico, the store is full of goodies - be sure to check out our dedicated Raspberry Pi Pico section too!
More Resources
The internet is jam-packed full of projects and examples using the Raspberry Pi Pico and MicroPython, and 99.9% of this information is free - so don't stop now! We've even had some great examples from makers in the comments sections of the calendar along the way.
Search Engines are your best friend when it comes to making and coding. Forums, blogs, tutorials, social network user groups and more are at your fingertips and hold and endless amount of examples, code snippets, previous discussions and useful information.
A good starting place for inspiration and a great community is the Raspberry Pi forum, specifically the Pico section. Just don't forget to always search before asking a question!
That's all Folks!
Have a wonderful festive period and a Happy New Year, from everyone at The Pi Hut!
We used Fritzing to create the breadboard wiring diagram images for this page.


50 comments
Hugo
AMAZING, AMAZING, AMAZING calendar!
This was my first venture into Raspberry Pi land, and how fun it was! I started learning Python around Christmas time last year, and this gave me a glimpse of many cool things I can do with programming. I’m definitely buying the Black Codemas calendar later on this year! :)
Cam
I have really enjoyed this calendar! I received it at the beginning of December but only just finished it today. I have had a lot of fun and feel much more confident in my programming ability. I love the way in which there are some challenges and recommendations across the 12 days and found it really encouraging to try to take each day further!
I have really enjoyed this calendar! I received it at the beginning of December but only just finished it today. I have had a lot of fun and feel much more confident in my programming ability. I love the way in which there are some challenges and recommendations across the 12 days and found it really encouraging to try to take each day further!
Jose Forest
I really enjoyed doing all these projects. Well done !
I experienced some problems with the NeoPixels. I was either not able to program them or the behavior was not as expected.
Since it was supplied with 5V and the Pico drive 3.3V logic levels, I suspected it didn’t reach the proper high level logic voltage.
I checked the datasheet for the NeoPixels (I suppose they are WS2812B) and noticed the high level input voltage needs to be 0.7*Vdd minimum. Vdd being 5V it means it needs 3.5V minimum to consider the input signal at a high level.
The Pico will reach at best a little less than 3.3V.
Based on the same datasheet, Vdd needs to be more than 3.5V for the NeoPixels. I tried it at 3.3V and they worked but since the load would be a little bit high for the Pico 3.3V supply, I hesitate to drive all these Pixels with it.
Instead, I plugged the NeoPixels supply on Vsys.
Vsys comes from a diode connected to Vbus. That diode has around 0.3V drop and can drive up to 1 A (ample of juice for the strip). Which means a supply voltage of 5V – 0.3V = 4.7V for the NeoPixels and a resulting minimum high level voltage of 0.7 * 4.7V = 3.29V.
It’s not ideal but since the NeoPixels strip presents a single load to the Pico (each pixels reshapes the signal for the following pixel), it worked.
To experiment it’s OK but for a long term functioning design, it would not be a good way to do it. Ideally, it would need a level translator from 3.3V logic to 5V logic to respect the proper logic levels.
A BJT transistor configured in switching would do the job.
So if you have some trouble talking to the NeoPixel strip, try using Vsys (pin 39) instead of Vbus.
tinker2much
Behaviour when using a Pi5 is better when the Pico connected via a powered USB2 hub, but not perfectly reliable. I’ve noticed that, once all 15 LEDs are lit, it’s more likely (though not certain) that the next program which sets all 15 to some different color, will work the first time. As if there’s some effort to getting them all lit, and once that’s achieved, they’re more able to switch to other values.
Behaviour when using a Pi5 is better when the Pico connected via a powered USB2 hub, but not perfectly reliable. I’ve noticed that, once all 15 LEDs are lit, it’s more likely (though not certain) that the next program which sets all 15 to some different color, will work the first time. As if there’s some effort to getting them all lit, and once that’s achieved, they’re more able to switch to other values.
tinker2much
I’m having trouble with this one. Whichever program I run, the strip may or may not display the correct colours. Taking Activity 2 – the Better method – as an example: If I click the green triangle to run the code, I may get a few of the LEDs to be yellow, but others are random colours. If I keep clicking, some more may become yellow. Perhaps all but the last one may be yellow. But then I click again and they’re back to random coulours. Rarely, I get them to all be yellow as desired. As another example, Activity 4 – the Light Chaser may work correctly some of the time, with a smooth sequence of red, green, and blue, but some of the time the colours may be random. Then it gets better again.
Hints? I’m doing this on a Pi5, with the pico hooked to one of the USB2 sockets.
At some point, I thought it worked better if the code file were stored on the Pico, instead of on this computer, but I don’t think that’s true.
Philip Jones
Here’s a little program which helps you choose which colour to make the LEDs, by choosing the intensity of the red, green, and blue values:
```
import time
from machine import Pin, ADC
from neopixel import NeoPixel
strip = NeoPixel(Pin(28), 15)
potentiometer = ADC)
button = Pin(15, Pin.IN, Pin.PULL_DOWN)
red = 255,0,0
green = 0,255,0
blue = 0,0,255
colours = [red, green, blue]
myIndex = 0
indexLength = len(colours)
rcol = 0
gcol = 0
bcol = 0
while True:
select the colourif button() == 1:
if myIndex < indexLength:
myIndex += 1
else:
myIndex = 0 if myIndex != 3: show which colour currently editing
strip0 = ((colours[myIndex]))
strip1 = ((colours[myIndex]))
strip2 = ((colours[myIndex])) adjust that colour reading = potentiometer.read_u16() if myIndex == 0: set red intensity
rcol = int((reading / 65535) * 255)
strip3 = ((rcol, 0, 0))
strip4 = ((rcol, 0, 0))
strip5 = ((rcol, 0, 0))
elif myIndex == 1: set green intensity
gcol = int((reading / 65535) * 255)
strip6 = ((0, gcol, 0))
strip7 = ((0, gcol, 0))
strip8 = ((0, gcol, 0))
elif myIndex == 2: set blue intensity
bcol = int((reading / 65535) * 255)
strip9 = ((0, 0, bcol))
strip10 = ((0, 0, bcol))
strip11 = ((0, 0, bcol)) final colour
strip12 = ((rcol, gcol, bcol))
strip13 = ((rcol, gcol, bcol))
strip14 = ((rcol, gcol, bcol))
else: on last button press fill whole strip with the chosen colour
strip.fill((rcol, gcol, bcol)) print(f"index:{myIndex}, colour({rcol},{gcol},{bcol})") strip.write() time.sleep(0.5)
```
The Pi Hut
@Fernando – It works the same both ways – seems we strayed into the ‘other way’ on that activity! Going forward, I think we’d use button() == 1: as it makes the code a little cleaner. Nice spot!
@Fernando – It works the same both ways – seems we strayed into the ‘other way’ on that activity! Going forward, I think we’d use button() == 1: as it makes the code a little cleaner. Nice spot!
Fernando
Really enjoyed playing with all items.
On activity 6, should the if statement that checks the button value be “button.value()” instead of just button()?
Really enjoyed playing with all items.
On activity 6, should the if statement that checks the button value be “button.value()” instead of just button()?
The Pi Hut
@Paul – If you set just one LED to light up (low, something like 10,0,0), this will remove any doubts re current draw on the strip. As you’ve had a replacement already, and have checked wiring/changed the pin, I’m really struggling with what else to suggest. I suppose you could try a Windows machine if you have access to one?
@Paul – If you set just one LED to light up (low, something like 10,0,0), this will remove any doubts re current draw on the strip. As you’ve had a replacement already, and have checked wiring/changed the pin, I’m really struggling with what else to suggest. I suppose you could try a Windows machine if you have access to one?
Paul
I’ve been unable to get the strip to light up with a simple fill() , even running it from different pin. Tried a different breadboard too, and after contacting support PiHit sent me a replacement strip, but still no joy :(
I am using a USB-C cable to connect the Pico a Macbook Pro, I’m wondering if there’s maybe a voltage issue? Has anyone else got it work from a Macbook?
The Pi Hut
@Melvin – Try starting over completely, re-wiring everything, and if still no joy please get in touch with our support guys via support.thepihut.com and they will be able to help with that
@Melvin – Try starting over completely, re-wiring everything, and if still no joy please get in touch with our support guys via support.thepihut.com and they will be able to help with that
Melvin
Every other day has worked fine for me, but i think me LEDstrip is broken because i can’t seem to turn on any of the lights. even took off all the other things so i just have the LED strip connected and it still doesn’t work (also tried addressing different LED’s on the strip and different color codes to see if it was just a dead led but no help)
Every other day has worked fine for me, but i think me LEDstrip is broken because i can’t seem to turn on any of the lights. even took off all the other things so i just have the LED strip connected and it still doesn’t work (also tried addressing different LED’s on the strip and different color codes to see if it was just a dead led but no help)
The Pi Hut
@Mark Maloney – That’s probably happening because the strip in the box uses jumper wires, and any movement may disturb the connection in the breadboard (and then the data line/timing freaks out a bit).
If you plan to use it in a permanent/semi-permanent project, it would be best to strip the ends and either solder them or use them with screw terminal blocks or similar.
Mark Maloney
Did anyone else have issue with the LED strip? I found it to be EXTREMELY sensitive to touch. For example, if I tried to lay the strip flat so all the LEDs were facing UP, I would get very strange results. if I changed the position so that the strip was on its side and curved (somewhat naturally from the shipment), then the program would work correctly. It seemed very very flaky. When it worked, it worked fine, but getting it to work took a significant amount of playing around.
Did anyone else have issue with the LED strip? I found it to be EXTREMELY sensitive to touch. For example, if I tried to lay the strip flat so all the LEDs were facing UP, I would get very strange results. if I changed the position so that the strip was on its side and curved (somewhat naturally from the shipment), then the program would work correctly. It seemed very very flaky. When it worked, it worked fine, but getting it to work took a significant amount of playing around.
Gareth
What fantastic fun!
I connected the temperature sensor and OLED screen along with the LED strip and set it to change colour according to temp and show current temp on screen.
Anyone got any other ideas for combining the elements?
My code here in case anyone wants it
Define the number of LEDs and the pin to which they are connectedimport machine
import neopixel
import time
import urandom
import onewire, ds18x20
from machine import Pin, PWM, I2C
from ssd1306 import SSD1306_I2C
num_leds = 15
led_pin = machine.Pin(28) # Change this to the GPIO pin you’re using Set up I2C and the pins we’re using for it
i2c=I2C, scl=Pin(1), freq=400000) Short delay to stop I2C falling over
time.sleep(1) Define the display and size (128×32)
display = SSD1306_I2C(128, 32, i2c) Clear the display first
display.fill(0) Create the NeoPixel object
led_strip = neopixel.NeoPixel(led_pin, num_leds) Set the data pin for the sensor
SensorPin = Pin(26, Pin.IN)
reading = 0 Tell MicroPython that we’re using a DS18B20 sensor, and which pin it’s on
sensor = ds18x20.DS18X20) Look for DS18B20 sensors (each contains a unique rom code)
roms = sensor.scan() Function to set random RGB color
def set_random_colors():
for i in range(num_leds):
led_strip[i] = (urandom.randint(0, 255), urandom.randint(0, 255), urandom.randint(0, 255)) Function to set RGB color based on temperature
def map_temperature_to_color(temperature): Define color mapping based on temperature
temperature = min(40, max(0, temperature)) # Ensure temperature is within 0-40°C
color_scale = int(255 / 40) # Scale to map 0-40 to 0-255 for RGB values
blue_value = int(max(0, 255 – color_scale * temperature))
red_value = int(min(255, color_scale * temperature))
green_value = int(255 – abs(128 – temperature) * (color_scale * 2)) return (red_value, green_value, blue_value) Main loop to create the light show
while True:
sensor.convert_temp()
time.sleep(1) for rom in roms: # For each sensor found (just 1 in our case) print((sensor.read_temp(rom)),“°C”) # Print the temperature reading with °C after it Clear the OLED display and write the Temperture value
display.fill(0)
display.text(“Temperature”,0,0)
display.text(str(sensor.read_temp(rom)),0,12)
display.text(str(“deg C”),60,12) display.show() time.sleep(1) color = map_temperature_to_color(sensor.read_temp(rom)) for i in range(num_leds): led_strip[i] = color led_strip.write() time.sleep(0.1)
isaac
absolutely fantastic! was brilliantly set up so even someone as weak at coding as me could have fun and follow along. All of the tasks were the perfect lengths to keep enjoyable and interesting and they even added helpful libraries which made the coding quick and enjoyable. 10/10 buying next Christmas!
absolutely fantastic! was brilliantly set up so even someone as weak at coding as me could have fun and follow along. All of the tasks were the perfect lengths to keep enjoyable and interesting and they even added helpful libraries which made the coding quick and enjoyable. 10/10 buying next Christmas!
David
Have loved this advent calendar, does anyone have any good projects to use all the pieces in something meaningful afterwards?
Have loved this advent calendar, does anyone have any good projects to use all the pieces in something meaningful afterwards?
Scott
In Day 12, where did the neopixel.py come from?
In Day 12, where did the neopixel.py come from?
Susannah
Just finished this – I decided to do it as a ‘12 days of Christmas’ project given the 12 boxes – and because it was much more likely I’d have the brainpower for coding on Boxing Day, after a few days off work, than on the 1st of December! Very much enjoyed it, would love to purchase more things like this with little discrete projects that can be done of an evening – a ‘tinker box’ or similar as suggested below would be amazing. Thanks for setting this up, and I’m looking forward to doing more things with all the components when I have the time…
Just finished this – I decided to do it as a ‘12 days of Christmas’ project given the 12 boxes – and because it was much more likely I’d have the brainpower for coding on Boxing Day, after a few days off work, than on the 1st of December! Very much enjoyed it, would love to purchase more things like this with little discrete projects that can be done of an evening – a ‘tinker box’ or similar as suggested below would be amazing. Thanks for setting this up, and I’m looking forward to doing more things with all the components when I have the time…
Jjo998
Thanks so much, I got this box as a 12 days of Christmas so only just opened up the RGB component! Was great fun!!
Thanks
Thanks so much, I got this box as a 12 days of Christmas so only just opened up the RGB component! Was great fun!!
Thanks
Paul
I’ve been following the series using a Pi400 (with the official 3A power supply) and everything has worked perfectly except for today, where the neopixel strip was very unpredictable, lighting in the wrong colours, varying intensities, only the first few pixels, or not at all. I’m guessing the Pi400 can’t supply enough power to the Pico as I tried again using my Windows laptop and everything works fine there.
I’ve been following the series using a Pi400 (with the official 3A power supply) and everything has worked perfectly except for today, where the neopixel strip was very unpredictable, lighting in the wrong colours, varying intensities, only the first few pixels, or not at all. I’m guessing the Pi400 can’t supply enough power to the Pico as I tried again using my Windows laptop and everything works fine there.
AndyG
Had the most fun over Christmas I have had for ages working through these projects. I got this ‘advent’ Calendar from the wife on Christmas Day and have done one project a day for the ‘twelve’ days of Christmas. At nearly 60, I am probably a bit older than most and although I have some coding experience I have never really looked at ‘sensor’ type projects. I hope you create a ‘similar’ calendar for next Christmas, I for one would love to receive it :) (hint to the wife!) – As the saying goes ‘every day is a school day’ – Thanks for the kit PiHut, keep up the good work!
Had the most fun over Christmas I have had for ages working through these projects. I got this ‘advent’ Calendar from the wife on Christmas Day and have done one project a day for the ‘twelve’ days of Christmas. At nearly 60, I am probably a bit older than most and although I have some coding experience I have never really looked at ‘sensor’ type projects. I hope you create a ‘similar’ calendar for next Christmas, I for one would love to receive it :) (hint to the wife!) – As the saying goes ‘every day is a school day’ – Thanks for the kit PiHut, keep up the good work!
Dave
I’ve had so much fun doing this! Thanks for putting it together, and I’ll definitely be doing some more advanced projects soon.
I’ve had so much fun doing this! Thanks for putting it together, and I’ll definitely be doing some more advanced projects soon.
Paul
Great kit, great tutorials, although other stuff meant I was way behind everyone else. I’m done some pico and python before but I really enjoyed following along, reading the comments, trying others shared ideas and programs, and making up my own. Thanks so much everyone.
Great kit, great tutorials, although other stuff meant I was way behind everyone else. I’m done some pico and python before but I really enjoyed following along, reading the comments, trying others shared ideas and programs, and making up my own. Thanks so much everyone.
Ash
Combined day 3 and day 12 to create a mini chaser game.
https://github.com/cacophonic/pico/blob/main/neopixel-chaser.py
Could probably extend with a scoreboard using day 11 too. I’d love to see these tutorials extended further I’ve enjoyed every minute of it.
Combined day 3 and day 12 to create a mini chaser game.
https://github.com/cacophonic/pico/blob/main/neopixel-chaser.py
Could probably extend with a scoreboard using day 11 too. I’d love to see these tutorials extended further I’ve enjoyed every minute of it.
Robert Box
Further to other comments, mine wouldn’t work on 5V, only on the 3V3. I’m guessing the dodgy Dell laptop can’t handle the current draw or noise was an issue. I’ll stick a scope it on when back to work but something wasn’t right. The 3V3 PSU hasn’t fried so OK so far…
Further to other comments, mine wouldn’t work on 5V, only on the 3V3. I’m guessing the dodgy Dell laptop can’t handle the current draw or noise was an issue. I’ll stick a scope it on when back to work but something wasn’t right. The 3V3 PSU hasn’t fried so OK so far…
Gilbert
Thank you!
this has been a fantastic 12 days.
Thank you!
this has been a fantastic 12 days.
Galbi3000
My previous comment had an error as I removed an unneeded variable but left in a reference of it, remove the comment if you want! I’ve cleaned it up more and put in some explanation comments in the code for the bits I added or changed.
ImportsI have modified the final code of the tutorial to create a bouncing moving light effect, think of the scanner on KITT (the car) in Knight Rider, with the ability to cycle colours with the button. The button code has been improved over the tutorial code version so the button code only runs once on button down instead of constantly running while the button is down! Also the fade factor value that’s set to 3 can be any non-integer value above 1, the higher it is the shorter the trail. 1.7 is a good value for a more authentic KITT look.
import time
from machine import Pin
from neopixel import NeoPixel Define our button pin
button = Pin(15, Pin.IN, Pin.PULL_DOWN) Define the strip pin number (28) and number of LEDs (15)
strip = NeoPixel(Pin(28), 15) Colour variables
red = 255,0,0
green = 0,255,0
blue = 0,0,255
yellow = 255,255,0
magenta = 255,0,255
cyan = 0,255,255
white = 255,255,255 Define colour list
colours = [red, green, blue, yellow, cyan, magenta, white] Create index variable starting at 0
myindex = 0
lightPos = 0
lightDir = 1
pressed = 0 Variable with the number of items in our list (3) We -1 as the index starts at 0, and we want to use this for the colour list index number (0, 1 or 2) This is useful as it means we don’t have to count the colours if we add more
indexlength = len(colours) -1
while True: # Run forever
time.sleep(0.07) # Delay for j in range(15): RGB = list(strip[j]) # Convert the current colour tuple to a list so it can be changed for i in range(3): if RGB[i] != 0: RGB[i] = int(RGB[i]/3) # Fade the value by a factor of 3 strip[j] = tuple(RGB) # Convert the list back to a tuple for the NeoPixel functions lightPos = lightPos + lightDir # Adjust the position of the light along the strip if lightPos == 14 or lightPos == 0: # If it’s reached either end of the strip lightDir = lightDir * -1 # change it’s direction Set the NeoPixel at the lightPos position to the current list index colourstrip[lightPos] = (colours[myindex]) Write the data to the LED strip
strip.write() The following handles the button being pressed to cycle through the list of colours if button() == 0: # If button not pressed pressed = 0 # Make sure we know it’s not being pressed! else: # If the button is pressed if pressed == 0: # If the button was not pressed before pressed = 1 # This is so the code below does not repeat if you hold the button If the index variable is less than or equal to the lengh of the index
if myindex < indexlength: Add +1 to the index variable
myindex = myindex + 1 If the index variable is over the index length
else: Set index variable back to 0 (the first item in our list)
myindex = 0
Finn
This has been so much fun! Thank you all so much for making this! I will definitely be doing this next year haha!
Merry Christmas! :)
This has been so much fun! Thank you all so much for making this! I will definitely be doing this next year haha!
Merry Christmas! :)
Danny (Orionrobots)
Hello and Merry Christmas, I’ve been making a Youtube video series covering these boxes https://www.youtube.com/watch?v=eiN-GT0A-qo&list=PLXxP0FUTG0FnEQz4X2yPWCAsAZEDCnxYG – and I’ve been extending the code to share on github at https://github.com/orionrobots/codemas2022. I’m happy to apply whichever license you deem fit (MIT/BSD?) for them.
Hello and Merry Christmas, I’ve been making a Youtube video series covering these boxes https://www.youtube.com/watch?v=eiN-GT0A-qo&list=PLXxP0FUTG0FnEQz4X2yPWCAsAZEDCnxYG – and I’ve been extending the code to share on github at https://github.com/orionrobots/codemas2022. I’m happy to apply whichever license you deem fit (MIT/BSD?) for them.
Paul
I took @Matt’s great Knight Rider idea and had a play adding some fading LEDs chasing the primary.
Too much to paste into here but you can have a look on my GitHub. I welcome comments as I’m certain it could do with a lot of polishing:
https://github.com/Honcho41/PiHutAdventCalendar/blob/eb7b18eaecbb9a61f0966ae5a68d264395a41aa0/D12%20Act8%20-%20KnightRider.py
Hiro
This whole box has been great, thanks for putting this together!
Makers, if you’d like a cool marquee effect you can try out this code:
Importsimport time
from machine import Pin
from neopixel import NeoPixel
Define the strip pin number (28) and the number of LEDs (15)strip = NeoPixel(Pin(28), 15) Color variables
red = 255,0,0
green = 0,255,0
blue = 0,0,255
yellow = 255,255,0
turquoise = 0,255,255
pink = 255,20,147 Create a marquee effect
def marquee(color): Go through the loop 15 times, or 45 lightings of the LEDs
for i in range(15): myLED = 0 Set up a nested function to shorten the code. def lightLED(color, myLED): strip.fill((0,0,0)) If the LED is position less than 15… while myLED < 15: Light that LED with the given color strip[myLED] = (color) Go 3 spaces down and light the next one myLED += 3 strip.write() time.sleep(0.1) Light every 3rd LED with given color lightLED(color, myLED) Now start at 1 instead of 0, wipe and repeat myLED = 1 lightLED(color, myLED) Same thing, but start at 2. Do this whole thing 15 times. myLED = 2 lightLED(color, myLED)
while True: ## Run forever
marquee(red) marquee(green) marquee(blue) marquee(yellow) marquee(pink) marquee(turquoise)This whole box has been great, thanks for putting this together!
Makers, if you’d like a cool marquee effect you can try out this code:
Importsimport time
from machine import Pin
from neopixel import NeoPixel
Define the strip pin number (28) and the number of LEDs (15)strip = NeoPixel(Pin(28), 15) Color variables
red = 255,0,0
green = 0,255,0
blue = 0,0,255
yellow = 255,255,0
turquoise = 0,255,255
pink = 255,20,147 Create a marquee effect
def marquee(color): Go through the loop 15 times, or 45 lightings of the LEDs
for i in range(15): myLED = 0 Set up a nested function to shorten the code. def lightLED(color, myLED): strip.fill((0,0,0)) If the LED is position less than 15… while myLED < 15: Light that LED with the given color strip[myLED] = (color) Go 3 spaces down and light the next one myLED += 3 strip.write() time.sleep(0.1) Light every 3rd LED with given color lightLED(color, myLED) Now start at 1 instead of 0, wipe and repeat myLED = 1 lightLED(color, myLED) Same thing, but start at 2. Do this whole thing 15 times. myLED = 2 lightLED(color, myLED)
while True: ## Run forever
marquee(red) marquee(green) marquee(blue) marquee(yellow) marquee(pink) marquee(turquoise)Keith
Thanks – that was a lot of fun. Took me back to playing with my Philips X40 kit as a kid, which cost about the same (although obviously £40 in the early seventies was rather more than £40 today) and probably had about one trillionth of the processing power (I think it had three transistors). I second Geraldine’s suggestion and would look forward to subscribing to a monthly tinker box.
Thanks – that was a lot of fun. Took me back to playing with my Philips X40 kit as a kid, which cost about the same (although obviously £40 in the early seventies was rather more than £40 today) and probably had about one trillionth of the processing power (I think it had three transistors). I second Geraldine’s suggestion and would look forward to subscribing to a monthly tinker box.
Kim Bahir
Never mind me – after disassembling everything and reassembling, it now works in a predictable fashion
Never mind me – after disassembling everything and reassembling, it now works in a predictable fashion
Kim
I have really enjoyed this concept and the way we learn the different components. Unfortunately my LED strip acts weird. I have tested on two different computers, and even the first example is unable to set the same color twice in a row.
It varies from different shades of red, off, and anything in between…
Importsimport time
from machine import Pin
from neopixel import NeoPixel Define the strip pin number (28) and number of LEDs (15)
strip = NeoPixel(Pin(28), 15) Select the first pixel (pixel 0) Set the RGB colour (red)
strip0 = (255,0,0) Send the data to the strip
strip.write()
Are there anyone else with the same problem?
Geraldine
This was so much fun! Only problem – I am now addicted and would love a way to continue with regular projects. Any chance for you to create a monthly tinker box or something? :)
This was so much fun! Only problem – I am now addicted and would love a way to continue with regular projects. Any chance for you to create a monthly tinker box or something? :)
Chris
Very interesting and easy to understand introduction to the Pico.
If the tutorial is to remain then why not sell a box of all the components all year round as a beginners kit?
How about some more advanced add on kits?
Great work, well done!
Very interesting and easy to understand introduction to the Pico.
If the tutorial is to remain then why not sell a box of all the components all year round as a beginners kit?
How about some more advanced add on kits?
Great work, well done!
Dan
Thank you guys for an excellent advent, I enjoyed it so much.
Using Matts code and Frankensteining the code from activity 5 I know have a knight rider style chase that I can control the speed of via the potentiometer.
Thank you guys for an excellent advent, I enjoyed it so much.
Using Matts code and Frankensteining the code from activity 5 I know have a knight rider style chase that I can control the speed of via the potentiometer.
Matt
For all the Knight Rider fans out there :-) You’ll probably have to fix the indentation…
Importsimport time
from machine import Pin
from neopixel import NeoPixel Define the strip pin number (28) and number of LEDs (15)
strip = NeoPixel(Pin(28), 15)
i = 0
while True: # Run forever
while i < 14: strip.fill((0,0,0)) strip[i] = (255,0,0) time.sleep(0.05) i = i + 1 strip.write() while i > 0: strip.fill((0,0,0)) strip[i] = (255,0,0) time.sleep(0.05) i = i – 1 strip.write()For all the Knight Rider fans out there :-) You’ll probably have to fix the indentation…
Importsimport time
from machine import Pin
from neopixel import NeoPixel Define the strip pin number (28) and number of LEDs (15)
strip = NeoPixel(Pin(28), 15)
i = 0
while True: # Run forever
while i < 14: strip.fill((0,0,0)) strip[i] = (255,0,0) time.sleep(0.05) i = i + 1 strip.write() while i > 0: strip.fill((0,0,0)) strip[i] = (255,0,0) time.sleep(0.05) i = i – 1 strip.write()Matt Dennison
I’ve loved every minute of it!
… and 12 days feels about right to me, what with everything else going on at this time of year.
I’ve loved every minute of it!
… and 12 days feels about right to me, what with everything else going on at this time of year.
Steve Harte
In case anyone else runs into this…
The LED strip worked fine when it was the only thing attached to the Pi but as soon as I started adding other components on the 3.3v line, it would start behaving strangely. ie. colours wrong/changing randomly.
It seems that not all USB ports are created equally. This only happens on my laptop, which I assume is down to it not providing enough current though the USB bus. On my desktop PC or connected to a mains USB plug, it works fine.
The Pi Hut
@Paul @Martin @Matt These guides will not be taken down, including the main thepihut.com/pages/advent link from the front of the box which includes links to all of them, so the resources will always be available.
@Paul @Martin @Matt These guides will not be taken down, including the main thepihut.com/pages/advent link from the front of the box which includes links to all of them, so the resources will always be available.
Matt
I may be slightly behind with my build but…………..Will there be a PDF version of this to download?
Would be nice to box this back up and maybe do it again in the new year to see if i really did remember anything
I may be slightly behind with my build but…………..Will there be a PDF version of this to download?
Would be nice to box this back up and maybe do it again in the new year to see if i really did remember anything
PF
What an absolutely awesome kit! It’s been fun and all the components and instructions have been top quality. I had imagined that the kit would last 24 days though – a new component and instructions on each odd day then some advanced tricks/builds on the even days. Will definitely be building all the bits again so I can teach my daughter as we go along.
What an absolutely awesome kit! It’s been fun and all the components and instructions have been top quality. I had imagined that the kit would last 24 days though – a new component and instructions on each odd day then some advanced tricks/builds on the even days. Will definitely be building all the bits again so I can teach my daughter as we go along.
Steve
This advent calendar has been really nice to do, I managed to stick to daily though sometimes a bit later in the evening than I would have liked due to work. I think 12 days is nice amount for something like this at a time of year that does get quite busy.
I think it has been well worth the price for the physical products and the very well done guides and prompt support in the comments and I assume if people contacted PiHut via their Contact Us / Support Portal.
Any chance you might consider selling two calendars next year instead of a 24-day calendar? One like this for beginners and another for intermediate makers? There are lots of components that could be included or one or two small breakout boards with right angle pin headers soldered on and using I2C _. Though if beginner makers have followed along this year, hopefully they have the opportunity to buy lots of nice stuff from PiHut and other sellers of products for the Raspberry Pi Pico.
Oh and a comment on day 12, besides it been a well explained intro to using RGB LEDs and some concepts in MicroPython, you did describe len and getting the length of a list, but never actually say that len is a function :).
Thanks again and hope everyone has a great rest of the year and many more to come.
callum
This advent calender has been awesome. I have learnt so much in such a fun way. I have really enjoyed it, the projects have been a good length to where they dont just get boring, and the components used have made for some really fun and interesting projects. Cant wait to now try and make all of this into something awesome.
This advent calender has been awesome. I have learnt so much in such a fun way. I have really enjoyed it, the projects have been a good length to where they dont just get boring, and the components used have made for some really fun and interesting projects. Cant wait to now try and make all of this into something awesome.
Paul
I really enjoyed this. Is there any possibility of having these 12 days instructions/code/diagrams posted as a downloadable PDF or something so that we can keep these even when these pages are taken off line?
I really enjoyed this. Is there any possibility of having these 12 days instructions/code/diagrams posted as a downloadable PDF or something so that we can keep these even when these pages are taken off line?
Martin Gugerell
Love this project, thank you.
There is just one thing left, I’d love to have the whole 12-parts description as one downloadable PDF for easy access.
Thanks!
Love this project, thank you.
There is just one thing left, I’d love to have the whole 12-parts description as one downloadable PDF for easy access.
Thanks!
scott
I enjoyed this and would get another next year. A full 25-day one would be great fun!
I enjoyed this and would get another next year. A full 25-day one would be great fun!
JM
Really enjoyed the 12 days. A great introduction to Raspberry Pi.
Really enjoyed the 12 days. A great introduction to Raspberry Pi.